Precision Bass Setup: String Height, Pickup Height & Intonation
Master the fundamentals of Fender Precision Bass setup with this comprehensive guide. Learn how to dial in string height (action), set split-coil pickup height, adjust neck relief, and fine-tune intonation for a solid, punchy P-Bass tone. Whether you're solving buzzing and clank, optimizing playability, or tailoring your bass for studio or stage, this step-by-step guide covers everything from P-Bass string height specs to pro setup checklists.
The Ultimate Fender Precision Bass Setup Guide: String Height, Pickup Height & Intonation Tips
The Fender Precision Bass (P-Bass) is the blueprint for electric bass—simple, reliable, and unmistakably powerful. With its split-coil pickup, 34-inch scale length, and straightforward hardware, a great setup goes a very long way. This guide walks you through a complete, practical P-Bass setup: string height (action), pickup height, truss rod relief, intonation, and more. Use it to eliminate fret buzz, tame clank, improve tuning stability, and get consistent punch live or in the studio.
If you've followed our guitar setup articles, you'll feel right at home: we take the same methodical approach used in our popular Jaguar, Stratocaster, and Telecaster guides.
 Photo by Alberto Bigoni on Unsplash
Part 1: Understanding P-Bass String Height (Action)
Action is central to both tone and feel. Bass strings have more mass and excursion than guitar strings, so a touch more height is normal. The ideal numbers vary by technique (fingerstyle, pick, slap) and string type (roundwound vs flatwound), but these are solid starting points measured at the 12th fret:
- G string: 2.0 mm (5/64 inches)
- D string: 2.1–2.2 mm (~5/64–3/32 inches)
- A string: 2.3–2.4 mm (3/32 inches)
- E string: 2.5–2.7 mm (3/32–7/64 inches)
Players who dig in hard or slap often run slightly higher action; lighter touch players can go lower if the fretwork is excellent. Use a precise gauge like the Jim Dunlop String Height Gauge for repeatable measurements.
Part 2: Adjusting String Height on a P-Bass
Most P-Bass bridges use individual saddles with two height screws per string. Your goal is even feel and a radius that follows the fretboard.
- Detune slightly to reduce tension.
- Raise/lower each saddle with a small Allen key such as a D'Addario Multi-Tool.
- Match the string arc to the fingerboard radius (commonly 9.5" on modern Fenders; vintage can be 7.25").
- Retune and re-measure at the 12th fret.
- Play across the neck. If you hear clank or localized buzz, increase that string's saddle slightly and recheck.
Tip: Establish clear "witness points" by gently pressing each string down right at the nut and saddle after tuning. This improves intonation accuracy and reduces random buzz.
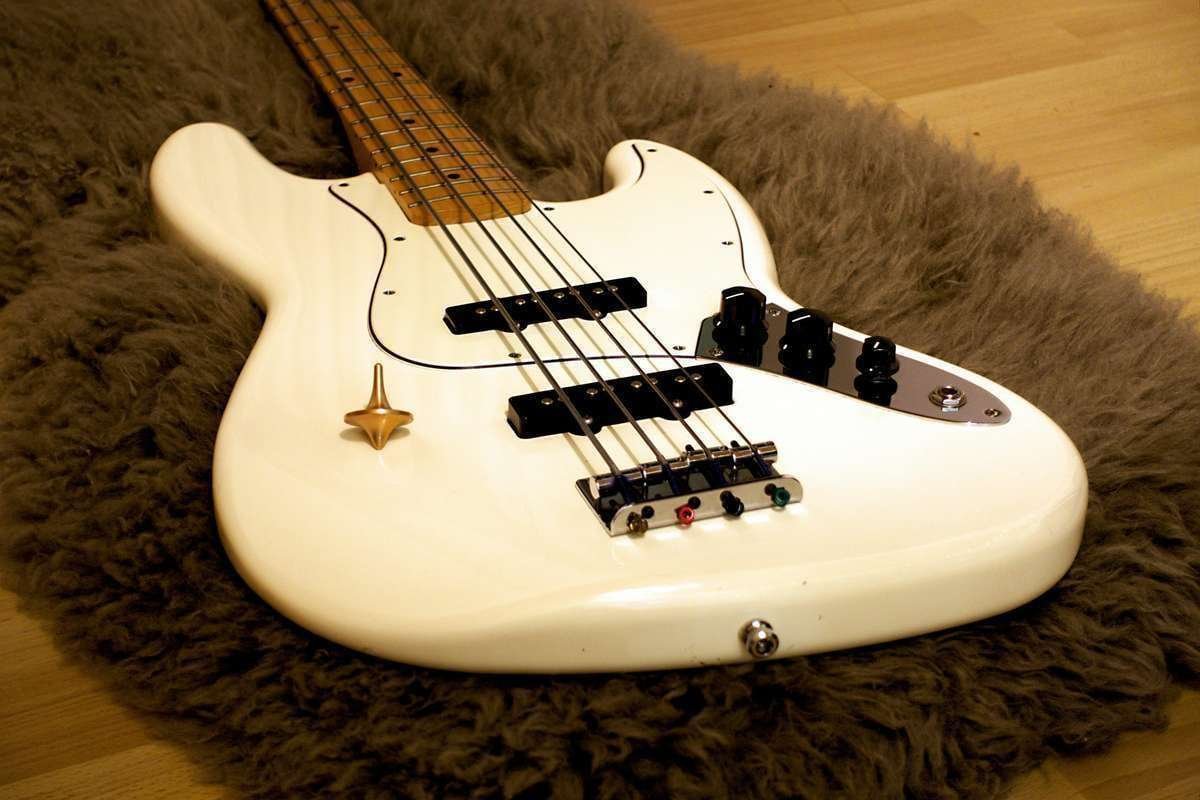
Photo by Alberto Bigoni on Unsplash
Part 3: Precision Bass Pickup Height Specifications
The split-coil P pickup is designed for strong fundamentals and focused mids. If it sits too high, you'll get boomy, uneven output and possible string pull; too low and the tone can get thin. Measure with the last fret pressed, from the bottom of the string to the top of the pole piece:
- P-Bass Split Pickup
- Bass Side (E/A): 3.2 mm (1/8 inches, 8/64)
- Treble Side (D/G): 2.4 mm (3/32 inches, 6/64)
Adjustment process:
- Start at the spec above.
- Balance by ear: match D/G clarity with E/A punch.
- Test with even playing strength across strings and through an amp.
- Nudge in 1/4–1/2 turns for fine control. Small changes matter.
Part 4: Neck Relief (Truss Rod) for P-Bass
Relief is the slight forward bow that gives strings room to vibrate. Too little relief causes widespread buzz; too much makes the action feel high.
- Target Relief: 0.25–0.35 mm (0.010–0.014 inches) at the 7th–8th fret
- How to Measure: Capo at the 1st fret, fret the last fret with your picking hand, measure the gap at the 7th–8th fret with feeler gauges
Adjustment guidelines:
- Clockwise tightens the rod (reduces relief); counterclockwise loosens (adds relief).
- Move in small increments—no more than 1/8 turn—then let the neck settle (use a well‑fitting tool such as the MusicNomad Truss Rod Wrench Set (MN235)).
- Re-measure and play-test before more changes.
Part 5: P-Bass Intonation Guide
Accurate intonation ensures the bass plays in tune across the neck.
- Tune open strings precisely using a high-quality tuner like the Boss TU-3 Chromatic Tuner.
- Compare the 12th fret fretted note to the open string.
- If the 12th fret note is sharp, move the saddle back (lengthen the string). If flat, move it forward.
- Retune and recheck after each micro-adjustment.
- Repeat for all strings. Establish witness points again if results seem inconsistent.
Common intonation gotchas on bass:
- Not setting witness points after retuning
- Old strings (intonation drifts as strings wear)
- Inconsistent playing pressure between checks
Part 6: Nut Height, String Gauge, and Technique
Nut slot height strongly affects first-position feel and open-string buzz. If open strings buzz but fretted notes are clean, the nut slots may be too low. If the first frets feel stiff but action is fine higher up, the nut may be too high.
String gauge and type profoundly change setup targets:
- Roundwounds (common): Brighter, more bite; can run slightly higher action if you dig in.
- Flatwounds: Smoother, less finger noise; often allow slightly lower action with fewer overtones.
- Typical gauges: 45–105 (standard), 40–100 (lighter touch), 50–110 (heavy/low tunings).
Adjust relief, action, and pickup height after any gauge or string-type change.
Part 7: Best Bridge Setup for Precision Bass
The classic 4-saddle Fender bridge is simple and effective when dialed in.
- Set overall action with saddle heights.
- Match the string radius to the fretboard.
- Intonate in the familiar stair-step pattern (E longest, then A slightly shorter, D shorter, G shortest—final order varies with gauge and tuning).
- Ensure saddle screws don't protrude uncomfortably under your picking hand; balance the two height screws if needed.
- Verify the ground connection and clean contact points while you're there.
Aftermarket options (for sustain or palm comfort) can help, but a stock bridge in good condition sets up beautifully.
Part 8: Comprehensive P-Bass Setup Checklist
Pre-Setup
- Clean instrument and hardware
- Install fresh strings
- Gather tools and a flat workspace
Neck
- Measure relief (target 0.25–0.35 mm)
- Adjust truss rod in 1/8 turns, allow to settle
Action
- Set saddle heights to starting specs
- Match fingerboard radius
- Eliminate localized buzz by micro-raising individual saddles
Pickups
- Set split-coil starting height (3.2 mm bass side, 2.4 mm treble side)
- Balance output across strings by ear
Intonation
- Tune precisely
- Set each saddle and retune between moves
- Recheck after final witness points
Part 9: Troubleshooting and Common P-Bass Issues
- Excessive clank when digging in: Add a touch more relief and/or raise action slightly on E/A.
- Wolf tones or dead spots (often around D on the G string): Slight relief tweaks, different strings, or headstock mass can help.
- Uneven string volume: Rebalance pickup tilt; check witness points; verify string age.
- Persistent buzz in specific areas: Micro-raise that saddle; if it persists, consider fretwork.
Part 10: Advanced Setup and Genre-Specific Tweaks
- Classic Motown/Old-School Soul: Flatwounds, slightly higher action, pickup a touch lower for warmth; consider light foam mute at the bridge.
- Rock/Punk with Pick: Roundwounds, medium action, slightly higher pickup for bite; check for comfortable palm contact over the saddles.
- Modern Pop/Funk: Low-to-medium action, clean relief, balanced pickup height for even articulation.
- Studio Focus: Lower noise floor (shielding/clean grounds), precise intonation, and consistent witness points for re-take consistency.
Recommended tools to keep handy: D'Addario Multi-Tool, Jim Dunlop String Height Gauge, and a precise tuner like the Boss TU-3 Chromatic Tuner. For humidity control, a D'Addario Humidipak helps keep neck movement predictable.
P-Bass Maintenance and Care
- Change strings regularly based on use and sweat chemistry; wipe down after playing.
- Keep fretboard conditioned as appropriate for the wood (avoid over-oiling).
- Periodically check relief and action as seasons change.
- Clean pots and jack with contact cleaner if scratchy.
For additional maintenance ideas, see our Eco-Friendly Fender Guitar Care Article.
Conclusion
A thoughtful P-Bass setup transforms feel and tone: focused low end, even dynamics, and reliable tuning. With careful relief, sensible action, balanced pickup height, and precise intonation, your Precision Bass will deliver the tight, musical punch it's famous for—night after night.
For more setup guides, check out our Stratocaster Setup Guide and Telecaster Setup Guide.
Frequently Asked Questions (FAQ)
1. What is the correct string height for a P-Bass?
Answer: Start around 2.0 mm on the G up to 2.5–2.7 mm on the E at the 12th fret. Adjust for technique and string type.
2. How high should P-Bass pickups be?
Answer: With the last fret pressed, set the split pickup to about 3.2 mm on the E/A (bass) side and 2.4 mm on the D/G (treble) side, then fine-tune by ear.
3. My bass buzzes but only on certain frets—what should I change first?
Answer: Micro-raise the affected string's saddle. If it persists broadly, add a touch more relief; if localized, consider fret leveling.
4. What relief should I aim for on a P-Bass?
Answer: Typically 0.25–0.35 mm (0.010–0.014 inches) at the 7th–8th fret.
5. How do I set P-Bass intonation?
Answer: Tune accurately, compare the 12th fret note to open, move saddles back if sharp and forward if flat, and retune between changes.
6. Which strings work best for a P-Bass?
Answer: 45–105 roundwounds are a versatile baseline. Flatwounds deliver classic thump and often permit slightly lower action.
7. How can I reduce clank when playing aggressively?
Answer: Add a little relief and/or raise action slightly on the E and A. Consider technique adjustments and pickup height tweaks.
8. Should I use foam muting on a P-Bass?
Answer: For vintage thump or tight studio control, yes—light foam near the bridge works well, especially with flatwounds.
9. Do I need a professional setup?
Answer: Many players handle basic setups with the right tools. For nut work, fret leveling, or vintage instruments, consult a pro.
10. Why do my strings feel uneven in volume?
Answer: Rebalance pickup tilt (slightly lower on the E/A, higher on D/G), set witness points, and ensure strings aren't dead.
Photo by Jeremy Horvatin on Unsplash
For more comprehensive bass guitar resources and setup guides, explore our Precision Bass articles to discover additional techniques and maintenance tips.

