Stratocaster Pickup Height - Complete Setup Guide
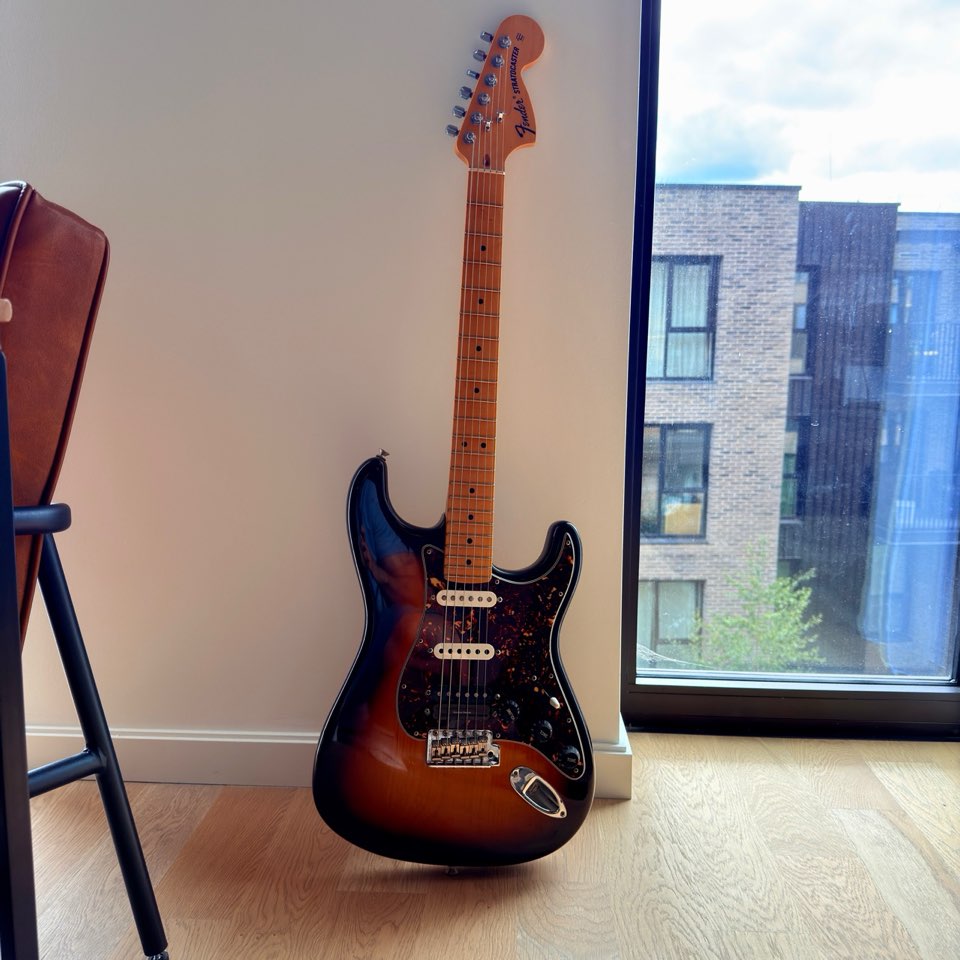
Stratocaster pickup height starting specs, measuring steps and photos of my Strat showing why you should identify the installed pickups before choosing a gap.
Stratocaster Pickup Height: The Ultimate Guide to Perfect Tone
Adjusting your Stratocaster pickup height is one of the most impactful modifications you can make to your guitar's tone—and it's completely free. Whether you're wondering how close pickups should be to strings or looking for the ideal single coil pickup height settings, this comprehensive guide covers everything you need to optimize your Fender Stratocaster's sound. Proper pickup height adjustment can transform your tone from weak and thin to powerful and balanced, making it essential knowledge for every Strat player.
This guide covers manufacturer starting measurements, the adjustment process and how to compare settings by ear. I've included photos of my own Strat to show why identifying the installed pickups comes before choosing a gap, especially when the bridge pickup differs from the neck and middle.
Working beside your guitar? The free pickup-height worksheet gives you a printable hardware checklist and space for your own before-and-after readings.
🧮 Try Our Pickup Height Calculator: Get your ideal pickup-to-string gaps and a raise/lower recommendation in seconds — free, no signup.
Factory Specs Tool to compare your current setup against factory standards, or add it to My Garage to track maintenance.
What is Stratocaster Pickup Height and Why Does It Matter?
Quick Answer: Stratocaster pickup height is the distance between pickups and strings when fretted at the highest fret. It affects tone, output, sustain, and playability. Small adjustments make a big difference.
Stratocaster pickup height refers to the distance between your pickups and the strings when fretted at the highest fret. This seemingly small adjustment has a profound impact on your guitar's tone, output level, sustain, and overall playability. Understanding how pickup height affects your sound is crucial for achieving the tone you hear in your head.
How Pickup Height Affects Your Tone
Single coil pickups like those found on a Stratocaster work by sensing the magnetic field disturbances created by vibrating steel strings. The closer the pickup sits to the strings, the stronger this magnetic field interaction becomes, which affects several tonal characteristics:
When Pickups Are Too Close to Strings:
- Excessive output that can sound harsh or unbalanced
- Magnetic pull that dampens string vibration and reduces sustain
- Increased "wolf tones" or uneven response across strings
- Potential for strings hitting the pickup pole pieces
- Loss of dynamic range and touch sensitivity
When Pickups Are Too Far from Strings:
- Weak output requiring more gain compensation
- Thin, anemic tone lacking body and presence
- Reduced harmonic content and overtones
- Poor note definition, especially on lower strings
- Difficulty cutting through in a band mix
The Sweet Spot: Finding the ideal Stratocaster pickup height balances strong, clear output with proper string vibration, optimal sustain, and responsive dynamics. This sweet spot varies based on your playing style, pickup type, and personal tonal preferences.
How Close Should Pickups Be to Strings? (Standard Measurements)
Quick Answer: Choose the starting gap by pickup type, then balance the three positions by ear. Fender lists vintage-style single coils at 6/64" (2.4mm) bass and 5/64" (2.0mm) treble, and standard single coils at 5/64" (2.0mm) bass and 4/64" (1.6mm) treble. These are starting points, not a universal neck/middle/bridge gradient.
Measure with the guitar tuned and each outer E string fretted at the last fret: from the top of its pole piece to the underside of the string. A larger gap means a lower pickup; a smaller gap means a higher pickup.
Fender Starting Specifications by Pickup Type
| Pickup type | Bass-side gap | Treble-side gap |
|---|---|---|
| Vintage-style single coil | 6/64" (2.4mm) | 5/64" (2.0mm) |
| Standard single coil | 5/64" (2.0mm) | 4/64" (1.6mm) |
Source: Fender's Stratocaster setup instructions, pickup section, checked September 9, 2026. Fender lists separate guidance for Texas Specials, Noiseless pickups and humbuckers. Use the instructions for your actual pickups, especially on modified, HSS or Squier instruments; the guitar's model name alone does not identify the pickup type.
Balancing Neck, Middle and Bridge
Use the relevant pickup-type starting point at each position, then listen for unwanted volume jumps. Fender's rule of thumb puts the largest gap at the bass side of the neck pickup and the smallest at the treble side of the bridge. It does not prescribe an exact neck/middle/bridge staircase of measurements.
The greater string movement near the neck can make that pickup need more clearance. A slightly larger bass-side gap can also help control magnetic pull and balance the outer strings. Measure and listen rather than force every pickup into a fixed staircase.
| Pickup type | Bass side | Treble side |
|---|---|---|
| Vintage style | 2.4mm (6/64") | 2.0mm (5/64") |
| Standard single-coils | 2.0mm (5/64") | 1.6mm (4/64") |
Keep the full setup sequence beside your guitar
Pickup height is one step. The Fender Setup Guide brings neck relief, action, tremolo setup and intonation together in a downloadable PDF.
See a real page: measuring neck relief
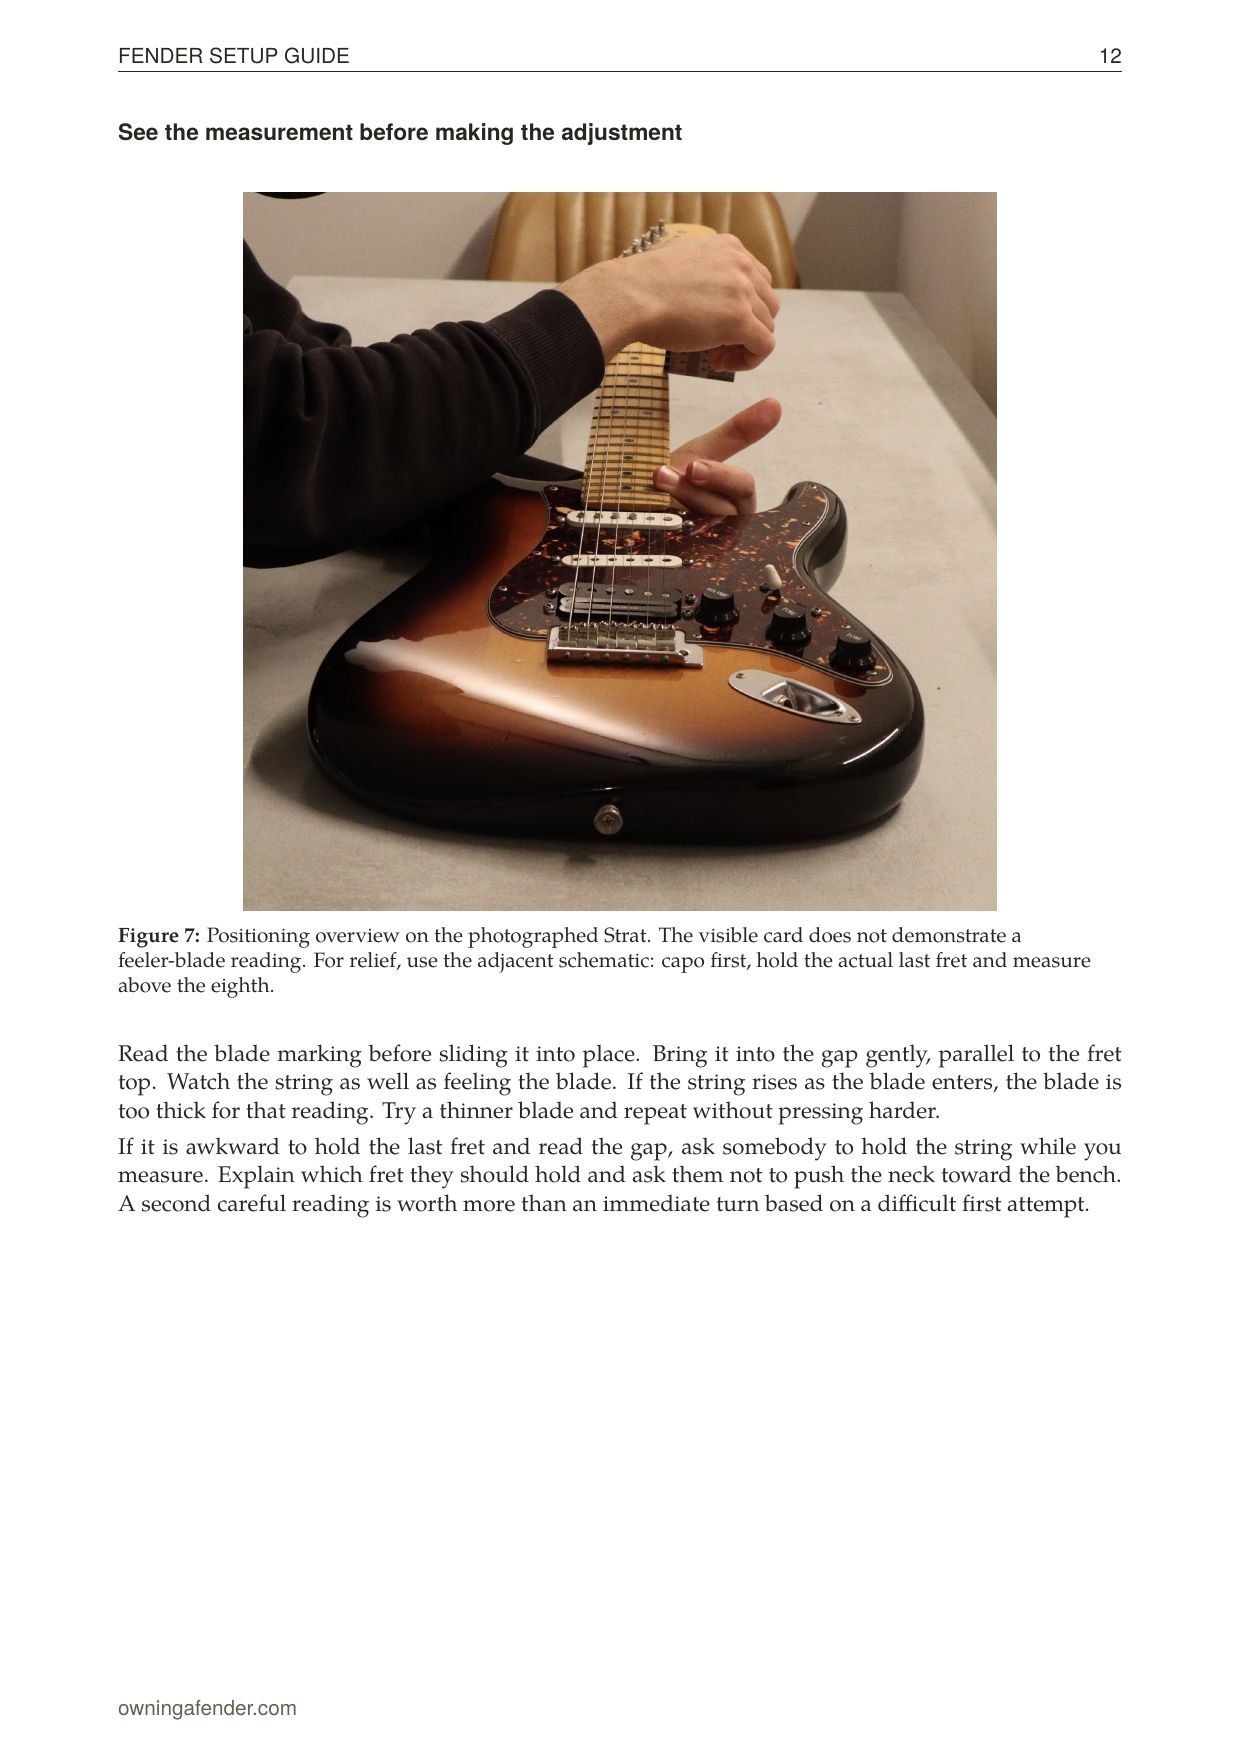
Check the included models and preview pages before buying. Use the measurements appropriate to your guitar and hardware.
View the Fender guide — $19
 Buy on Amazon
Single Coil Pickup Height Adjustment: Step-by-Step Guide
Now that you understand the theory, let's walk through the complete process of adjusting your Stratocaster pickup height for optimal tone.
Tools You'll Need
- Small Phillips screwdriver (for pickup mounting screws)
- 6" ruler or precision measuring tool like this Jim Dunlop String Height Gauge
- Capo (optional, for fretting at the last fret)
- Tuner like the Boss TU-3 Chromatic Tuner (to ensure accurate pitch during testing)
- Cable and amplifier (for tone testing)
- Guitar setup tool like the D'Addario Multi-Tool for various adjustments
Preparation Steps
- Tune your guitar to pitch - Pickup height measurements only work if strings are at proper tension
- Clean your workspace - Avoid scratching your guitar's finish
- Have good lighting - You need to see the measurements clearly
- Gather your tools - Keep everything within reach
How to Measure Pickup Height Correctly
This is the most critical step—accurate measurement ensures optimal results:
-
Fret each string at the highest fret (typically 21st or 22nd fret)
- For easier measurement, use a capo at the last fret
- This gives a repeatable fretted reference; also check clearance while playing and bending
-
Position your ruler vertically
- Place it between the string and pickup
- Measure from the top of the pole piece (the magnet) to the bottom of the string
- Not from the top of the plastic pickup cover
-
Record the two outer-string gaps at each pickup
- Measure bass side (low E string) first
- Then measure treble side (high E string)
- Note: You can measure all strings, but these two give you the adjustment reference
-
Compare to target specifications
- Use the guidance for the actual pickup fitted; the Fender single-coil table above is not a specification for every replacement pickup
- Adjust based on your playing style (covered later)
My Strat: Check the Hardware Before Choosing a Gap
My sunburst Strat has a maple fretboard, two white single-coil-shaped pickups and a wider black Seymour Duncan bridge pickup. The whole-guitar photo at the top shows that layout. The close-up below, taken during a string change, makes the bridge hardware easier to see.
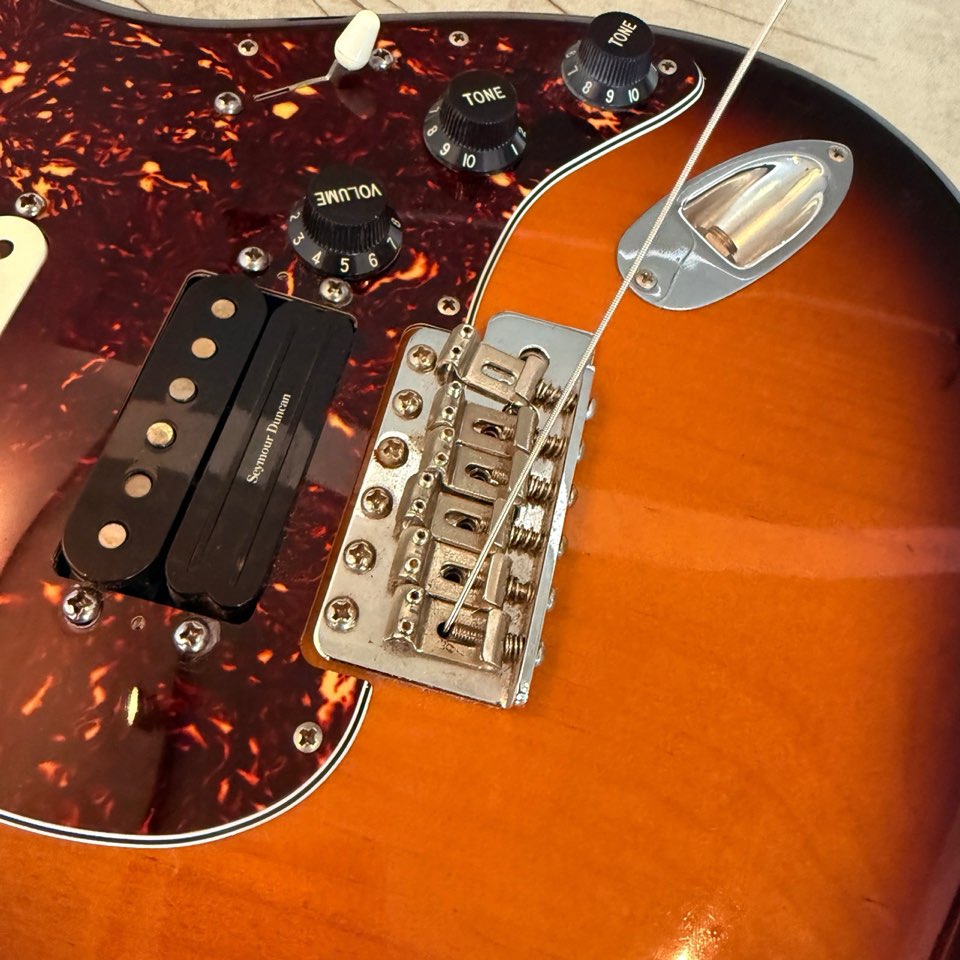
My Strat during restringing: the six screws along the front of the metal bridge plate belong to the tremolo bridge. They are separate from the pickup mounting screws in the pickguard.
The bridge pickup has a row of six round pole pieces beside a narrow rail-like section. It looks like a Seymour Duncan P-Rails, but I haven't confirmed the exact model. I wouldn't select a height specification from that visual identification alone. The white covers on the neck and middle pickups don't establish their models either.
Here are the distinctions to make on your own guitar before reaching for a screwdriver:
| What to identify | Why it matters for pickup height |
|---|---|
| The pickup at each position | A familiar Strat body does not establish which pickups are fitted. Check any replacement-pickup receipt or fitting record before using a factory table. |
| Pickup mounting screws versus bridge screws | Pickup height and bridge setup are separate adjustments. The bridge's six front screws are not pickup-height controls. |
| The specified measuring surface | The single-coil method above references the pole-piece top. For a different design, check the pickup maker's instructions rather than assume the plastic cover is the reference. |
These photos show the hardware, not measured pickup gaps or a before-and-after tone test. For your own setup, record the low E and high E gaps at each pickup with the measured string held at the last fret, using the correct reference surface. That gives you six readings to compare with the appropriate guidance and a record to return to after an adjustment.
Print a Record for Your Own Pickups
Download the free pickup-height worksheet (PDF, 2 pages) — no email required. Print both pages, or just the blank record on page 2; use A4 or fit to Letter.
The photo on page 1 shows what to identify before measuring. Page 2 has room for your pickup models, string set, tuning, ruler increments and six outer-string gaps, with separate target, before and after columns. Write the manufacturer source and measuring surface beside your readings, then note the amp settings and what you heard in a consistent listening comparison.
The sheet contains no prefilled measurements from my Strat. If a pickup model or reference surface is unknown, record that first and find the correct instructions before choosing a target. Keep the earlier reading so you can compare a later adjustment using the same method.
This is a focused pickup record. The Fender Setup Guide linked above covers the broader relief, action, pickup and intonation sequence.
Adjusting Bridge Pickup Height
The bridge pickup typically requires the most attention as it has the greatest impact on your overall tone:
-
Locate the two adjustment screws
- One on each side of the pickup
- They pass through the pickguard and thread into the pickup mounting ears
- Springs or rubber tubing between the pickup and pickguard hold the assembly under tension
-
Turn screws clockwise to raise the pickup (toward the strings)
- Look straight at the screw head from above the guitar
- This reduces the measured gap and usually increases output
- Too little clearance can cause magnetic pull or string contact
-
Turn screws counter-clockwise to lower the pickup (away from the strings)
- This increases the measured gap and usually reduces output
- It can relieve magnetic pull if the pickup was too close
-
Make small adjustments
- Turn each screw 1/4 turn at a time
- Test tone after each adjustment
- Keep both sides relatively balanced (unless going for specific effect)
-
Test with your amp at playing volume
- Play your typical style and techniques
- Listen for balanced output across all strings
- Check for any string-to-pole piece contact
These directions apply to standard pickguard-mounted Strat pickups, as documented in Fender's Standard Series manual, printed page 4. They are not a rule for body-mounted pickups or individual adjustable pole screws. Stop if a screw binds or the pickup fails to move; do not unscrew it far enough to detach the pickup.
Adjusting Middle Pickup Height
The middle pickup on a Stratocaster often gets overlooked but is crucial for positions 2 and 4 (the iconic "quack" tones):
- Start with the gap for your pickup type, then balance against the bridge and neck
- Focus on balance with other pickups
- When switching between positions, output should be similar
- No dramatic volume jumps
- Test positions 2 and 4
- These combine middle pickup with bridge or neck
- Ensure the middle pickup isn't overwhelming these famous tones
Adjusting Neck Pickup Height
The neck pickup provides your warmest, jazziest tones:
- Start with the gap for your pickup type; the neck may need a larger gap when balancing
- This pickup has naturally high output due to increased string movement
- Be cautious about raising it too high
- Easy to get too much output here
- Can sound muddy if too close
- Test with clean and overdriven settings
Fine-Tuning for Your Style
After setting the starting gaps for your pickup type, make small listening comparisons and recheck clearance:
For More Output/Aggression:
- Raise all pickups 1/64" (0.4mm) closer
- Great for high-gain rock and lead playing
- Provides more signal to drive your amp
For More Clarity/Dynamics:
- Lower all pickups 1/64" (0.4mm) further
- Better for clean tones and touch-sensitive playing
- Increases sustain and string vibration
For Balanced Vintage Tone:
- Stick closely to Fender specifications
- This represents decades of refinement
- Works well for most playing styles

Common Stratocaster Pickup Height Mistakes
Avoid these frequent errors that can compromise your tone:
Mistake #1: Treating a Starting Table as the Final Setup
Why it matters: Identical pickup types can start at the same measured gap, but their positions and your playing affect the final balance.
The fix: Compare all five switch positions and adjust the louder pickup downward if needed. A fixed neck/middle/bridge progression is not mandatory.
Mistake #2: Maxing Out Pickup Height
Why it's wrong: More height doesn't always equal better tone. Excessive magnetic pull actually reduces sustain and can create tuning issues.
The fix: Start with factory specs and only raise pickups if you need more output for a specific reason.
Mistake #3: Not Balancing Left and Right Sides
Why it's wrong: Uneven pickup heights create unbalanced string-to-string volume, making some strings louder than others.
The fix: Start with the bass/treble gaps for your pickup type, then listen to both outer strings. There is no single required difference for every pickup.
Mistake #4: Measuring from Pickup Cover Instead of Pole Pieces
Why it's wrong: The magnetic pole pieces do the actual sensing, not the plastic cover.
The fix: Always measure from the top of the visible pole piece (magnet).
Mistake #5: Not Testing at Playing Volume
Why it's wrong: Pickup height sounds different at bedroom volume vs. playing volume due to speaker compression and harmonic content.
The fix: Make your final adjustments at the volume you typically play at.
Mistake #6: Forgetting About Action Height Changes
Why it's wrong: If you later adjust your string action (string height), this changes the pickup-to-string distance.
The fix: Set your action first, then adjust pickup height afterward.
Electric Guitar Pickup Height for Different Playing Styles
Your ideal pickup height depends on your pickups and musical context. The following are optional listening experiments, not Fender factory presets or verified artist settings. Work from the starting point for your pickup type and recheck clearance, sustain and pitch after every change:
Blues and Jazz Settings
Target feel: Warm, smooth, dynamic response with great touch sensitivity
Recommended adjustments:
- Lower all pickups 1/64" below Fender specs
- Emphasizes clarity and string vibration
- Allows for expressive bends and vibrato
- Reduces harsh upper harmonics
- Increases sustain for those long, singing notes
Best for:
- Stevie Ray Vaughan-style Texas blues
- Eric Johnson clean tones
- Jazz comping and soloing
- Clean rhythm work
Rock and Metal Settings
Target feel: High output, strong presence, aggressive attack
Recommended adjustments:
- Raise bridge pickup 1/64" closer than specs
- Keep neck and middle at standard height or slightly raised
- Provides more signal to drive amplifier harder
- Increases harmonic content for distortion
- Strong enough to cut through heavy band mix
Best for:
- Classic rock rhythm and lead
- Hard rock and heavy metal
- High-gain playing
- Aggressive strumming
Country and Funk Settings
Target feel: Crystal-clear articulation, percussive attack, low string noise
Recommended adjustments:
- Start with Fender's guidance for your pickup type and balance by ear
- Alternatively, lower middle pickup slightly for cleaner positions 2 & 4
- Maximize the famous Strat "quack" tones
- Clean, percussive attack for chicken-pickin'
- Excellent note separation for fast passages
Best for:
- Traditional country rhythm and lead
- Funk rhythm guitar (Nile Rodgers style)
- R&B and soul
- Studio session work requiring clean tone
Studio/Recording Settings
Target feel: Balanced, consistent tone across all positions, low noise
Recommended adjustments:
- Start with Fender's guidance for your pickup type
- Fine-tune based on specific recording needs
- Test with actual recording equipment
- Consider slightly lower heights for better noise floor
- Balance all three pickups for seamless switching
Best for:
- Professional recording sessions
- Multi-genre session work
- Tone consistency across album
- Situations requiring exact repeatability
Pickup Height Comparison: Single Coil vs Humbucker
While this guide focuses on Stratocaster single coils, understanding humbucker height helps put these measurements in context:
Fender's general table gives humbuckers a starting gap of 4/64" (1.6mm) on both sides, compared with the single-coil entries above. Pickup construction and magnetic pull matter more than a blanket rule that one type must always sit closer. Check your specific humbucker's instructions, including whether its measurement references a pole screw or cover.
Why This Matters for Strat Players
On an HSS Strat, set each pickup from its own manufacturer's guidance and compare output through a clean amp. If the bridge humbucker overwhelms the single coils, try lowering it and listening again. There is no universal “double output” ratio or required 1/64–2/64" offset.
Setting Guitar Pickup Height: Advanced Considerations
Interaction with String Action
String action (the height of strings above frets) directly affects optimal pickup height:
Lower Action:
- Strings sit closer to pickups naturally
- May need to lower pickups to maintain proper distance
- Common for fast, technical playing styles
Higher Action:
- Strings sit further from pickups naturally
- May need to raise pickups to maintain output
- Common for slide guitar and heavy picking styles
Scale Length Effects
While all Stratocasters use 25.5" scale length, understanding this helps if you adjust other guitars:
- Longer scales have higher string tension
- Higher tension = less string vibration amplitude
- This is why Strat pickups can sit relatively close to strings
- Shorter scale guitars (24.75" like Les Paul) may need pickups further away
Pickup Magnet Strength Variations
Not all Stratocaster pickups have the same magnet strength:
Pickup labels are not enough to predict a safe gap. Vintage-style does not guarantee weak magnetic pull, and extra winding does not necessarily mean a stronger magnet. Follow the pickup maker's guidance, then listen for balance and sustain. If notes warble or decay unusually quickly, try increasing the gap.
Temperature and Humidity Effects
Your pickup height may need seasonal adjustment:
High humidity:
- Wood absorbs moisture and swells
- Neck relief increases
- Strings may sit slightly higher
- May need to raise pickups slightly
Low humidity:
- Wood dries and contracts
- Neck relief decreases
- Strings may sit slightly lower
- May need to lower pickups slightly
Troubleshooting Pickup Height Issues
Problem: Pickups Sound Weak or Thin
Diagnosis: Pickups likely too far from strings
Solutions:
- Measure current height against factory specs
- Raise pickups 1/64" at a time until desired output achieved
- Stop raising if sustain worsens, notes warble or strings approach the pickup; there is no universal safe minimum gap
- If still weak, consider pickup upgrade or wiring issues
Problem: Loss of Sustain and "Wolf Tones"
Diagnosis: Pickups too close to strings, causing magnetic string pull
Solutions:
- Lower pickups 1/64" at a time
- Test sustain on all strings, especially bass strings
- Listen for uneven harmonic response (wolf tones)
- Continue lowering until sustain improves
Problem: String-to-Pole-Piece Contact
Diagnosis: Pickups definitively too close
Solutions:
- Lower pickups immediately to prevent damage
- Start at factory specs and test
- Consider that you may need truss rod adjustment if strings are too close
- Check if pickup mounting springs are compressed or broken
Problem: Unbalanced Volume Between Pickups
Diagnosis: Pickup heights not properly balanced
Solutions:
- Test output of each position individually
- Adjust the quieter pickup(s) up by 1/64"
- Alternatively, lower the louder pickup(s)
- Test in all 5 positions for smooth transitions
Problem: Excessive Noise or Hum
Diagnosis: While height can affect noise, this usually indicates other issues
Solutions:
- Ensure proper grounding (not pickup height related)
- Check for fluorescent lighting interference
- Test with different cables and locations
- Consider if you're near electronic equipment
Problem: Tone Changes When Bending Strings
Diagnosis: Pickups may be too close, affecting bent strings differently
Solutions:
- Lower pickups 1/64" and test bends
- This is especially common with the bridge pickup
- Find height that maintains consistent tone through bends
Stratocaster Setup Optimization: The Complete System
Pickup height doesn't exist in isolation—it's part of your complete guitar setup:
Setup Order Matters
Always adjust these elements in this order for best results:
- Truss Rod Adjustment - Set proper neck relief first
- String Height (Action) - Determine string-to-fret distance
- Pickup Height - Now optimize pickup-to-string distance
- Intonation - Ensure proper tuning across the neck
Complementary Adjustments
When changing pickup height, consider:
- Bridge Saddle Height: Affects string action and pickup distance
- Pickup Screws: Ensure they're secure but not over-tightened
- Spring Tension: Weak springs won't hold pickups steady
- Pickguard Condition: Warped pickguards can cause uneven pickup heights
For a complete Stratocaster setup, check out our comprehensive Stratocaster Setup Guide.

Frequently Asked Questions (FAQ)
1. How close should Stratocaster pickups be to the strings?
Answer: Start by pickup type, not just position. Fender lists vintage-style single coils at 6/64" (2.4mm) bass and 5/64" (2.0mm) treble, and standard single coils at 5/64" (2.0mm) bass and 4/64" (1.6mm) treble. Measure pole-piece top to string underside with each outer E fretted at the last fret; balance the positions by ear.
2. What is the ideal single coil pickup height?
Answer: There is no universal ideal gap. Use the manufacturer starting point for the actual pickup, then adjust for output balance, clear sustain and string clearance. A fixed neck/middle/bridge gradient is not a Fender factory requirement.
3. How do I measure pickup height correctly?
Answer: To measure pickup height accurately, fret each string at the highest fret (or use a capo), place a ruler vertically between the string and pickup, and measure from the top of the pickup pole piece (the visible magnet) to the bottom of the string. Always measure with the guitar in tune for accurate string tension.
4. Can pickup height affect guitar sustain?
Answer: Yes, pickup height significantly affects sustain. Pickups too close to strings create magnetic pull that dampens string vibration and reduces sustain. If you hear magnetic pull, increase the gap gradually and compare sustain while retaining useful output. Lowering an already well-balanced pickup does not guarantee more sustain.
5. How do I adjust Stratocaster pickup height?
Answer: For a standard pickguard-mounted Strat pickup, use its two mounting screws, one at each end. Viewed from above the screw head, clockwise raises the pickup toward the strings and counter-clockwise lowers it. Make up to 1/4-turn adjustments, then remeasure and listen. These directions do not apply to every body-mounted pickup or to adjustable pole screws.
6. Should all three Stratocaster pickups be the same height?
Answer: They can start at the same measured gap if they are the same pickup type. The final gaps may differ after balancing; the neck often needs more clearance. Judge output, sustain and clearance in all switch positions rather than require a fixed staircase.
7. How does pickup height affect tone on a Stratocaster?
Answer: Higher pickup positions increase output, presence, and brightness but can reduce sustain and dynamic response. Lower pickup positions decrease output but increase clarity, sustain, and string vibration. The ideal height balances these characteristics for your playing style.
8. What's the difference between Fender vintage and modern pickup heights?
Answer: Fender gives different starting gaps for different pickup designs, including vintage-style, standard single-coil, Texas Special and Noiseless pickups. Use the specification for the actual pickups fitted. The guitar's age or the word “modern” alone does not select the right setting.
9. How often should I adjust my pickup height?
Answer: Adjust pickup height whenever you change string gauge, modify string action, adjust the truss rod, or notice tonal changes. Most players set pickup height during initial setup and only readjust if they change their playing style or hear problems with tone or sustain.
10. Can I damage my pickups by adjusting the height?
Answer: Careless adjustment can strip screws, detach a pickup from its mounting screw or strain its wiring. Use the right screwdriver, make small turns and stop if anything binds. Avoid string contact and excessive magnetic pull; do not keep loosening a screw when the pickup no longer follows it.
Want These Specs on Your Workbench?
Pickup height is just one part of a complete setup. The Fender Setup Cheat Sheet includes:
- The complete setup order: relief → action → tremolo/bridge → pickups → intonation
- Pickup-type starting points, adding Texas Special and humbucker rows to the single-coil table above
- A diagnostic worksheet for symptoms that measurements alone don't explain
- Printable setup and pickup records for your own before/after settings
Get the Complete Setup Guide →
Quick Reference: Stratocaster Pickup Height Specifications
| Reference | Starting gap or method |
|---|---|
| Vintage-style single coil | Bass: 6/64" (2.4mm), treble: 5/64" (2.0mm) |
| Standard single coil | Bass: 5/64" (2.0mm), treble: 4/64" (1.6mm) |
| Adjustment | Pickguard mounting: clockwise raises; counter-clockwise lowers |
| Increment | Up to 1/4 turn, then remeasure; screw turns are not a fixed distance |
| Measurement | Pole-piece top to string underside, each outer E fretted at the last fret |
Use the pickup-specific guidance linked above for other designs. These are starting gaps, not a position-based factory prescription.
Conclusion: Achieving Your Perfect Stratocaster Tone
Mastering Stratocaster pickup height adjustment is one of the most valuable skills you can develop as a guitarist. This free modification takes only 15-20 minutes but can dramatically transform your tone, making your Strat sound fuller, more balanced, and more inspiring to play.
Start with the manufacturer guidance for your pickup type. From there, make small adjustments based on your playing style, musical genre, and personal tonal preferences. Remember that there's no single "perfect" setting; the ideal pickup height depends on your unique combination of pickups, strings, playing technique, and musical goals.
The key principles to remember:
- Start by pickup type, then balance the neck, middle and bridge by ear
- Measure accurately from pole pieces with strings fretted at the last fret
- Adjust incrementally in 1/64" (0.4mm) steps
- Test at playing volume for realistic assessment
- Balance output across all positions for seamless switching
Take your time with this adjustment. Listen critically to how each change affects your tone. With patience and experimentation, you'll discover the pickup heights that make your Stratocaster sing exactly the way you want it to.
For more comprehensive Stratocaster setup guidance, explore these related articles:
Related Posts
Stratocaster Setup and Maintenance
- Ultimate Stratocaster Setup Guide - Complete step-by-step setup from start to finish
- Stratocaster Tremolo Setup Guide - Mastering the floating bridge system
- Best Strings for Stratocaster - String recommendations for optimal tone
Guitar Setup Fundamentals
- Guitar Truss Rod Adjustment Guide - Set proper neck relief first
- Guitar Action Height Guide - String height adjustment basics
- Guitar String Gauges Guide - Understanding string tension and thickness
Pickup Height Guides for Other Models
- Jazzmaster Pickup Height Guide - Offset pickup specs and adjustment for Jazzmaster
- Telecaster Pickup Height Guide - Telecaster pickup specs and adjustment

Last updated: September 10, 2026 — added original Strat photos and hardware-identification guidance; retained the corrected mounting directions and pickup-type starting specifications.