Jaguar Tremolo Setup: Lock, Arm Fit and Tuning Checks
Set up a Jaguar tremolo with checks for vintage locks, lockless units, loose arms and tuning return. Use the free helper to choose your next check.
Free workbench helper
Find your next tremolo check
Match your hardware and symptom for a practical next step. This does not diagnose wear or give a universal screw setting.
Start with the hardware table if you are unsure. The full checks below also work without this helper.
A Jaguar tremolo setup starts by identifying the tailpiece fitted to your guitar. On a traditional unit with a sliding trem-lock, spring adjustment establishes the lock reference. A lockless unit has no equivalent stop to calibrate, and an unfamiliar replacement needs its own instructions. Arm retention, bridge movement and strings returning to pitch are separate checks.
Use the helper above to choose a starting point, then work through the relevant section below. You do not need to buy a bridge, fit heavier strings or alter the neck angle before recording what the guitar actually does.
For the rest of the setup sequence, use the complete Jaguar setup guide. If you want an offline workbench companion, the Fender Setup Guide includes offset hardware identification, diagnostic worksheets and printable setup records. The detailed trem-lock procedure on this page remains free.
Identify your hardware
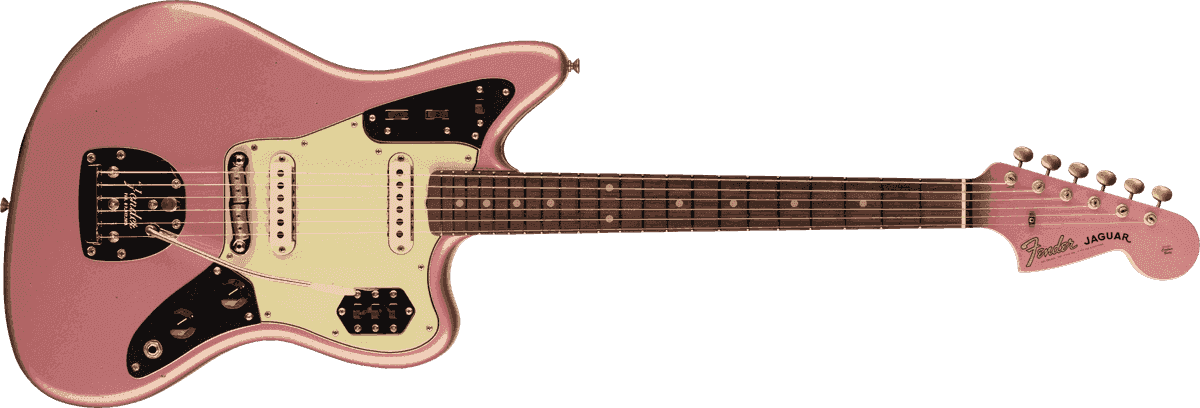
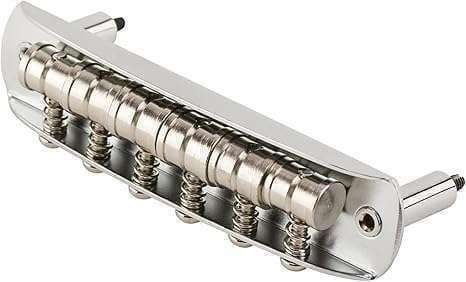
The Jaguar tremolo system changes string tension at a tailpiece behind the bridge. That separate bridge supports the strings and determines action and intonation. Calling both parts a “floating bridge” can make an instruction ambiguous: establish which part a guide means before touching a screw.
Use the installed parts as your reference, especially on a used guitar. A model name, year or familiar chrome plate does not establish which replacement arm, bridge or vibrato is fitted.
| What you can identify | What changes the setup | Your starting point |
|---|---|---|
| Traditional offset tailpiece with a sliding lock button | A spring-tension screw and lock reference belong to the vintage mechanism | Check the Fender diagram, then use the vintage lock procedure below |
| Offset tailpiece without a sliding lock | There is no lock position to use as a spring-balance reference | Use that model's instructions and record tuning return |
| Modern Fender assembly or aftermarket replacement | Arm retention and bridge/post details may differ | Match the exact part to its maker's service sheet |
| Hardtail, unfamiliar mechanism or uncertain parts | This article cannot identify a suitable spring adjustment from the body shape | Stop at identification and document the hardware |
Fender describes the Squier Classic Vibe '70s Jaguar as having a non-locking floating vibrato. Missing a lock button on that configuration is not, by itself, a fault. Fender's American Professional Jaguar service sheet lists a lock, a separate arm sleeve, a compression spring and retention hardware. It illustrates why arm parts should be identified independently of the main spring.
For a broader visual identification route, see Fender bridge and tremolo identification.
Before adjusting: make a baseline
Choose the strings and tuning you intend to keep, then stabilise tuning across all six strings. Check that the strings are seated and wound correctly for the installed tuners. Record the gauge, tuning and whether the problem started after a string change, transport, a replacement part or an adjustment.
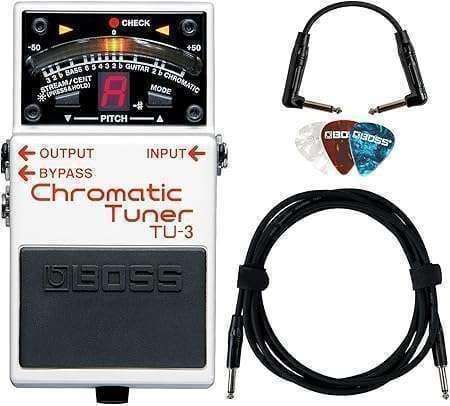
Have a reliable tuner, the correctly fitting tool for the identified screw, a padded work surface and somewhere to write results. Photograph the bridge and tailpiece at rest. A starting photo is more useful than remembering that the bridge looked “roughly upright” later.
Separate three complaints in your notes: an arm that feels loose, a lock that will not engage, and a guitar that fails to return to pitch. They can coexist, but tightening the main spring is not a general cure for all three. Test one complaint at a time so you know whether a change helped.
 Buy on Amazon
Choose strings for your playing, then recheck the setup
There is no universal minimum string gauge that every Jaguar must use. Fender supplies the Classic Vibe example above with .009–.042 strings; a recommendation that all Jaguars require .011s would exclude a documented factory configuration. A heavier set may suit your touch, but it also changes the work you need to check.
If you change gauge or tuning, revisit relief, action, bridge/tailpiece balance and intonation. Do not treat a gauge change as proof that the nut, bridge or tremolo is repaired. Likewise, do not assume a new string that goes sharp or flat must indicate a spring fault before checking its seating and winding.

Set the vintage trem-lock
Scope: an identified traditional Jaguar/Jazzmaster floating tailpiece with the sliding lock. Fender's historical floating-tremolo instructions, Figure 3 provide the reference below. Match the diagram to your unit first; this is not a Strat spring-claw procedure.
- Tune the guitar and place the button in its unlocked position: away from the spring-tension screw.
- With the arm released, tighten the identified spring-tension screw clockwise in small increments until the button no longer slides into the locked position. Do not force the button.
- Loosen the screw until the button can just slide into the locked position. Keep the tool seated and stop for binding or unexpected resistance.
- Retune and compare the released resting pitch with the lock engaged and disengaged. Repeat the check after tuning settles.
On this mechanism the button moves toward the spring-tension screw to lock. Fender describes depressing the arm to engage the lock after a string breaks, recovering the remaining strings' pitch. This depends on the mechanism being correctly adjusted; verify with a tuner rather than assuming perfect return.
What the lock check can and cannot tell you
A sliding button that engages at a consistent resting position gives you a useful reference for that mechanism. It does not prove that every string is travelling freely through the nut, that the bridge returns to its previous position, or that the arm is correctly retained.
If engaging the button changes tuning, stop and repeat the identification and calibration check. If you cannot obtain the documented behaviour within normal adjustment travel, record what happens and have the mechanism inspected. A damaged stop, worn part or incorrectly assembled replacement cannot be diagnosed from the pitch direction alone.
Use the arm gently during checks and release it naturally. Do not pull the arm back to the pitch you wanted and then record that as a successful return. That would conceal the very behaviour you are trying to compare.
Lockless and modern units
On a lockless offset vibrato, skip the button procedure entirely. There is no hidden lock setting to find by tightening another screw. You can still record its resting position and tuning return, but a vintage lock calibration cannot provide the reference your unit lacks.
For a modern or replacement mechanism, find the model or part number and its current instructions. Separate the arm-retention adjustment from the main spring adjustment. Do not assume a hole visible beside the arm takes the same tool or performs the same job as one on another Jaguar.
If the guitar works well and your question is simply how many turns the screw “should” be from fully tight, preserve the working position. An arbitrary turn count loses the relationship to the actual spring, strings, tuning and mechanism. Never bottom out an adjustment merely to establish somebody else's starting number.
After a tuning change, work around all six strings again. A floating system can respond to the changed pull of one string, so checking only the retuned string misses movement elsewhere. Record the result in the same playing position and with the same technique each time.
Check return to pitch
This repeatable check helps distinguish a shared movement from a string-specific symptom. It is an observation routine, not a fault detector: different causes can produce similar pitch changes.
- Tune every string. Note the bridge and tailpiece positions without pressing on them.
- Play each open string with a consistent touch and record the tuner reading.
- Make one gentle downward arm movement, release it and check every string again.
- Retune. Repeat using an ordinary fretted string bend without touching the arm.
- Compare the two results and inspect whether the bridge returned to its recorded rest position.
| Observation | Useful next check | What it does not establish |
|---|---|---|
| One string repeatedly returns differently | Its winding, seating and contact at the nut, tree and saddle | That the nut needs filing |
| Several strings shift together | Bridge/tailpiece rest position and overall tuning stability | That spring tension is the only cause |
| A string bends normally but changes after arm use | Compare movement and contact during the two tests | Which part is worn |
| Lock engagement changes pitch | Confirm compatible hardware and repeat the lock reference check | A universal clockwise/counterclockwise fix from pitch alone |
| Bridge remains visibly displaced | Determine whether that bridge is designed to rock and whether it returns | That every replacement must be fixed solidly |
Write the string names and whether each returned sharp, flat or near the original reading. If your tuner reports cents, record its readings; this guide does not assign a universal pass/fail tolerance. The useful question is whether the same symptom repeats under the same conditions.
Keep one short musical phrase as a second check. Play it before and after the trial with the same picking force and amplifier setting. A tuner record and a playing comparison answer different questions, and together they make a more useful note for a technician than “it never stays in tune.”
A workbench record you can copy
- Guitar and installed tailpiece: ____________________
- Bridge maker/type, or unknown: ____________________
- Strings and tuning: ____________________
- Resting position before test: ____________________
- Strings affected after arm use: ____________________
- Strings affected after a bend: ____________________
- One change made and result: ____________________
If the symptom disappears when you change two things at once, you have a better-playing guitar but weaker evidence about the cause. For troubleshooting, keep the earlier record and avoid presenting that result as proof that both changes were required.
Bridge rocking, action and string escape
A traditional offset bridge can move with the strings. A bridge intended to rock should be assessed against its own starting position and design. An aftermarket bridge may use a different post fit or movement; the brand name alone does not justify calling all replacements “non-rocking.”
Inspect without trying to immobilise the bridge with tape or forcing it to a different lean. Note whether it returns after arm use and whether the strings contact anything besides their intended support points. If identification remains uncertain, use the hardware maker's fitting instructions before changing post fit.
For example, Mastery's installation instructions are specific to its hardware. Buying a part that fits the body does not make another manufacturer's rocking-bridge procedure applicable. Check compatibility, radius, spacing and intended adjustment before deciding an upgrade addresses the observed problem.
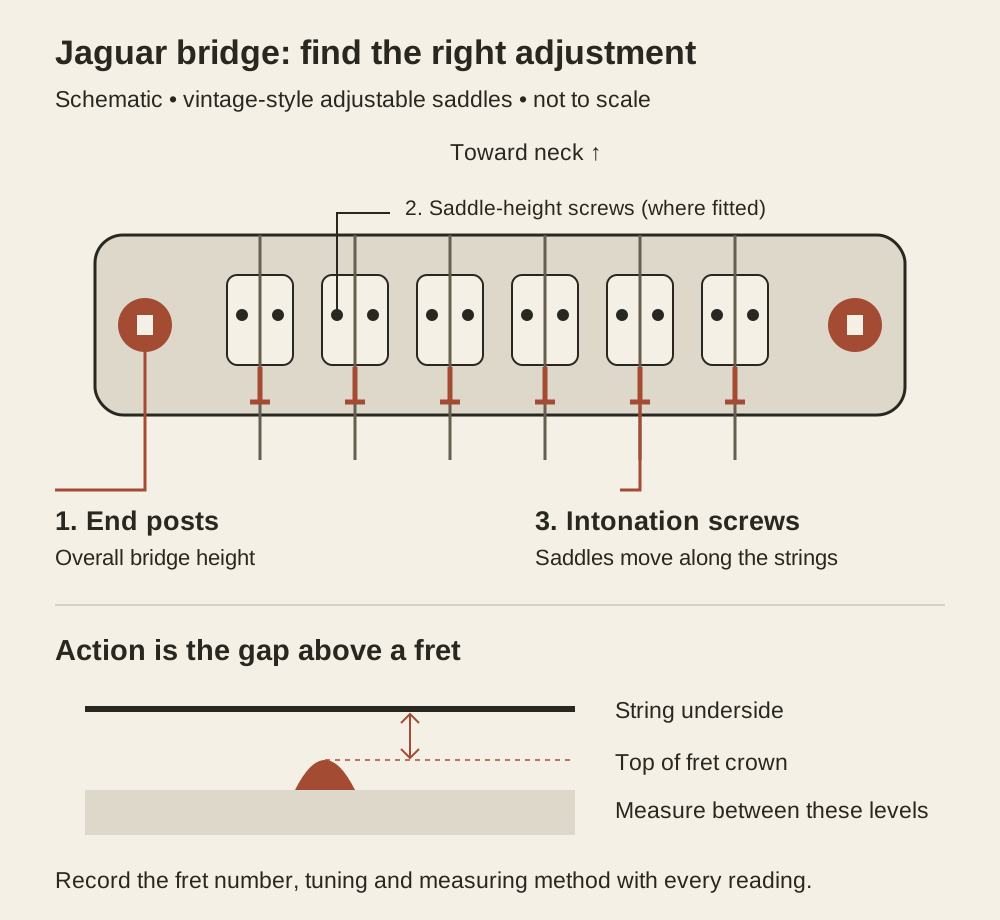
For action changes, use the Jaguar bridge-height and action walkthrough. Record the measuring fret and units as well as the number. Bridge height changes action; tailpiece spring adjustment serves another purpose, so do not substitute one for the other to chase a measurement.
Do you need a neck shim?
Strings escaping their grooves or a rattling bridge deserve inspection of saddle condition, string choice, bridge height and the instrument's geometry. Those symptoms do not select a universal shim angle. A neck-pocket change should follow a diagnosis and an understanding of the installed hardware.
Do not raise the bridge solely to create a steeper string angle if it leaves the action unsuitable. Record the existing action and remaining adjustment range first. Neck removal, altered neck geometry and damaged screw threads call for appropriate tools and experience; you can complete the observational checks without doing that work.
Arm fit and mechanical noise
Loose, stuck or falling-out arm
Check whether the fitted arm is a push-in or threaded design, and confirm it is the correct matching part. Do not screw a push-in arm into place or force a mismatched thread. A second-hand guitar may have acquired an arm that looks plausible but does not match its sleeve.
Keep arm retention separate from spring feel. An arm that swings loosely around its socket is a different complaint from a vibrato that resists a pitch movement. Identify any documented retention adjustment before using it, and do not bend the arm, hammer its tip or squeeze the collet as a generic repair.
If the sleeve itself moves, the arm repeatedly releases, or the correct arm cannot seat normally, stop using force. Record the model and loose part for inspection. Removing the assembly or manipulating its internal hardware is a separate service task, not a required first step for using this guide.
Rattles, clicks and restricted movement
Compare playing with the arm stationary against gentle arm use. Note whether the sound is acoustic only or audible through the amp, and whether it occurs at a particular point of travel. Look for visible string contact or a component moving where it should be secured.
A click does not prove that the main spring needs grease. Avoid applying household products to an unidentified mechanism or introducing thread-locking compound before diagnosing the loose part. Use the maker's maintenance instructions where available; grinding, binding or damaged hardware needs inspection.
FAQ
Which way does the Jaguar tremolo lock slide?
On the traditional mechanism covered by Fender's Figure 3, the button moves toward the spring-tension screw to lock and away to unlock. Check the diagram against your hardware; descriptions such as “forward” depend on how somebody is holding the guitar.
Does every Jaguar have a trem-lock?
No. Fender describes the Classic Vibe '70s Jaguar's vibrato as non-locking. Identify the tailpiece on your own guitar before following any button-based adjustment procedure.
Will adjusting the spring fix tuning instability?
It may address an incorrect spring/lock reference on a compatible mechanism, but it cannot establish that strings, contact points, bridge movement and worn parts are sound. Use the return-to-pitch record to identify the next inspection.
Should the tremolo arm screw in or push in?
That depends on the fitted unit and arm. Match both to the maker's parts information; do not decide from the Jaguar name or force an arm that will not seat normally.
Do I need .011 strings for a Jaguar tremolo?
No universal minimum applies. Choose strings for your playing and recheck the setup after changing them. The Classic Vibe factory configuration cited here uses .009–.042 strings.
Can the trem-lock help when a string breaks?
Fender describes that use for the correctly adjusted traditional unit. Depress the arm to allow engagement and check the remaining strings with a tuner. Lockless units do not offer that same stop.
Should I shim the neck to stop bridge rattles?
A rattle alone does not establish that the neck angle is wrong. Check the actual bridge, saddle condition, action and string contact before considering geometry changes. There is no universal shim angle for this complaint.
Is the Jaguar tremolo adjusted like a Stratocaster?
No. The traditional Jaguar/Jazzmaster unit uses a separate tailpiece mechanism. A Strat rear spring-claw procedure or bridge-to-body gap should not be transferred to it.
What should I record before taking the guitar to a technician?
Record the installed hardware, string gauge, tuning, when the symptom started, the strings affected after arm use and bends, and any change you made. Add clear photos of the bridge and tailpiece at rest.
Keep the next setup repeatable
Start with the identified mechanism, work on one symptom and preserve your measurements. If you need the whole-guitar sequence, return to the Jaguar setup guide. The paid Fender guide adds offline hardware checks, worksheets and records for repeat visits to the workbench; it does not inspect your guitar or promise a particular tuning result.