Ultimate Fender Jaguar Setup Guide: Exact Specs
Complete Fender Jaguar setup guide with exact specs for string height, bridge adjustment, tremolo lock, and pickup height. Fix bridge buzz, improve tuning stability, and dial in your Jaguar's tone step by step.
The Ultimate Fender Jaguar Setup Guide: String Height, Pickup Height & Intonation Tips
Last updated: September 16, 2026 — Jaguar intonation procedure corrected and expanded against Fender's Jaguar manual: bridge resting position, saddle direction, and hardware differences.
Quick Answer: Identify your Jaguar's bridge and installed pickups before choosing settings. Measure relief and action using the fret stated by the applicable manual; measure pickup clearance with the last fret held. Pickup type, mounting and switching vary across Jaguar models. A shim is a geometry decision, not a routine requirement for every short-scale guitar.
The Fender Jaguar, with its distinctive offset body and unique bridge system, offers a tonal palette unlike any other guitar in the Fender lineup. However, its complex setup requirements often intimidate even experienced guitarists. This comprehensive guide will walk you through every aspect of setting up your Fender Jaguar, from basic string height adjustments to solving common bridge problems that plague these iconic instruments.
Whether you're a beginner wondering how to set up a Fender Jaguar or an experienced player looking to fine-tune your jaguar guitar action height, this guide provides the detailed specifications and step-by-step instructions you need to achieve optimal performance.
🎸 Looking for a Jaguar? Read our How to Use Serial Number Lookup guide. Own one? Check factory specs, decode your serial, or track in My Garage.
📊 Quick Tools: Factory Specs • Serial Number Lookup • My Garage
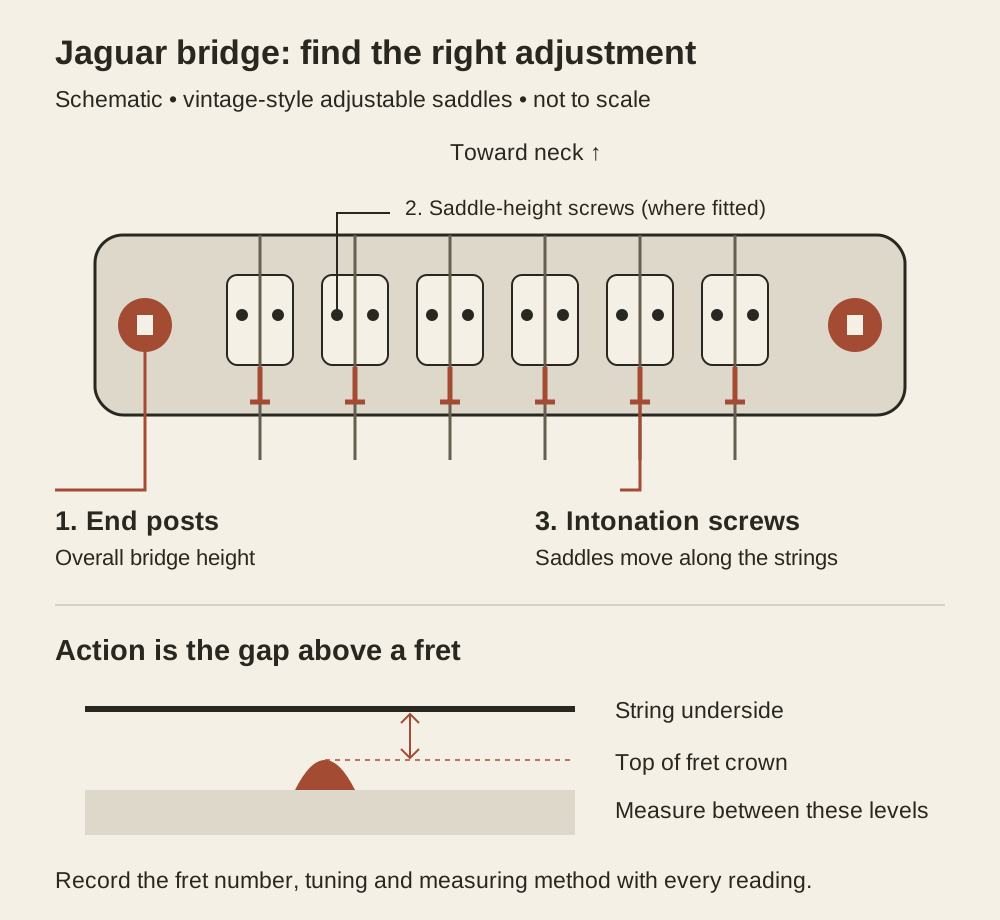
For the bridge-specific procedure, use Jaguar bridge height and action: identify the end posts, distinguish adjustable from preset saddles, and record the measuring fret before turning a screw.
Part 1: Understanding Jaguar Guitar String Height (Action)
String height, or action, is crucial for both playability and tone on a Fender Jaguar. Due to the Jaguar's unique bridge design and shorter scale length, the ideal string height differs slightly from other Fender models.
Standard Jaguar String Height Specifications (measured at the 12th fret):
Quick Answer: Jaguar string height ranges from 1.5mm (high E) to 2.0mm (low E) at the 12th fret. The shorter 24-inch scale allows for slightly lower action than other Fender models.
| String | Standard Height |
|---|---|
| High E | 1.5 mm (0.059 inches) |
| B | 1.6 mm (0.063 inches) |
| G | 1.7 mm (0.067 inches) |
| D | 1.8 mm (0.071 inches) |
| A | 1.9 mm (0.075 inches) |
| Low E | 2.0 mm (0.079 inches) |
These measurements provide a good starting point, but the Jaguar's shorter 24-inch scale length often allows for slightly lower action than Stratocasters or Telecasters. To measure and set your action accurately, consider using a Jim Dunlop String Height Gauge.
Part 2: Adjusting String Height on a Fender Jaguar
The Jaguar's bridge system is one of its most distinctive features, but also one of its most challenging aspects to set up properly. Here's how to adjust your jaguar string height:
-
Understand the Bridge Design: The Jaguar features a floating bridge with individual saddle height adjustments and a separate bridge height adjustment.
-
Adjust Bridge Height First: Use the two bridge height adjustment screws to set the overall bridge height. This affects all strings simultaneously.
-
Fine-tune Individual Saddles: Each saddle has its own height adjustment screw. Use a small Allen wrench such as a D'Addario Multi-Tool to adjust individual string heights.
-
Check for Buzz: Due to the Jaguar's shorter scale length, it's particularly sensitive to fret buzz. Test each string thoroughly after adjustments.
-
Balance with Tremolo: Ensure the bridge height works well with the tremolo system for proper functionality.
The key to successful jaguar guitar action height adjustment is patience and incremental changes. The bridge's floating nature means adjustments can affect multiple aspects of the setup.
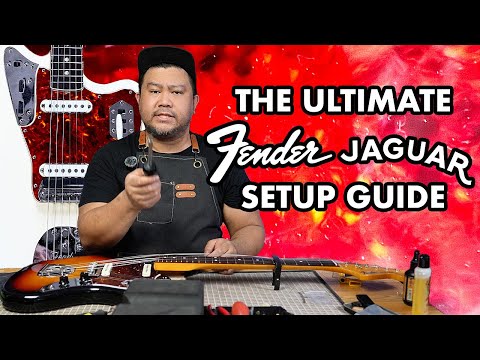
▶ Watch: The ULTIMATE Fender Jaguar Setup Guide
This video runs through the same action, bridge, and tremolo steps covered in this guide:
Click the thumbnail below to watch the full setup video on YouTube:
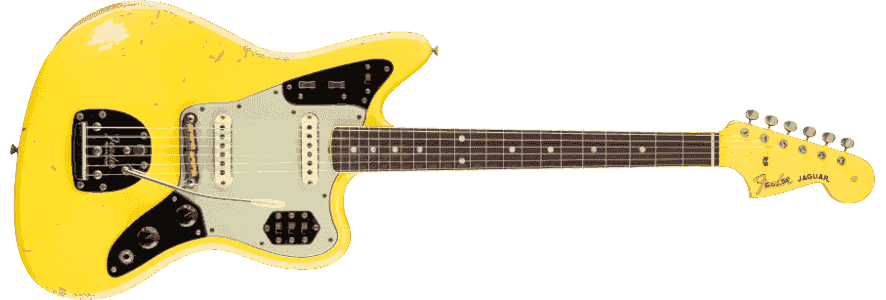
Essential Jaguar Setup Tools
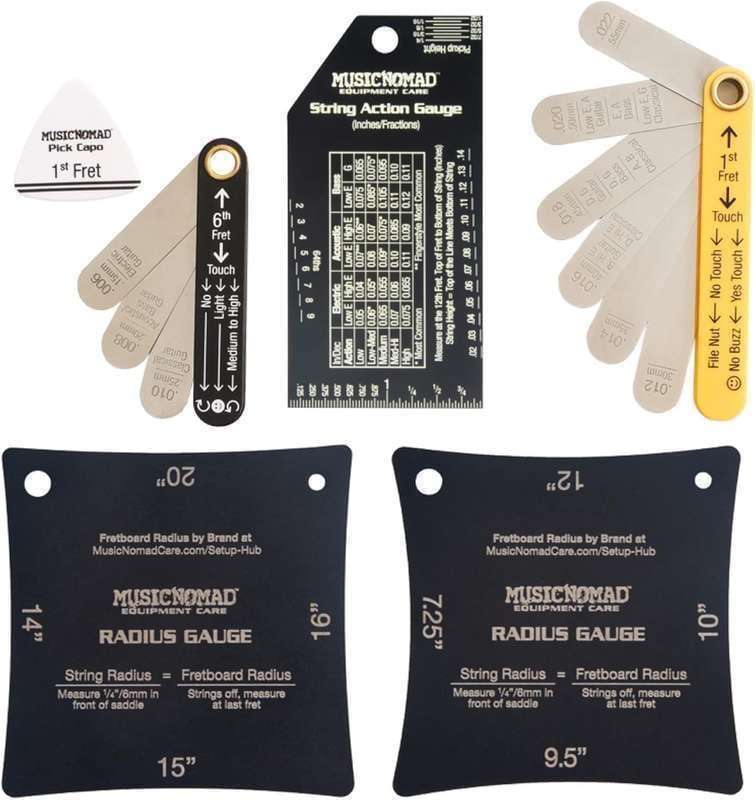
 Buy on Amazon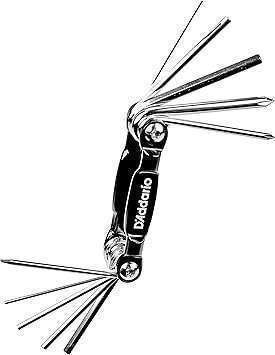
Part 3: Fender Jaguar Pickup Height Specifications
Jaguar pickup configuration varies: original Player models are HS, Player II is SS, and humbucker-equipped signature models need their actual pickup maker's instructions. Do not assign every Jaguar a neck/bridge factory table.
The 1986 Japan Reissue '62 Jaguar manual, printed page 15, gives 3/32 inch (2.4 mm) on the sixth-string side and 1/16 inch (1.6 mm) on the first-string side, measured from pole top to string bottom with the highest fret held. It does not provide separate neck and bridge rows. This historical reference is not a universal setting for modern variants or replacement pickups.
On the traditional body-mounted system described there, clockwise lowers the pickup and counterclockwise raises it when looking at the screw head. Pickguard/ring-suspended mounts work differently. Keep screws engaged and stop if the pickup fails to move. Record both sides before and after each small adjustment; no fixed millimetre-per-quarter-turn conversion applies to every mount.
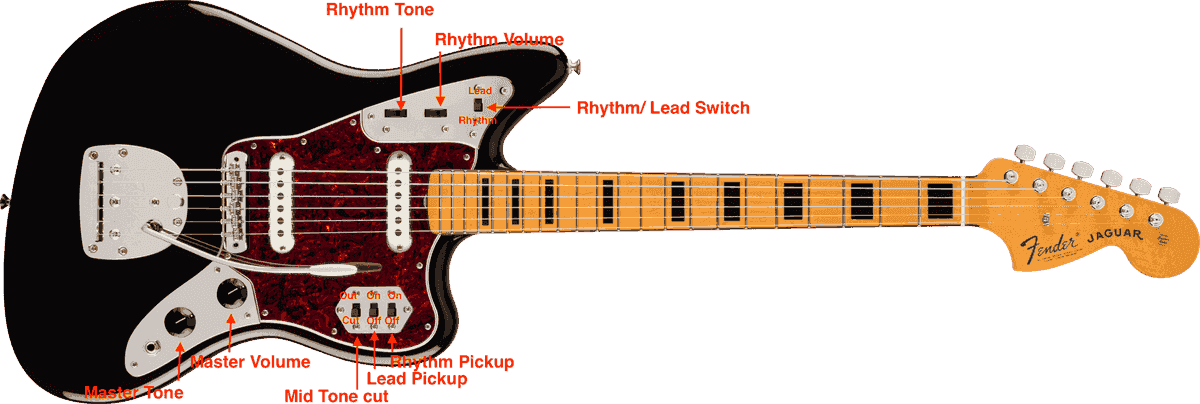
Compare output with the same clean amplifier setting and phrase. On a traditional two-circuit Jaguar, compare neck and bridge in the lead circuit with bass-cut unchanged, then check rhythm separately. Check for string contact and magnetic warble as well as volume balance.
Curious what your Jaguar is worth? Try our Guitar Price Estimate. After the bridge and action are stable, adjust Jaguar pickup height with a dedicated measurement and listening check.
Part 4: Solving Fender Jaguar Bridge Problems
The Jaguar's bridge is often cited as its biggest weakness, but with proper setup, it can be incredibly stable and functional. Here are the most common jaguar bridge problems and their solutions:
🎯 Jaguar and Jazzmaster bridges are nearly identical. For a full dedicated deep-dive on offset bridge setup — including factory specs, step-by-step adjustment, and upgrade comparisons — see our Jazzmaster Bridge Setup Guide.
Problem 1: Strings Popping Out of Bridge Saddles
Solution:
- Ensure proper string gauge (10-46 or 11-49 work best)
- Check that strings are properly seated in the bridge
- Consider upgrading to a Fender American Professional Jaguar Bridge for enhanced stability
Problem 2: Bridge Rattling
Solution:
- Tighten bridge height adjustment screws
- Apply threadlocker to prevent loosening
- Check that the bridge is properly seated in the thimbles
Problem 3: Intonation Issues
Solution:
- Settle the rocking bridge at its normal resting position before measuring — a leaning bridge moves every saddle with it
- Follow the saddle rule in Part 5 below: a sharp fretted note needs a longer string (saddle back, away from the nut), a flat note needs a shorter one
- If a saddle reaches the end of its travel, check string condition, saddle seating and bridge centering before forcing it further
Problem 4: Tremolo Not Returning to Pitch
Solution:
- Balance spring tension with string tension
- Lubricate the tremolo mechanism
- Check that the tremolo lock is functioning properly
For additional tremolo balancing concepts that also apply to offsets, see: Stratocaster Tremolo Setup — Float vs Decked.
Part 5: Fender Jaguar Intonation — Bridge Position and Saddle Setup
Intonation is the last step of a setup, not the first: it only holds once relief, action and tremolo balance are stable. On a Jaguar there is one extra job before touching a saddle — the bridge's resting position.
Quick Answer: Settle the bridge at its normal resting position, tune, then compare the 12th-fret harmonic with the fretted 12th-fret note. If the fretted note is sharp, lengthen the string by moving the saddle back, away from the nut; if it is flat, shorten the string by moving the saddle forward. Retune and retest after each small adjustment.
Step 1: Stabilize the bridge before measuring
A traditional Jaguar bridge is designed to rock with the tremolo, pivoting in its thimbles. If the bridge is left leaning after tremolo use, every saddle sits slightly out of position and the tuner comparison measures the lean rather than the setup.
- Tune to pitch, work the tremolo gently a few times, and let the bridge settle back to its normal resting position before measuring anything.
- If the bridge does not return to the same place each time, solve that first with the Jaguar tremolo setup guide. Intonation set against a wandering bridge will not hold.
- Fixed replacement bridges skip this step. A non-rocking design such as a Mastery follows its own maker's seating and adjustment instructions — do not copy the rocking-bridge routine onto it.
Step 2: Compare harmonic against fretted note
Use a precise tuner such as the Boss TU-3 Chromatic Tuner, with strings in good condition — Fender's Jaguar manual specifies new-condition strings for this adjustment.
- Tune the open string accurately.
- Play the 12th-fret harmonic, then fret the string at the 12th fret with normal pressure and compare the two readings.
- The 1986 Japan Reissue '62 Jaguar manual (printed page 17) sets the target as both notes matching within one cent, checking with the neck pickup selected and volume and tone at maximum.
Heavy fretting pressure bends the note sharp and defeats the comparison. Our intonation checker guide explains the method and the limits of a tuner reading in more detail.
Step 3: Move the saddle the correct way
The manual's rule: a sharp fretted note means the string is too short — lengthen it by moving the saddle back, away from the nut. A flat fretted note means shorten it — saddle forward, toward the nut. On the vintage-style bridge described there, the slot-head screw at the end of the bridge moves each saddle: clockwise lengthens the string, counterclockwise shortens it. Each saddle works against a small spring, so a screw that turns without the saddle moving usually means the saddle has reached the end of its travel or the spring is not engaged.
Retune the open string and repeat the comparison after every small movement. Expect the six saddles to end in a staggered pattern rather than a straight line.
Identify your bridge before turning anything
- Vintage-style rocking bridge: individually height-adjustable saddles plus one slot-head intonation screw per saddle, as described above.
- American Professional / Mustang-style bridge: preset-height, single-groove saddles with no saddle-height screws — but the American Professional Jaguar service manual lists an intonation adjustment spring and screws as bridge-assembly parts, so intonation still adjusts per saddle. Overall height is set only at the two end posts, covered in Jaguar bridge height and action.
- Fixed replacement (Mastery, Staytrem and similar): these bridges do not rock and use their own saddle arrangements. Follow the maker's instructions for both seating and intonation.
When a saddle runs out of travel
If a saddle reaches the end of its screw before the fretted note matches, stop rather than forcing it. Check in order:
- String condition and gauge — old or damaged strings will not intonate cleanly
- Saddle orientation, and that its height screws rest firmly against the bridge plate with the saddle parallel to it
- That the bridge is centered and properly seated in its thimbles
- That the open string is genuinely in tune when you make the comparison
Cutting springs or reversing parts is a repair decision, not a setup step.
Test vibrato return last
Once all six strings intonate, use the tremolo through its normal range and check that every string returns to pitch. The Jaguar manual notes that tremolo spring tension directly changes string pitch, so set the spring tension where you want it — see the tremolo setup guide — before finalizing intonation. Changing it afterwards means retuning and rechecking every string.
Common Intonation Issues on Jaguars:
- Bridge not settled at its resting position before measuring
- Saddles moved the wrong way — sharp notes need a longer string, not a shorter one
- Tremolo spring tension changed after intonation was set
- A saddle at its travel limit because of old strings, a mis-seated bridge or saddle orientation
Part 6: Jaguar Truss Rod Adjustment
The Jaguar's neck requires careful truss rod adjustment due to its shorter scale length and vintage-style construction.
Neck Relief Specifications:
- Target Relief: 0.010-0.012 inches at the 8th fret
- Measurement Method: Capo at 1st fret, press string at last fret, measure at 8th fret
Adjustment Process:
-
Measure Current Relief: Use feeler gauges to check current neck relief.
-
Make Small Adjustments: Turn the truss rod no more than 1/8 turn at a time (use a well‑fitting tool such as the MusicNomad Truss Rod Wrench Set (MN235)).
-
Allow Settling Time: Wait 24 hours between adjustments for the neck to settle.
-
Check in Different Conditions: Temperature and humidity changes affect neck relief.
Vintage vs Modern Considerations:
- Vintage Jaguars may have different truss rod access points
- Modern Jaguars often have easier-to-access truss rod adjustments
- Be extra careful with vintage instruments to avoid damage
Part 7: Best Bridge Setup for Jaguar
The stock Jaguar bridge, while authentic, has limitations. Here are the best bridge setup options:
Stock Bridge Optimization
- Proper Height Setting: Set bridge height so strings clear the bridge plate
- Saddle Adjustment: Ensure saddles are properly aligned and tightened
- String Gauge Selection: Heavier strings (11-49) work better with the stock bridge
- Bridge Plate Lubrication: Apply graphite or specialized lubricant to reduce friction
Aftermarket Bridge Options
Mastery Bridge: The most popular upgrade, offering:
- Enhanced stability and sustain
- Better intonation adjustment
- Reduced string jumping
- Improved tremolo performance
Staytrem Bridge: British-made alternative offering:
- Authentic vintage look
- Improved stability
- Better string retention
- Enhanced tremolo functionality
Mustang Bridge: Budget-friendly option providing:
- Better string retention than stock
- Improved intonation
- Cost-effective upgrade
Part 8: Comprehensive Jaguar Setup Checklist
A complete Jaguar setup involves multiple interconnected adjustments:
Pre-Setup Preparation
- Clean the guitar thoroughly
- Install fresh strings (recommended: Ernie Ball Regular Slinky Nickel Wound Electric Guitar Strings
- Gather necessary tools
- Set up a clean workspace
Neck and Truss Rod
- Check neck relief
- Adjust truss rod if necessary
- Allow neck to settle
- Recheck relief
Bridge and Action
- Set bridge height
- Adjust individual saddle heights
- Check for string buzz
- Test tremolo functionality
Pickups and Electronics
- Set pickup heights
- Test all switching positions
- Check output balance
- Clean potentiometers if needed
🔌 Want to upgrade your electronics? Our Jaguar Wiring Guide covers treble bleed installs, pot swaps, and rhythm circuit mods step by step.
Intonation and Tuning
- Set intonation for all strings
- Check tuning stability
- Test tremolo return to pitch
- Fine-tune bridge position
Part 9: Jaguar Maintenance and Care
Proper maintenance ensures your Jaguar performs consistently:
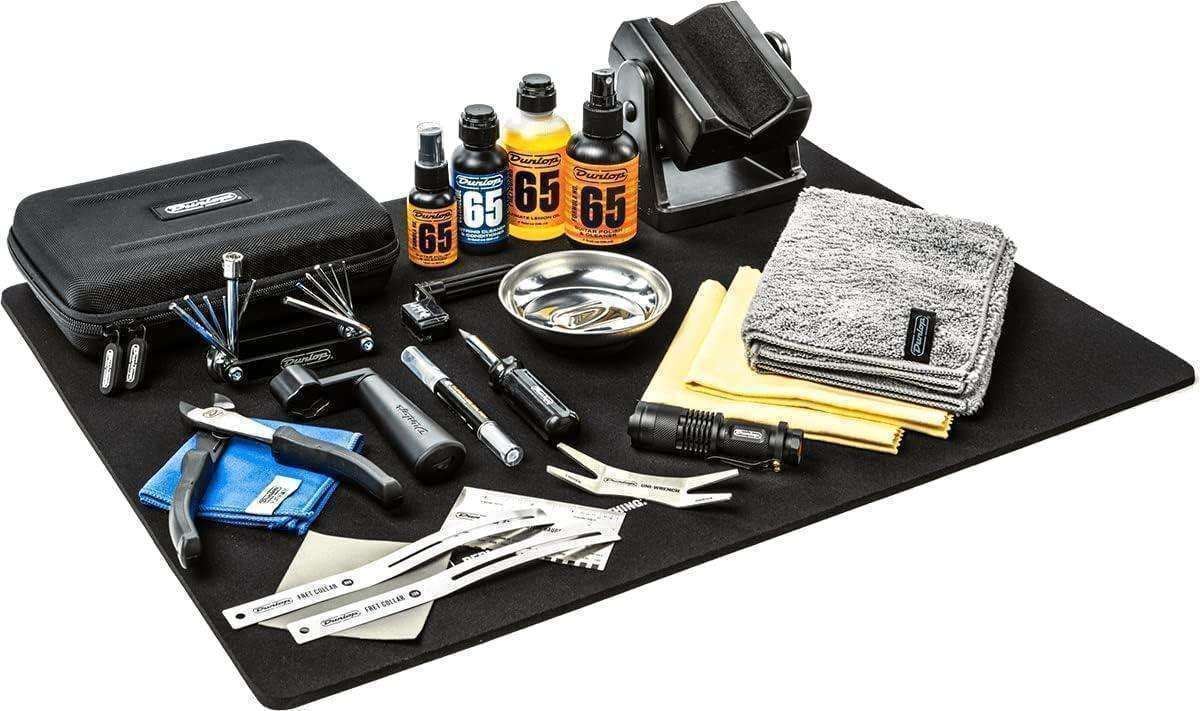
Strings and Care Gear

Regular Maintenance Tasks
- String Changes: Change strings every 2-4 weeks depending on playing frequency
- Bridge Cleaning: Clean bridge saddles and threads regularly
- Tremolo Maintenance: Lubricate tremolo mechanism periodically
- Electronics Care: Clean switches and potentiometers with contact cleaner
Environmental Considerations
- Humidity Control: Use a D'Addario Humidipak to maintain proper humidity levels
- Temperature Stability: Avoid extreme temperature changes
- Case Storage: Store in a proper guitar case when not in use
- Safe Shipping: Use our Fender Shipping Setup Guide if you need to transport or ship your guitar
Professional Setup
- Annual Checkup: Have a professional technician check your setup annually
- Major Adjustments: Consult a professional for truss rod or nut work
- Vintage Instruments: Always use a qualified technician for vintage Jaguars
For more information on guitar maintenance, follow proper cleaning and storage procedures to maintain your instrument's condition over time.
Part 10: Advanced Jaguar Setup Techniques
For experienced players looking to push their Jaguar's performance:
Custom Modifications
- Pickup Upgrades: Consider higher-output pickups for modern applications
- Bridge Upgrades: Mastery or Staytrem bridges for enhanced performance
- Electronics Modifications: Custom switching configurations
- Tremolo Enhancements: Upgraded tremolo arms and mechanisms
Genre-Specific Setups
- Surf Rock: Higher action and bridge pickup focus
- Alternative/Indie: Lower action and balanced pickup settings
- Jazz: Higher action and neck pickup emphasis
- Rock: Medium action and bridge pickup optimization
Recording and Performance Setups
- Studio Setup: Lower action for easier playing
- Live Performance: Higher action for better string control
- Recording Specific: Pickup height optimized for microphone placement
Conclusion
Setting up a Fender Jaguar requires patience and attention to detail, but the results are worth the effort. The Jaguar's unique design and tonal characteristics make it one of the most distinctive guitars in the Fender lineup, and proper setup unlocks its full potential.
Whether you're solving common jaguar bridge problems or fine-tuning your pickup heights, the key is to approach each adjustment methodically and understand how different components interact with each other. The Jaguar's complexity is part of its charm, and mastering its setup is a rewarding experience for any guitarist.
Equip yourself with the right tools and accessories, like the D'Addario Multi-Tool or MusicNomad String Guitar String Cleaner, to ensure your Jaguar stays in perfect playing condition. With proper setup and maintenance, your Fender Jaguar will provide years of exceptional performance and inspire creativity in your playing.
For more setup guides, check out our Stratocaster Setup Guide and Telecaster Setup Guide. Wondering what your guitar is worth? Try our Guitar Price Estimate.
Frequently Asked Questions (FAQ)
1. How do you set the intonation on a Fender Jaguar?
Answer: Settle the rocking bridge at its normal resting position first, then tune. Compare the 12th-fret harmonic with the fretted 12th-fret note using a precise tuner and normal fretting pressure. If the fretted note is sharp, lengthen the string by moving the saddle back, away from the nut; if flat, move the saddle forward. Retune and retest after each small adjustment, and check vibrato return once all six strings are done.
2. What is the correct string height for a Jaguar?
Answer: The ideal string height for a Jaguar at the 12th fret is 1.5mm for the high E string, gradually increasing to 2.0mm for the low E string. Due to the Jaguar's shorter 24-inch scale length, it can often handle slightly lower action than other Fender models.
3. Why do strings keep popping out of my Jaguar bridge?
Answer: This is a common issue with stock Jaguar bridges. Solutions include using heavier string gauges (11-49), ensuring strings are properly seated, and considering an upgrade to a Fender American Professional Jaguar Bridge or Staytrem Bridge for enhanced stability and string retention.
4. How often should I set up my Fender Jaguar?
Answer: Perform a basic setup every 6-12 months, depending on playing frequency and environmental conditions. Jaguars are particularly sensitive to temperature and humidity changes, so more frequent checks may be necessary in varying climates.
5. What tools do I need for a Jaguar setup?
Answer: Essential tools include Allen wrenches for bridge and saddle adjustments, screwdrivers for pickup height, a string height gauge, feeler gauges for neck relief, a precision tuner for intonation, and a string winder. A D'Addario Multi-Tool covers most basic needs.
6. Can I set up my Jaguar myself, or should I take it to a professional?
Answer: Basic setups can be done at home with proper tools and instructions. However, if you're inexperienced with truss rod adjustments or have a vintage Jaguar, consult a professional to avoid damage. Bridge upgrades and major modifications are best left to qualified technicians.
7. How do I adjust the tremolo on my Jaguar?
Answer: Balance the tremolo spring tension with string tension. Access the tremolo cavity through the backplate, adjust the claw screws to set the bridge angle (floating or decked), and fine-tune spring tension. Test the tremolo's return to pitch after adjustments.
8. What's the best bridge upgrade for a Jaguar?
Answer: The Fender American Professional Jaguar Bridge is the most popular upgrade, offering enhanced stability, better intonation adjustment, and improved tremolo performance. The Staytrem Bridge is a British alternative that maintains vintage aesthetics while improving functionality.
9. How does the Jaguar's shorter scale length affect setup?
Answer: The 24-inch scale length allows for lower action without fret buzz, but requires more precise intonation adjustment. String tension is lower, which can affect tremolo performance and may require heavier string gauges for optimal bridge stability.
10. Why is my Jaguar's bridge rattling?
Answer: Bridge rattling is common on stock Jaguar bridges. Solutions include tightening bridge height adjustment screws, applying threadlocker to prevent loosening, ensuring the bridge is properly seated in the thimbles, and considering an aftermarket bridge upgrade for enhanced stability.
11. What gauge strings are best for a Jaguar?
Answer: Most Jaguar players prefer .011-.049 strings. The shorter 24-inch scale lowers tension, so a slightly heavier gauge improves bridge stability, sustain, and tuning reliability while keeping playability comfortable. Lighter gauges (.009-.042) can feel slinky but are more prone to slipping out of the stock bridge.
12. How high should my Jaguar bridge be?
Answer: The bridge should sit roughly 6-7 mm above the body, creating a gentle upward break angle from the tailpiece to the saddles. If the break angle is too shallow, strings can buzz or pop out of the saddles; a thin neck-pocket shim is often the simplest fix before replacing the bridge.
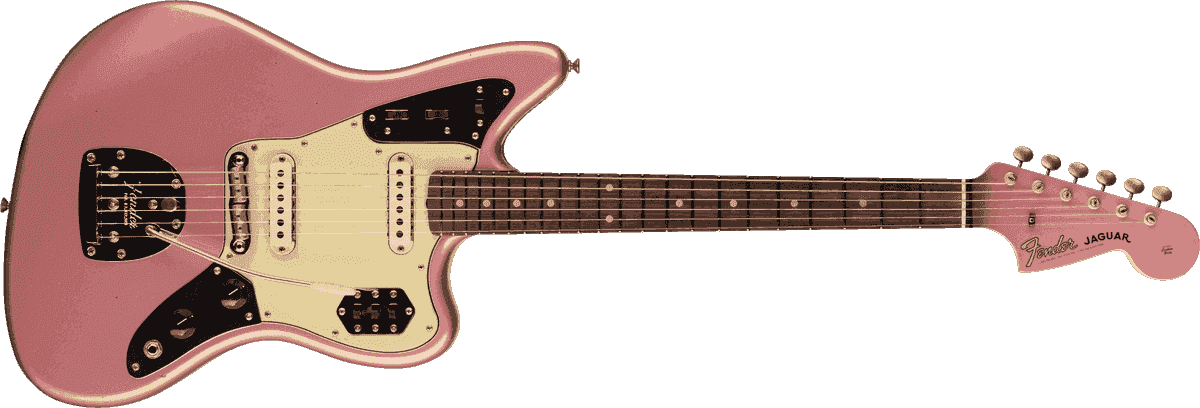
Complete Your Jaguar Setup
Now that your Jaguar is properly set up, pair it with the perfect amplifier. The Jaguar's unique offset voice shines through these recommended amps:
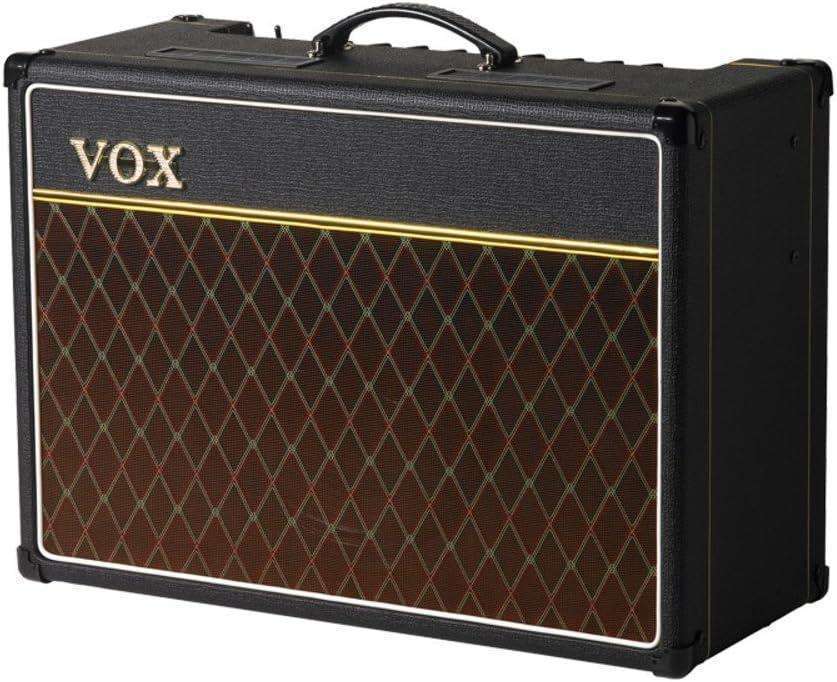
Classic British Tone - Vox AC15
The legendary pairing for offset guitars featuring chime, sparkle, and natural compression.
Versatile Modern Option - Boss Katana 50
Perfect for practice and recording with multiple amp models and built-in effects.
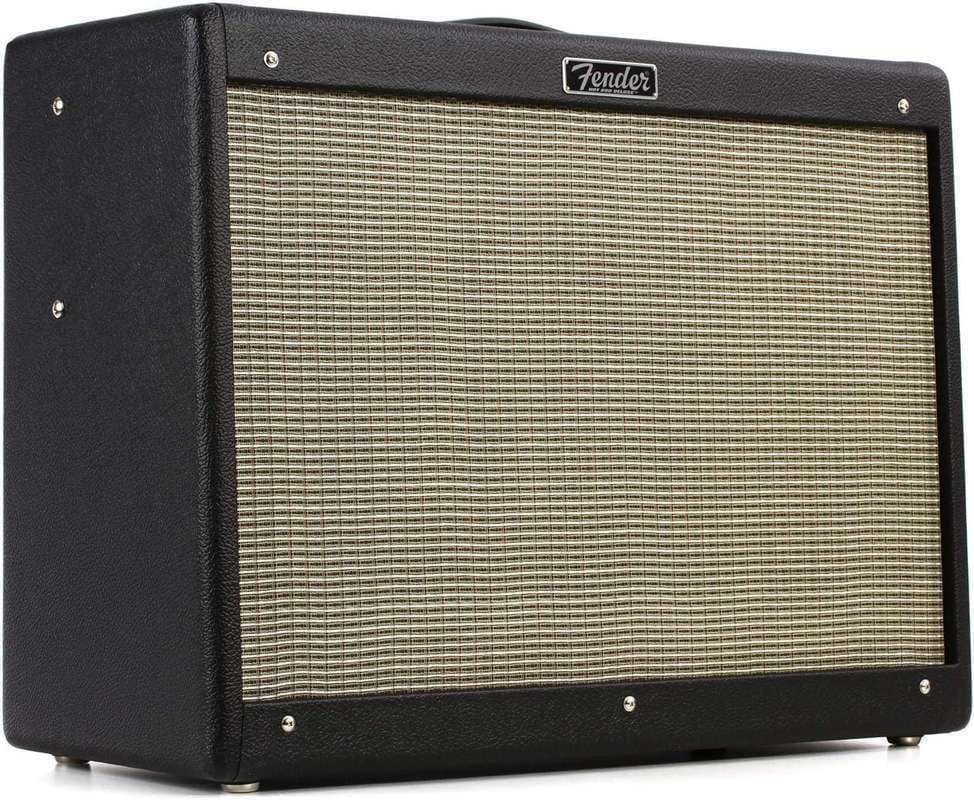
American Power - Fender Hot Rod Deluxe
Classic Fender clean tones with powerful headroom for gigging.
Amplifiers for Your Jaguar

Related Posts
Jaguar-Specific Guides
- Jaguar Truss Rod Adjustment - Detailed neck relief adjustment techniques
- Jaguar Tremolo Setup Guide - Tremolo system configuration
- Jaguar Controls Explained - Deep dive into switches and knobs
- Jaguar Wiring Guide - Volume, tone pot mods, and rhythm circuit upgrades
- Jaguar String Gauge Selection Guide - Action height and string gauge selection
Other Fender Guitar Setup Guides
- Telecaster Setup Guide - Complete Telecaster setup process
- Stratocaster Setup Guide - Complete Stratocaster setup process
- Stratocaster Tremolo Setup - Stratocaster tremolo configuration
- Jazzmaster Setup Guide - Jazzmaster-specific setup procedures
- Complete Fender Mustang Guide** - Short-scale offset setup techniques
🛠️ Done with this setup? Log the spec — action, relief, strings — in My Gear Garage so you remember exactly what you did in six months. Free, no password — magic-link sign-in.