Jaguar Bridge Height and Action: Adjust the Right Screws
Set Jaguar bridge height and action with a clear screw diagram, consistent measurements, and checks for sinking bridges, saddle radius and string clearance.
Jaguar bridge height becomes much easier to adjust once you separate three jobs: raising the whole bridge, setting the curve across its saddles, and moving saddles for intonation. They use different screws. Turning everything until the strings look low can leave you with rattles, uneven action and no record of where you started.
Quick answer: Identify your bridge before adjusting Jaguar action. On a conventional offset bridge, the two end-post adjusters raise or lower the whole assembly; adjustable saddles provide a separate radius adjustment. Some Mustang-style saddles have no height screws. Measure from fret crown to string underside at a stated fret, retune after each small change, and finish by checking every string and your normal bends.
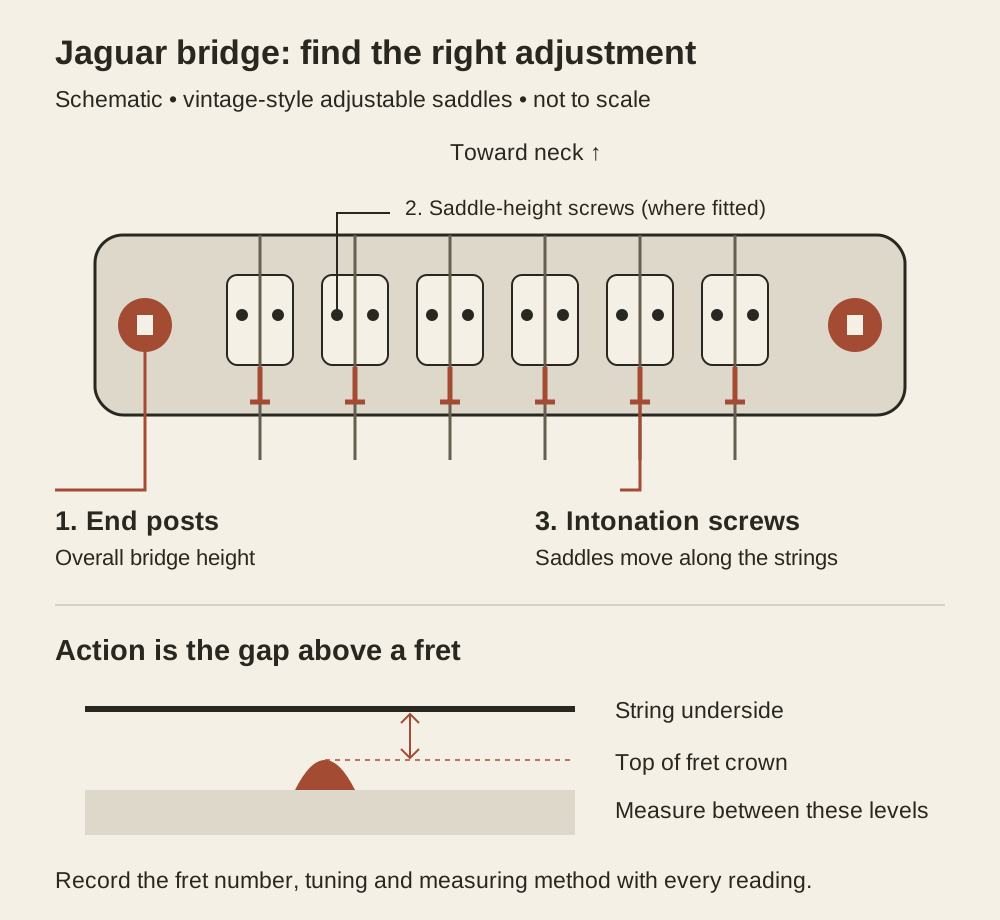
Updated September 12, 2026. Hardware distinctions checked against Fender and Mastery documentation. The drawing is a schematic, not a photograph or a dimensioned replacement-part template.
- Identify the screws and bridge
- Measure Jaguar action consistently
- Adjust the bridge in small steps
- Diagnose sinking, buzzing and uneven action
- Know when neck angle or hardware needs attention
- Frequently asked questions
- Save your finished settings
Identify your Jaguar bridge-height screws
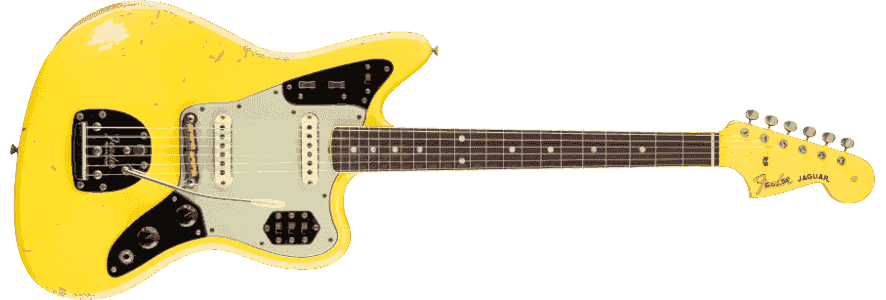
The headstock tells you which family the guitar belongs to, but it does not prove which bridge is installed. Replacement bridges are common, and Jaguar versions use different hardware. Before reaching for a key, take a clear photograph from above and another from the side.
Two end posts: overall action
On a conventional rocking offset bridge, an adjuster at each end changes the bridge's height above its supporting thimble. One is on the low-E side and one on the high-E side. They move the assembly that carries all six saddles, allowing the bass and treble sides to sit at different heights.
These are the first controls to identify when all the strings on one side need more or less clearance. A pair of adjustments can change overall action while retaining the existing saddle curve. They do not independently correct one unusually low middle string.
The American Professional Jaguar service manual specifies a 0.050-inch hex key for that model's bridge-height adjusters. That is a model-specific tool reference, not a guarantee that every Jaguar replacement takes the same key. A key should seat cleanly without wobbling.
Saddle screws: radius and individual strings
Vintage-style threaded saddles usually have individual height adjustment. The smaller saddle screws let the six string supports follow the required curve across the neck. If this curve already works, preserve it while adjusting the end posts.
By contrast, Fender describes its American Professional Jaguar/Jazzmaster bridge assembly as having Mustang-style, single-groove saddles that are not height adjustable. Do not hunt for nonexistent saddle-height screws or turn an intonation screw hoping it will raise the string.
Intonation screws: a different direction
An intonation adjustment changes a saddle's position along the string. Height adjustment changes clearance above the frets. Both can affect the final setup, but they solve different problems and should be checked separately.
| What you want to change | Conventional adjustable-saddle bridge | Preset-height saddle bridge |
|---|---|---|
| All strings higher or lower | Two end-post height adjusters | Two end-post height adjusters |
| Bass side relative to treble side | Corresponding end-post adjuster | Corresponding end-post adjuster |
| One middle string's support height | Its saddle-height screws, after diagnosis | Check correct bridge radius and hardware |
| Fretted pitch at the octave | Saddle intonation adjustment | Saddle intonation adjustment |
Mastery and other replacements need their own instructions. The Mastery installation guide, for example, separates post adjustment from its four saddle-height screws and its intonation adjustment. Its two-saddle architecture is different from the six-saddle illustration here.
For the rest of the instrument, the complete Jaguar setup guide provides the broader route through strings, neck, bridge and pickups. Keep a record of the hardware on your particular guitar beside those references.
Measure Fender Jaguar action at a stated fret
“My action is 1.6 mm” is incomplete information. You also need the string, measuring fret, tuning and whether a capo was used. Otherwise two reasonable measurements can look like a disagreement simply because they describe different tests.
Choose one convention
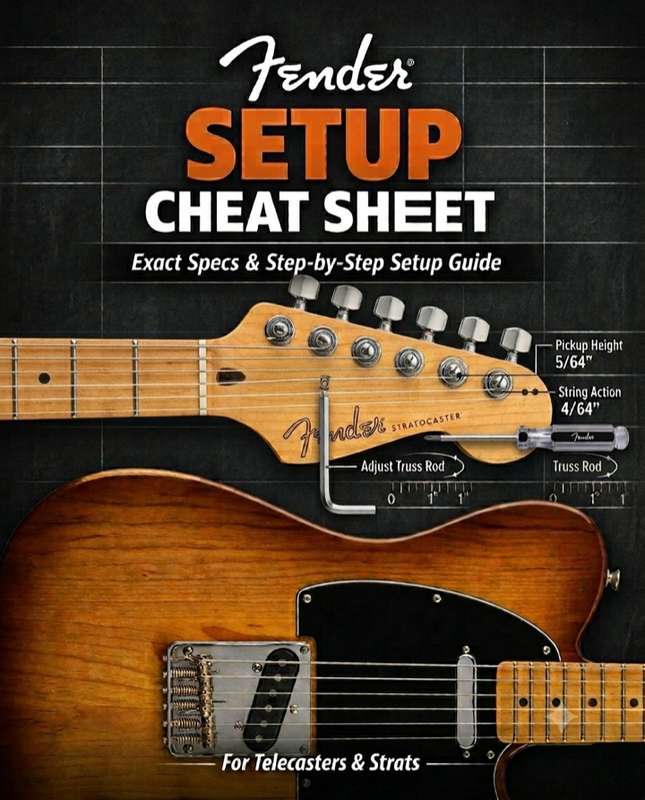
Fender's 2013 electric-guitar owner's manual measures action between the string underside and the top of the 17th fret, after checking tuning. Its approximate 4/64 inch, or 1.6 mm, reference is a starting point, with playing preference explicitly relevant. It directs adjustment through the bridge-height screws when saddles are preset.
Use a specification for your actual model when available. If you prefer recording action at the 12th fret, label it as a 12th-fret reading and compare it only with instructions using that convention. Do not transfer a 17th-fret target unchanged and call the new result factory-correct.
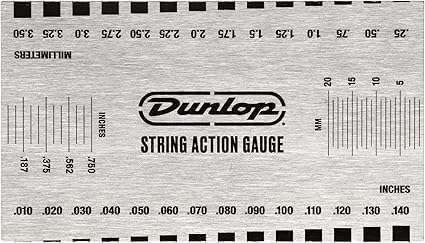
You are measuring the gap above the metal fret crown, not above the fingerboard wood. Stand a suitable ruler or action gauge against the fret without pressing the string down. Read squarely across the gap; an angled view can make a small clearance look larger.
Record a usable baseline
Tune to the pitch you actually play. Support the guitar securely and take your final readings in a consistent playing position. Photograph the gauge if possible, keeping the fret number visible in your notes rather than relying on memory.
| Baseline field | What to write |
|---|---|
| Guitar and bridge | Model, bridge type, known replacement details |
| Strings and tuning | Full gauge set, tuning, approximate string age |
| Measuring convention | Fret number, open string/capo condition, units |
| Outer-string action | Low E and high E separately |
| Playing symptoms | Exact string/fret, ordinary note or bend, amplified or acoustic |
For orientation, 4/64 inch is about 1.59 mm and 5/64 inch is about 1.98 mm. Those conversions help you read different gauges; they are not instructions to set every bass string to one number and every treble string to another.
Check relief before chasing action
Neck relief is a different measurement: the clearance under a string used as a straightedge between two fretted points. It describes neck curvature. An action measurement describes the playing gap at a specified fret.
If relief needs attention, settle that before the final bridge adjustment. Do not keep lowering the bridge to compensate for an obviously bowed neck, or tighten the truss rod simply because the bridge sits high above the body. When the diagnosis is unclear, record the readings and have the neck assessed before making both changes together.
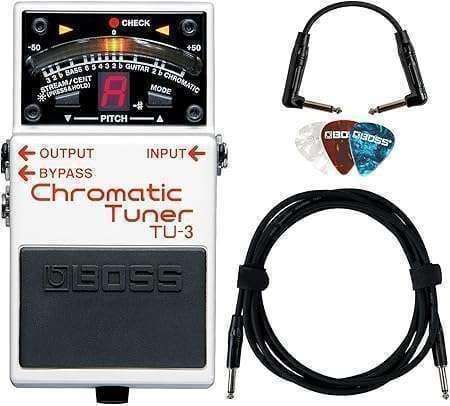
A ruler, a matching adjustment key and an accurate tuner are the core tools. The options below are alternatives or useful additions; check the actual key sizes rather than assuming a multi-tool includes the size your bridge needs.
Disclosure: we may earn a commission from qualifying purchases through affiliate links, at no extra cost to you. See our affiliate disclosure.
Action measuring and tuning tools on Amazon
 Buy on Amazon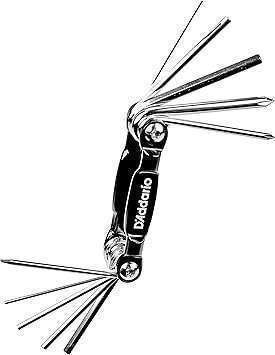
Adjust Jaguar bridge height in small steps
Work from the recorded baseline. The goal is a comfortable, repeatable setup under your hands, with sufficient clearance for the notes you play. It is not the lowest possible number obtained by plucking very softly during an adjustment.
Step 1: Seat the correct tool
Locate the two end-post adjusters using the bridge identification above. Fit the proper key fully into the socket, keeping it aligned with the screw. Protect the surrounding finish from a slipping tool.
If the key does not fit securely, stop and identify the correct size. A nearly fitting metric or imperial key is not an acceptable substitute. Worn or seized hardware needs attention before a height experiment can give reliable results.
Step 2: Make one small, observable change
Start with the side that needs adjustment. Make a small movement, then remove the tool and observe what happened to the bridge and string gap. A modest fraction of a turn is a checkpoint, not a calibrated amount of action change; thread pitch and bridge design vary.
Watch the result rather than relying on an unqualified “turn left” instruction. Your viewing position and the adjuster's construction matter. If the screw turns but the assembly does not respond normally, investigate support and hardware instead of adding more turns.
Follow the bridge maker's instructions about string tension during adjustment. If an adjuster binds under load, reduce string tension before proceeding rather than forcing the key. Return to playing pitch before judging the new action.
Step 3: Retune and measure both sides
Retune all strings, then measure the low E and high E using the same fret and method as your baseline. Adjust the other side if necessary. Keep the bridge supported correctly and avoid winding an adjuster so far out that the assembly becomes unstable.
Write down a meaningful change when you reach one. “High E now 1.7 mm at the 17th fret” is more useful than “turned it a bit.” If you dislike the result, this record makes it possible to work back toward the earlier setting.
Step 4: Check every string and normal bends
Play through the neck at your ordinary picking strength. Test single notes, the chords you use most, and bends in the upper register. A setting that sounds clean under a light touch may choke or rattle when played as you actually perform.
Listen through a clean amp as well as acoustically. Some noises are mechanical rattles around the bridge; others are fret contact affecting the musical note. Locate the noise before deciding whether more action is the useful correction.
Step 5: Recheck intonation and vibrato return
Once the action is settled, compare the tuned open string or octave harmonic with the normally fretted octave. Use ordinary fretting pressure. Our intonation-checker guide explains that comparison and the limits of a tuner reading.
If you use the vibrato, check return to pitch after normal movement. A conventional rocking bridge must work as intended rather than being accidentally left leaning at a new resting angle. Use the Jaguar tremolo setup guide for the spring and lock procedure, with the installed hardware identified first.
Diagnose sinking bridges, rattles and uneven action
Use the symptom to decide the next check. A bridge problem does not automatically require a replacement, heavier strings or a neck shim. Changing several things together also makes it harder to tell which adjustment helped.
The bridge height drops again
Compare today's measurement with the saved one at the same tuning. Check whether the height screws have moved, whether the bridge is seated differently, and whether the neck reading has changed. Those are different faults even if all three make the strings feel lower.
If an adjuster repeatedly moves, identify its retention arrangement and consult the bridge manufacturer. Do not pour adhesive into the installed bridge or treat permanent threadlocker as routine maintenance. The repair should retain future adjustability and keep finishes and moving parts clean.
One string buzzes while the others feel right
First identify whether the problem is open-string-only, at one fret, or across a longer stretch. Check the string itself and look for unintended contact at the saddle or nearby screw. Raising all six strings may hide a local problem without addressing it.
On an adjustable-saddle bridge, a misplaced individual saddle may need correction. On preset-height saddles, investigate bridge radius, string seating and fret condition instead of inventing an adjustment the hardware cannot perform. A fret or nut issue can remain even when the bridge is correctly set.
Bends choke in the upper register
Test the same bend repeatedly at your normal pressure. A little more treble-side clearance may help, but saddle radius and fret condition also matter. Do not assume the short scale guarantees lower action than another Fender guitar.
The useful endpoint is the bend completing cleanly with comfortable effort. If raising the bridge substantially is the only way to keep one isolated fret sounding, get that area inspected. A local high fret is not corrected by a universal action chart.
| Symptom | First useful check | Avoid |
|---|---|---|
| Whole side becomes lower again | Recorded height, post seating and screw movement | Repeated turns without finding what changed |
| One middle string is too low | Saddle type, radius and local fret condition | Raising both posts indefinitely |
| Rattle at the bridge | String path and the specific moving/contacting part | Calling every rattle fret buzz |
| Notes choke only during bends | Bend location, treble action and fret condition | Testing only unbent notes |
| Pitch shifts after vibrato use | Bridge resting position and string return | Resetting intonation after every use |
When bridge radius or neck angle needs attention
Bridge height above the body and string height above the frets are related, but they are not the same measurement. The neck's angle, the saddle shape and the string path all contribute. A bridge can look unusually tall while the playing action is reasonable.
A bridge near the end of its travel
If action remains high when the bridge is near its lowest usable position, stop before parts contact the body or lose their intended support. Check relief, correct bridge fit and neck geometry. The next step is diagnosis, not removing material from a saddle on a guess.
Likewise, if a workable string path requires a very high bridge and excessive action, neck-angle assessment may be appropriate. A shim changes geometry; it is not a compulsory accessory for every Jaguar. Existing pocket angles, previous modifications and bridge types differ.
Match radius rather than buying by model name
A replacement bridge should suit the actual neck and installation. A preset saddle curve cannot be independently reshaped by turning an intonation screw. Confirm the maker's radius and fit specifications before ordering.
Keep the original bridge and record what was installed. That is useful maintenance information and useful disclosure if you later sell the instrument. A guitar price estimate can help with the broader selling decision, but it does not diagnose bridge fit or certify a setup.
Settle string choices before fine adjustment
Choose a gauge and tuning you intend to keep, then finish the setup around them. The Jaguar string-gauge guide discusses the playing tradeoffs. Do not change to heavy strings solely because someone says every offset requires them.
These three sets are alternative gauge/material choices for a planned string change, not parts needed to fix every bridge. If your current strings are healthy and suit you, keep them while diagnosing the hardware.
Replacement string alternatives on Amazon


Jaguar bridge height: frequently asked questions
Which screws adjust Jaguar bridge height?
On a conventional offset bridge, the adjusters in the two end posts change overall bass-side and treble-side height. Individual saddle screws, where fitted, adjust the saddle curve. Intonation screws move the saddles along the strings. Identify a replacement bridge from its own instructions before applying that layout.
What should Fender Jaguar action height be?
Use the reference for your model and its measuring convention. Fender's general 2013 electric-guitar manual uses an approximate 4/64-inch, or 1.6 mm, reference at the 17th fret and treats action as a playing preference. Higher clearance may suit your attack, bends or fret condition better.
Should I measure Jaguar action at the 12th or 17th fret?
Either can be a useful recording convention when clearly labelled, but compare a measurement only with a specification using the same fret and string condition. The Fender reference discussed here uses the 17th fret. A number copied from a 12th-fret guide is not automatically equivalent.
Can I adjust the height of Mustang-style saddles?
Some Mustang-style bridges use preset-height saddles. Fender explicitly lists its American Professional Jaguar/Jazzmaster assembly that way. Overall action still adjusts at the bridge posts, but individual saddle-height correction is unavailable. Check the actual replacement's design rather than assuming all similarly shaped bridges work identically.
Why does my Jaguar bridge keep sinking?
The post adjusters may be moving, but seating changes or a different neck reading can also change action. Compare consistent measurements and locate the movement first. Follow the maker's retention or repair advice; repeatedly raising the bridge does not explain why the setting is being lost.
Does a Jaguar always need a neck shim?
No. Neck angle should be assessed when the bridge cannot achieve suitable action and string geometry within its useful range. A shim is a possible geometry correction, not a universal setup step. Check the installed bridge, existing pocket angle and relief before deciding what needs to change.
Should I lower the bridge or adjust the truss rod?
Measure relief first. If neck curvature is already appropriate, use bridge-height adjustment for the final action. If relief needs correction, settle it before finalizing the bridge. The two adjustments interact, but the truss rod is not a general-purpose control for making every high string lower.
Do I need to loosen the strings before adjusting the bridge?
Follow the instructions for the bridge you have. Reduce tension if an adjuster binds under load and never force a poorly fitting key. After any adjustment, return all strings to playing pitch before measuring action or evaluating the result. A slack-string reading does not describe the finished setup.
Do I need to check intonation after changing action?
Yes, recheck it once the action is settled. Compare octave pitch using normal fretting pressure and retune between changes. Also check your usual vibrato movement and the bridge's return position. Keep intonation adjustment separate from height adjustment so you know which problem you are correcting.
Save the Jaguar setup that works for you
Finish with the guitar tuned, the tool removed and every string tested. Write down the bridge type, string set, measuring fret, outer-string action and the bends you checked. A photograph from the same angle makes the next maintenance session easier to compare.
Keep the previous settings as well as the new ones. If the guitar later develops a rattle, you will have something concrete to check before moving more hardware. A stable setup is a repeatable relationship between neck, bridge, strings and your playing—not a single number copied without its measuring method.