PRS Guitar Setup: Tremolo, Stoptail and Silver Sky Checks
Set up your PRS with sourced relief and action checks. Identify tremolo, stoptail and Silver Sky hardware before adjusting, and know when to see a technician.
By Nick TheodoulouUpdated

Your PRS setup0 of 5 done
Let the neck settle before you set the string height
A bigger truss rod change keeps moving for hours, so pros leave it overnight. Re-measure the relief tomorrow, then carry on.
Your ticks are saved on this device.
On this page
- PRS Setup: Identify the Model and Bridge First
- Essential Tools and Starting Measurements
- PRS Neck Relief and Truss Rod Adjustment
- PRS Action Height: Use the Correct Specification
- Standard PRS Tremolo Setup: Parallel Float
- Silver Sky Setup: The Factory Bridge Is Different
- Stoptail, Adjustable Stoptail and McCarty 594 Bridges
- PRS Intonation: Match the Method to the Bridge
- PRS Pickup Height: Identify the Pickup Type
- String Changes: Check, Then Adjust
- When a PRS Needs a Technician
- PRS Setup FAQs
- Keep a PRS Setup Record
A PRS guitar setup starts by identifying the hardware on your instrument. A Custom 24 with a standard PRS tremolo, a Silver Sky and a McCarty 594 can need different bridge instructions even when some of their action measurements overlap. “Core,” “S2” and “SE” do not identify every adjustment by themselves.
Quick Answer: Identify the bridge, fit your intended strings and tune before measuring relief and action. PRS publishes .005–.010 inches of relief using its eighth-fret check. Standard PRS tremolos have a 1/16-inch parallel float, while the Silver Sky's factory setup rests the rear of the bridge on the body. Stoptails need their own intonation method. Measure first, adjust the appropriate component, then retune and play-test.

Illustrative playing photograph; it does not demonstrate adjustment technique or establish the specifications of your guitar.
Use the PRS serial lookup to help identify an unfamiliar instrument, then confirm the actual bridge and any modifications. The PRS resource hub links the existing identification and strings articles.
In this guide:
- Identify the model and bridge
- Tools and starting measurements
- Neck relief
- Action height
- Standard PRS tremolo
- Silver Sky exception
- Stoptail and two-piece bridges
- Intonation
- Pickup height
- String-gauge changes
- When a technician is needed
- FAQs
- Your setup record
PRS Setup: Identify the Model and Bridge First
Look at the bridge rather than inferring its mechanism from price or country of manufacture. A used guitar may have replacement hardware, and familiar model names can cover different production years. Photographs of the bridge and its screws are useful when asking PRS or a technician for advice.
| What you actually have | Route through this guide |
|---|---|
| Standard six-screw PRS tremolo, such as a trem-equipped Custom 24 or CE | Standard parallel-float section; confirm the generation and correct tools |
| Maryland-made Silver Sky | Separate Silver Sky geometry; do not apply the standard parallel-float target |
| SE Silver Sky | Model-specific two-point bridge instructions; factory rear-edge contact is still intentional |
| Pre-compensated one-piece stoptail | Whole-bridge intonation adjustment; no separate saddle for each string |
| Adjustable stoptail | Individual saddle adjustment as well as overall bridge positioning |
| Two-piece bridge, as on McCarty 594 variants | Separate bridge and tailpiece; adjust the bridge for action/intonation |
| Floyd Rose, baritone, seven-string, piezo or modified assembly | Confirm its dedicated specifications and instructions before proceeding |
The distinction between a compensated stoptail and an adjustable stoptail matters. Calling both “wraparound” does not tell you which screws exist. Likewise, a Silver Sky is not simply a Custom 24 with different pickups.
Essential Tools and Starting Measurements
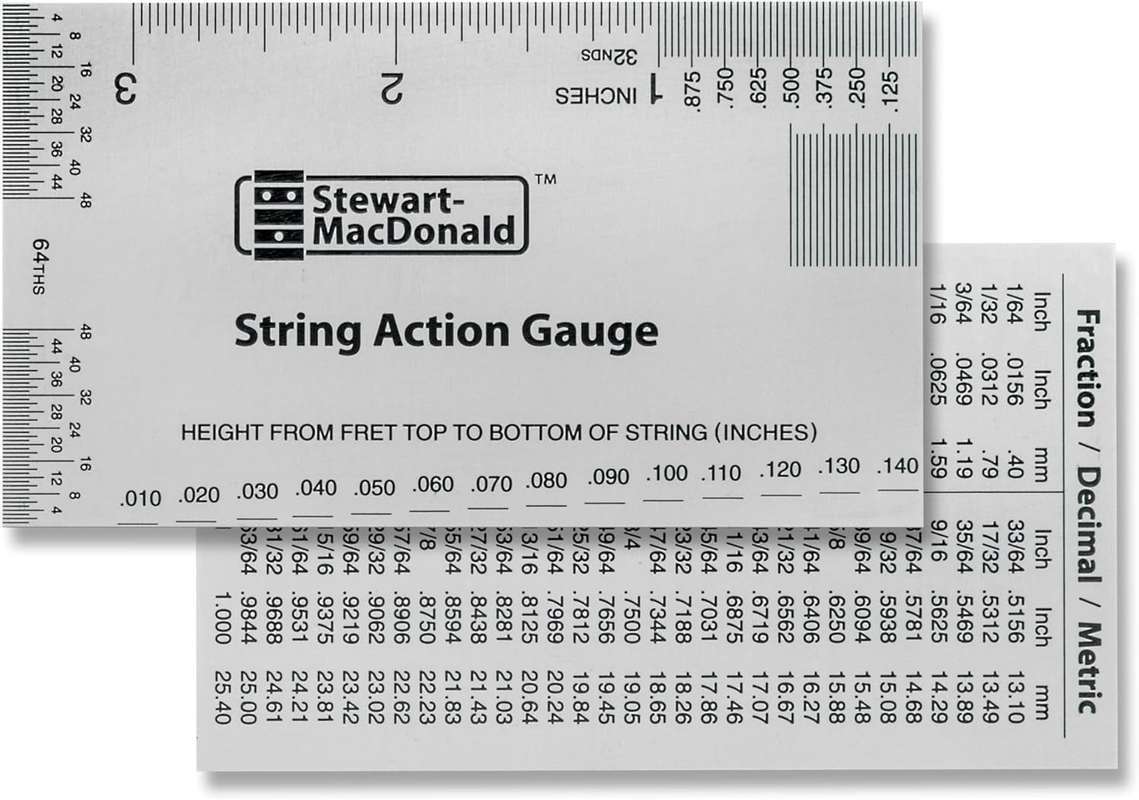
Gather a reliable tuner, readable action gauge, feeler gauges, capo and a stable padded support. Use the tool supplied with the guitar if it fits correctly. Do not force an almost-right metric or imperial wrench into a screw head.
PRS's June 2026 tool chart separates the following hardware:
| Adjustment | Published tool size |
|---|---|
| Maryland-made truss rod | 5/16-inch wrench |
| SE truss rod | 7 mm wrench |
| Gen II/III tremolo saddle height | .050-inch hex key |
| Molded tremolo saddle height | 1.5 mm hex key |
| Maryland-made stoptail whole-bridge intonation | 1/16-inch hex key |
| SE stoptail whole-bridge intonation | 1.5 mm hex key |
The chart distinguishes earlier CE tremolos from the later molded assembly. Check its specific row for Silver Sky, two-piece, hardtail and locking systems rather than assuming all CE or all SE screws are identical.
Before touching a screw, write down the tuning, string gauge, low/high E action, relief, bridge resting position and the symptom you want to change. Keep the guitar in a consistent measuring position. This turns “it felt better yesterday” into a useful before-and-after comparison.
Optional PRS measuring tools
 Buy on Amazon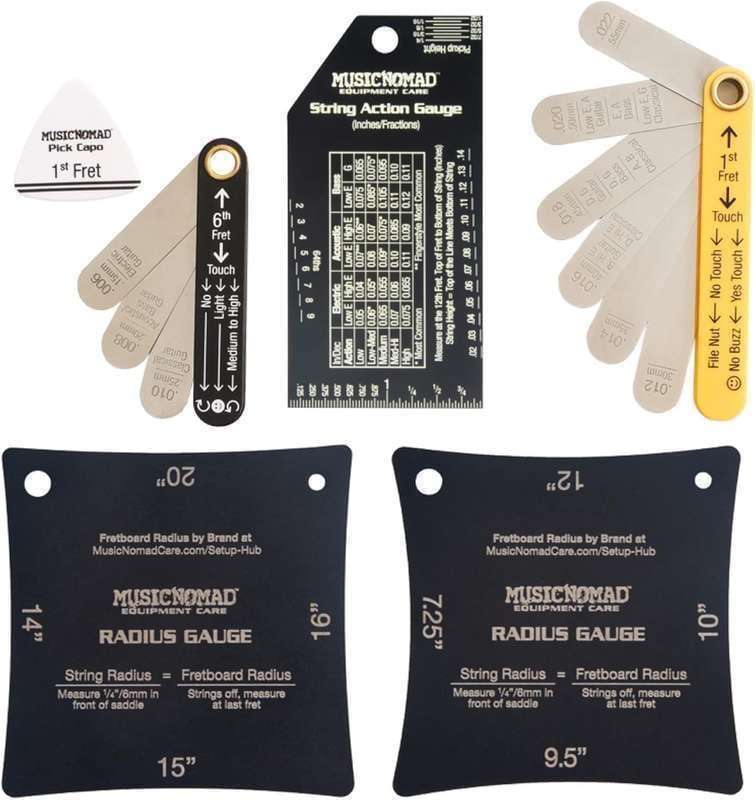

These are alternatives, not a shopping list you must complete. A tuner you already own and a clear ruler can be enough to begin checking the instrument. Buy an additional tool because a measurement requires it, not because every setup has to start with a new kit.
PRS Neck Relief and Truss Rod Adjustment
PRS's current relief instructions give .005–.010 inches, approximately 0.13–0.25 mm, with the guitar tuned, the first fret capoed and the string held at the last fret. Measure the gap at the eighth fret. The range does not mean every guitar must be moved to its upper limit.
If adjustment is needed, PRS specifies eighth-turn increments, followed by retuning and rechecking. At the headstock adjustment nut, clockwise reduces relief and counterclockwise increases it. Stop if the correct wrench will not seat, the nut resists or the result is unclear.
Use the same frets and measuring position each time. Do not switch halfway to a body-joint check and compare the new gap as though it were the same measurement. The general truss-rod guide explains why relief and overall action are different checks.
A gap below .010 inches is not automatically “too little,” and a Silver Sky does not automatically require a separate .010–.012-inch prescription. This article uses the current published general guidance; where a specific model's current documentation differs, confirm that exception before adjusting.
Diagnose the Pattern Before Turning the Rod
Play the problem notes first. Record whether the noise happens on open strings, in one small fret area or across much of the neck. Localized upper-fret buzz can need a fret or action assessment rather than more relief.
If the guitar plays comfortably and the measurement is sensible, there may be nothing to change. A setup is not a contest to make every guitar display an identical number. Keep the initial reading so you can recognize a meaningful change later.
PRS Action Height: Use the Correct Specification
Measure from the top of the fret crown to the bottom of the string. For the table below, the measurement is at the 12th fret with the guitar tuned to pitch. Set relief before interpreting action.
| Published reference | High E / treble side | Low E / bass side |
|---|---|---|
| Maryland-made standard electric systems, including the listed Silver Sky/Fiore systems | 1.4–1.8 mm | 1.5–1.9 mm |
| PRS SE six-string reference, printed metric values | 1.4–1.8 mm | 1.5–2.0 mm |
These are the manufacturer's published ranges, not a separate invented “factory target” for every intermediate string. The SE page's printed fractional and metric figures are not perfectly consistent conversions; do not treat them as an exact tolerance specification. Check with PRS if you need a precise model-specific acceptance figure. Locking-bridge and extended-range models have separate entries.
The separate SE Silver Sky page lists higher printed metric action ranges: 1.7–2.0 mm treble and 1.8–2.0 mm bass at the 12th fret. Use that model-specific reference rather than applying the general SE row to it. Its imperial figures are also rounded differently.
As an optional player reference, 1.5 mm treble and 1.8 mm bass sits within those broad metric ranges. It is not a compulsory setting or the SE Silver Sky factory action target. Choose clearance that lets your normal bends and picking ring cleanly; if lowering a saddle creates a new problem, return to the recorded setting and diagnose it.
Which Part Changes Action?
On a suitable tremolo or hardtail plate bridge, individual saddle-height screws set string height. On a one-piece stoptail, the supporting studs change the overall bridge height. A two-piece system has a separate tailpiece; changing that tailpiece is not the same operation as raising the bridge.
Do not use the six tremolo pivot screws as routine action adjusters. Identify the actual height mechanism and follow its instructions, including any string-tension precautions. Leave fret levelling and nut cutting to a competent repairer; first-fret measurements are diagnostic information, not permission to file toward a number.
Standard PRS Tremolo Setup: Parallel Float
PRS's standard tremolo guidance describes the six pivot screws aligned so the bridge floats 1/16 inch, about 1.6 mm, off the body. It specifically cautions that these factory-set screws should normally be left alone: incorrect adjustment can affect return to pitch.
With the intended strings tuned, inspect the plate's resting angle. A change in string tension can alter the balance against the springs. The rear spring claw controls that balance; it does not replace correct pivot geometry. If the bridge cannot reach its appropriate resting position through a normal balancing adjustment, stop and get the mounting assessed.
Do not copy this geometry to a Silver Sky, Floyd Rose or other assembly. The relevant question is which mechanism you have, not whether the headstock says PRS.
Check Return to Pitch Before Further Adjustment
Tune, make a small familiar tremolo movement and check the tuner again. Repeat using the same motion, then note whether all strings move together or one string behaves differently. Avoid changing the nut, claw, saddles and pivot screws at the same time; that makes the cause harder to isolate.
A bridge leaning after a string change and one string sticking at the nut are different observations. Neither proves that the tuners need replacing. If ordinary tuning and string seating checks do not resolve the problem, describe the pattern to a technician rather than turning every available screw.
Silver Sky Setup: The Factory Bridge Is Different
PRS's Maryland-made Silver Sky instructions describe rear-edge contact with the body, with the front edge raised 1/32 inch, about 0.78 mm. That is intentionally different from the standard parallel-float setup.
The SE Silver Sky guidance also describes factory rear-edge contact and downward-only pitch movement. The SE uses its own bridge construction; do not transplant the Maryland front-edge or pivot-screw procedure without confirming the SE instructions.
A resting bridge touching the body is therefore not, by itself, a fault on these guitars. Ask whether you want to retain the original down-only behavior or deliberately change the setup. That choice should precede adjustment.
PRS provides a separate Silver Sky flush-to-floating tutorial. Treat that as an intentional conversion, not the correction of an alleged factory mistake. Verify its applicability to your version or ask a PRS technician before changing the mounting geometry.
Stoptail, Adjustable Stoptail and McCarty 594 Bridges
PRS distinguishes three assemblies: a pre-compensated wraparound stoptail, an adjustable stoptail with individual saddles, and the two-piece bridge used on McCarty 594 models. Use the hardware you can see to choose the method.
The pre-compensated stoptail has end set screws for fine adjustment of the bridge as a whole. “No individual saddles” does not mean “no intonation adjustment.” PRS also notes that its standard pre-compensated bridge is not intended for a wound third string.
An adjustable stoptail provides individual saddle movement. The two-piece assembly separates the bridge from the tailpiece. On a piezo-equipped version, identify the pickup system before handling saddles or wiring.
Avoid automatically recommending a replacement bridge when one string reads sharp. Fresh strings, the tuning, fretting pressure, relief and action all belong in the diagnosis. A technician can determine whether you have reached a real adjustment limit or are testing around another problem.
PRS Intonation: Match the Method to the Bridge
For individually adjustable saddles, PRS's intonation procedure follows relief and action checks. Tune the open string, fret the 12th with normal pressure, and compare the octave. A sharp fretted note calls for moving the saddle away from the headstock; a flat note calls for moving it toward the headstock. Retune before judging each change.
On the pre-compensated stoptail, PRS uses the two E strings to guide whole-bridge positioning with the end screws. Afterwards, check the other strings. Do not apply an individual-saddle instruction to a casting with no such saddle.
Chasing an exact zero on a flickering display is not useful. Use consistent picking and fretting pressure and repeat the reading. If the guitar cannot reach a sensible result within normal travel, record the affected strings and seek a diagnosis.
PRS Pickup Height: Identify the Pickup Type
PRS's current pickup-height page measures with the string held at the last fret, from the string underside to the pickup cover or bobbin. Its general humbucker, Narrowfield and soapbar reference is approximately 2.0 mm high-E side / 2.8 mm low-E side.
For the listed single-coil reference, the high-E distances are approximately 2.0 mm neck, 2.8 mm middle and 1.6 mm bridge, with 3.2 mm on the low-E side. The page separately identifies exceptions such as Chleo and 509/513, so do not make these numbers universal for every PRS pickup.
Begin with the correct reference, then compare clean output and balance. Keep a note of each change and recheck clearance during bends. Adjust overall height at the mounting screws; leave individual pole settings alone unless you have a specific reason and the appropriate pickup guidance. An unsupported claim that every pole adjustment “unbalances the coils” is not needed.
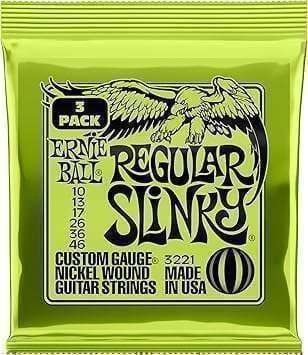
Optional 10–46 string choices where that gauge suits your PRS


String Changes: Check, Then Adjust
PRS's June 2026 string chart lists 10–46 for many electrics, with exceptions including 11–49 DGT, 9.5–44 Fiore, and different Holcomb/baritone sets. Read the row for your model; do not buy a gauge solely because it appears in a generic PRS recommendation.
After a gauge or tuning change, check relief, action, bridge balance, nut fit and intonation. Do not preselect truss-rod or claw direction from a shopping decision. Tune, measure and adjust only if the observed change calls for it.
Our PRS strings article discusses options. Retain a set that works for you unless you have a clear reason to change; a new material or heavier gauge does not guarantee more sustain or a better tone.
When a PRS Needs a Technician
Stop DIY if an adjustment resists, hardware is damaged, the bridge mounting appears wrong, or a symptom persists after the straightforward checks. A worn nut, uneven fret or damaged pivot needs a diagnosis rather than a more aggressive version of the same adjustment.
Give the technician your model, bridge photographs, string gauge, tuning and recorded symptoms. Describe the result you want: easier bends, reliable tremolo return or comfortable rhythm action. That is more useful than a request to make every measurement as low as possible.
For an unfamiliar used guitar, an initial professional setup can establish a dependable reference. Record the finished measurements so later maintenance is a comparison with something you know works. Ask what follow-up adjustment is included and how to recognize a condition that needs another visit.
PRS Setup FAQs
What relief should I use on a PRS?
PRS's current general guidance is .005–.010 inches, measured at the eighth fret with the first fret capoed and the string held at the last fret. Check the current instructions for your specific model and adjust only when measurement and playability justify it.
Should every PRS tremolo float parallel?
No. The standard PRS tremolo uses a parallel float, but the Silver Sky's factory setup rests the rear edge on the body. Identify the actual bridge before choosing a procedure; locking and other specialized systems need their own instructions.
Is a Silver Sky touching the body set up incorrectly?
Not necessarily. Rear-edge contact is intentional in the factory down-only arrangement. Floating it is a deliberate setup change. The Maryland and SE bridges differ, so use the documentation for the instrument you own.
Are SE and Core setup specifications identical?
Some reference ranges overlap, but hardware, tools and model exceptions differ. Check the published action range and actual bridge rather than assuming the production line alone determines every adjustment.
Can a PRS wraparound bridge be intonated?
A standard pre-compensated PRS stoptail has end screws that change the whole bridge position. It has no individual saddles, but it is not completely unadjustable. Adjustable stoptails and two-piece bridges have different adjustment options.
Should I adjust all six tremolo pivot screws to lower action?
No. PRS cautions that the standard tremolo pivot screws are factory set and normally should not need adjustment. Use the correct action mechanism for your bridge and ask a technician if its mounting geometry appears wrong.
Does a lighter string set tell me which way to turn the truss rod?
No automatic adjustment is justified. Tune the new set, measure relief and check playing behavior. Change the rod only if the result requires it, then retune and repeat the same measurement.
What if one string still will not intonate?
Check string condition, tuning, normal fretting pressure, relief and action before assuming the bridge is wrong. Confirm the available adjustment for the installed assembly. If the problem persists or travel is exhausted, have a technician assess it.
Should I buy new tuners for poor tremolo tuning stability?
First identify the pattern and check string seating, the bridge's intended resting position and return to pitch. A tuning problem does not by itself prove the tuners are faulty. Replace hardware only after a diagnosis supports it.
How often does a PRS need a setup?
Check when playability changes, after a gauge or tuning change, and after significant environmental changes. If the guitar remains comfortable and stable, a check does not require an adjustment or a paid service.
Keep a PRS Setup Record
Once the instrument feels right, save the measurements with the date and string set. A simple record is more useful than remembering that a screw moved “a little.” Repeat the same measurements next time before deciding anything has drifted.
| Record | Your before / after notes |
|---|---|
| Model, year and installed bridge | |
| String make, gauge and tuning | |
| Relief and measurement frets | |
| High/low E action at the 12th fret | |
| Bridge resting position | |
| Pickup distances and measuring method | |
| Problem notes, adjustments and play-test result |
You can copy this table into a notebook or use My Gear Garage to retain your settings. For a future adjustment, start with the manufacturer instructions linked in the relevant section, your own working measurements and the hardware in front of you.
Keep reading
Next for your PRS
- Same guitarPRS Pickup Height Calculator & SpecsRead
- Same guitarBest Strings for a PRS: Gauge & Material Guide for Every ModelRead
Everything for your PRS
Open the hub