Ibanez Edge Tremolo Setup: Balance and Troubleshooting
Follow this Ibanez Edge tremolo setup guide to identify your bridge, balance springs, check locking studs, set intonation, and solve common tuning problems.
By Nick TheodoulouUpdated

On this page
- Identify your Ibanez Edge bridge before adjusting it
- Prepare strings and tools for an Edge tremolo setup
- Balance an Ibanez Edge or Lo-Pro Edge tremolo
- Edge-Zero and Edge-Zero II: check the Zero Point System
- Set Edge bridge action and intonation separately
- Troubleshoot an Ibanez tremolo that will not settle
- Ibanez Edge tremolo setup FAQ
- Keep an Ibanez bridge setup record
Ibanez Edge tremolo setup begins by identifying the bridge, choosing your final strings and tuning, and separating spring balance from string height. An RG, S, or JEM name alone does not tell you which hardware is fitted. With the right manual beside the guitar, you can make each adjustment for a clear reason instead of chasing the tuning around.
Quick answer: Identify the exact bridge and unlock the nut before using the tuning machines. Centre the fine tuners, tune all strings, then adjust spring balance and retune repeatedly. Use the bridge's own diagram to judge its neutral position. Release any stud locks before height adjustments, and follow the model-specific saddle procedure for intonation. Lock the nut only after tuning has settled.
Last updated: September 9, 2026. Bridge distinctions checked against Ibanez's Edge, Lo-Pro Edge, Edge-Zero, and Edge-Zero II manuals.
- Identify the bridge and its controls
- Prepare strings, tuning, and tools
- Balance an Edge or Lo-Pro Edge
- Check Edge-Zero and Edge-Zero II systems
- Set action and intonation
- Troubleshoot tuning problems
- Frequently asked questions
- Keep a setup record

Identify your Ibanez Edge bridge before adjusting it
Match the hardware to its manual
Start with the bridge name in your guitar's specification, then compare the actual hardware with the diagrams. A used instrument may have been modified. The shape of the saddles, fine-tuner layout, studs, and rear spring assembly are more informative than the guitar's colour or series logo.
The official Ibanez manual library lists separate instructions for Edge/Lo-Pro Edge, Edge III, Edge-Zero II, Edge-Zero, and other designs. Gotoh T1502/T1802 bridges used on some AZ models also have their own instructions. Do not apply a locking Edge procedure to a non-locking AZ tremolo.
| Hardware identified | Manual to use | Detail to check first |
|---|---|---|
| Original Edge or Lo-Pro Edge | Edge/Lo-Pro Edge | Stud locks and saddle lock bolts |
| Edge-Zero II | Edge-Zero II | Whether a Zero Point System is present |
| Edge-Zero | Edge-Zero | Spring adjuster and intonation hardware |
| Edge III or another locking bridge | Its named manual | Adjustment sizes and bridge geometry |
| Gotoh T1502/T1802 | Its separate manual | Non-locking two-post procedure |
Separate the three kinds of adjustment
Spring balance changes the bridge's resting angle. String tension pulls one way; the rear springs oppose it. The equilibrium changes when you alter tuning or string gauges.
Stud height changes overall string action. Raising a post is not the normal way to correct a bridge that has tipped forward after fitting heavier strings. Fix the balance first, then judge whether the action needs changing.
Saddle position changes intonation. The fine tuners alter pitch; they do not replace the saddle-length adjustment. Knowing which part controls which result prevents a small tuning problem becoming a complete setup reset.
Do not use one visual rule for every bridge
Use the drawing for your exact model to judge the working angle. The top of a sculpted saddle or casting is not automatically the reference plane. A photograph taken at an angle can also make a correctly positioned bridge look tilted.
Take a side-on photograph before making changes, with the guitar in its normal orientation. Record the tuning at the same time. A picture without the tuning state cannot tell you whether the springs were balanced against the intended string tension.
For neck relief and the broader sequence, keep the complete Ibanez setup guide nearby. This article adds the bridge-specific checks that a general setup overview cannot cover in detail.
Keep a starting record: use My Gear Garage to note your bridge model, string set, tuning, and the problem you want to solve before changing anything.
Prepare strings and tools for an Edge tremolo setup
Decide on gauge and tuning first
A floating bridge responds to total string tension. Going from standard tuning to a dropped tuning, or fitting a substantially different set, may move the resting angle even when the bridge hardware is healthy. Make those musical choices before adjusting the springs.
If you are unsure which set to use, the Ibanez strings guide compares gauges and applications. Keep the individual string gauges in your notes, especially if you use a custom set. Two packs with similar names can impose different loads on the bridge.
Establish stable strings
Check that each string is correctly secured and winds neatly at the tuning post. On a locking bridge, distinguish the string-clamping bolt from the saddle-position lock before loosening either. Put small loose parts in a tray so a dropped block does not disappear under the bench.
For an ordinary change to the same gauge, replacing strings individually helps preserve a familiar starting position. If you need all strings off for cleaning, support the bridge gently according to its manual and protect the finish. Do not wedge a hard object against the lacquer or lever the bridge out of its pivots.
Start with the nut unlocked and fine tuners centred
Use the tuning machines while the nut is unlocked. Fine tuners should have useful travel available in both directions when you finish. If they are already at one extreme, reset them before the main tuning cycle rather than trying to recover a large pitch difference afterward.
Do not force a tuning machine against a clamped nut. If you cannot tell whether the strings are free to move through it, inspect the pressure pads first. Use the correct key and controlled pressure rather than the longest handle available.
Choose tools that fit the exact bridge
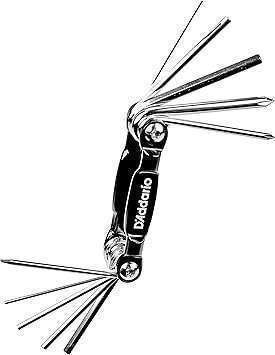
A tuner, a readable action gauge, and tools that fit the actual bolts are enough for many routine checks. A general multi-tool is useful only where its tip and access match the hardware. It is not a guarantee that every key on every Ibanez is covered.
Ibanez specifies different stud and lock sizes across bridge families. Keep a correctly fitting metric key set available and check the manual before trying a size. Stop if a bolt head starts to round or a key rocks in the socket.
Tuning and Measurement Tools for Bridge Setup

 Buy on Amazon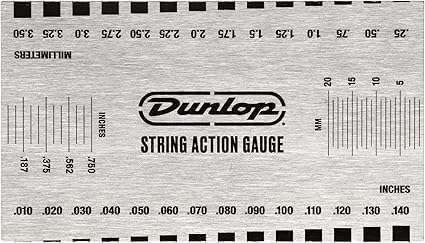
Balance an Ibanez Edge or Lo-Pro Edge tremolo
Understand why tuning one string affects the others
On a freely floating system, increasing one string's tension moves the bridge slightly. That movement changes the other strings' tension too. Repeated tuning passes are therefore expected; they do not automatically mean that the tuning machines or locking nut are defective.
Work through all strings in a consistent order and use progressively smaller corrections. Do not make a large spring adjustment in response to a single string before the whole set is near its intended tuning. The bridge responds to the combined load.
Check the neutral angle at the intended tuning
Tune the guitar, then compare the bridge with the correct side-view drawing. On the Edge/Lo-Pro Edge, the rear claw screws change spring tension: tightening increases it and loosening decreases it. Retune after a small adjustment before judging the angle again.
The Edge/Lo-Pro Edge manual explains this cycle and illustrates the bridge reference. Its adjustment directions apply to that assembly; use the separate manual for other hardware.
Make one small change at a time
Use a modest movement of the claw screws, then return to tuning. Keeping the claw movement controlled makes it easier to reverse an experiment. Do not chase the last visual fraction of a degree while the strings are still noticeably out of tune.
| What changed? | First check | Avoid doing this immediately |
|---|---|---|
| Heavier strings fitted | Tune, then inspect spring balance | Lowering the studs to hide the tilt |
| Tuning lowered | Retune the whole set and inspect balance | Adding springs without checking the load |
| One string replaced | Check its clamp, tuning, and settling | Resetting every bridge adjustment |
| Bridge touches the cavity | Stop and inspect travel and geometry | Forcing the arm past the obstruction |
Change spring count only when needed
There is no universal spring count for every gauge and tuning. If the existing adjustment range cannot produce a sensible balance, the spring arrangement may need attention. Do not run claw screws almost out of the wood or drive them hard against their limit to avoid addressing that question.
Reduce string tension before installing or removing springs, and support the bridge as the manual describes. Removing its balancing forces can allow the unit to shift out of position. If a hook, anchor, or pivot looks damaged, stop and have that part inspected.
Once tuning and balance are stable, note the spring arrangement and take a clear rear-cavity photograph. That record is more useful than a generic “three springs for tens” rule because it describes the particular guitar you are maintaining.
Ready to check action? Use the action-height calculator as a comparison aid after the bridge balance is stable. Keep your measurement fret and string configuration consistent with the tool's instructions.
Edge-Zero and Edge-Zero II: check the Zero Point System
Inspect the rear assembly
Do not assume that every Edge-Zero II has the same rear hardware. Ibanez's manual includes versions with and without a Zero Point System. Identify whether your guitar has the stop rod and associated mechanism before choosing a procedure.
On an equipped system, the neutral-position check includes the relationship among the tremolo block, stop rod, and stopper. The spring adjustment knob changes main-spring tension. Follow the contact conditions shown in the Edge-Zero II manual, checking again at pitch after adjustment.
Keep the intended operating mode
An intact stabilising system and a bridge deliberately converted to ordinary floating operation are different setups. Record which one you have. A previous owner's missing stop rod is not something to compensate for blindly with another turn of the adjuster.
The Edge-Zero manual documents its mechanism and an alternative floating configuration. Changing operating mode is optional; it is not a required step for a routine tune-up. If you want to change the feel, understand the parts involved before dismantling them.
Diagnose the mechanism, not just the top-view angle
If the bridge looks approximately right but feels unlike its previous setup, inspect the rear contacts and check for an obstruction. Do not use the arm to force a jammed mechanism into the position you expect. A cable, loose part, or incorrectly assembled component needs inspection rather than more spring load.
Keep photographs and any removed components together. This is especially useful on a second-hand instrument because its current arrangement may differ from the original specification. Documented hardware makes a technician's diagnosis much easier if you need help.
Set Edge bridge action and intonation separately
Check stud locks before moving the posts
Some bridge studs contain an internal lock that must be released before the main post is adjusted. Do not interpret a locked post as an invitation to apply more force. Identify both controls from the diagram and confirm the correct key sizes.
On Edge/Lo-Pro Edge hardware, the manual specifies a 1.5 mm stud-lock key and 4 mm main-post key. Edge-Zero II uses different sizes. Hardware can be replaced, so inspect what is fitted instead of assuming those numbers apply to every guitar carrying an Edge-family bridge.
As a cautious working method, reduce string load before height changes, maintain the bridge's seating, and restore tuning before measuring. Follow any model-specific requirements. If you are unfamiliar with the knife-edge seating or the post remains stiff with its lock released, stop rather than damaging the pivot.
Measure action after restoring balance
Use the measurement location specified for your setup reference. A figure taken at the 12th fret is not interchangeable with one taken at the 17th. Write the fret location beside the high- and low-string measurements.
These bridges generally change overall action at the posts; do not look for six independent saddle-height screws as on a Strat-style bridge. Individual radius corrections are a separate hardware job. Do not loosen saddle locks simply to imitate another bridge's action procedure.
Measure intonation before loosening a saddle
Tune the guitar, compare the 12th-fret harmonic with the normally fretted octave, and record the error. A sharp fretted note calls for more speaking length; a flat note calls for less. Repeat the measurement to confirm it is not an inconsistent attack or excessive fretting pressure.
For the Edge/Lo-Pro Edge procedure, unlock the nut and sufficiently slacken the string before releasing its saddle-position lock. Move the saddle slightly, secure it, and retune before checking again. Do not release a loaded saddle without the appropriate bridge-specific procedure or adjustment tool.
Use the correct intonation hardware
Edge-Zero includes its own intonation-adjustment hardware and a documented installation sequence. That does not make its procedure interchangeable with Edge-Zero II or an original Edge. Consult the named manual and keep the clamp bolt, saddle lock, and adjustment bolt distinct.
Once the saddle position is secure, restore tuning and the bridge's equilibrium. Check the other strings as well. Finish the intonation work before clamping the nut for the final fine-tuning pass.
If you are replacing a tired set during this process, choose the intended gauge now. These electric-string options provide different starting choices; changing between them can require another spring-balance check.
String Options for Your Intended Gauge and Tuning


Troubleshoot an Ibanez tremolo that will not settle
Fine tuners run out of travel
Unlock the nut, return the fine tuners toward their middle range, and tune with the machines. Check stability before clamping again. Fine tuners are for small corrections after locking, not a substitute for setting the main pitch accurately.
If locking the nut causes a substantial repeatable shift, inspect the pad seating and string path. Do not keep overtightening the pads to counter it. A fitting or wear issue needs a mechanical diagnosis.
The bridge returns to different pitches after a dive
First distinguish a whole-system shift from one slipping string. Test gently, record which strings move, and compare the result with a normal bend. Check that the strings have settled and that the correct clamps are secure before suspecting worn pivots.
If the bridge consistently settles in two different positions, stop making random spring changes. Pivot wear, loose hardware, or interference may need inspection. Increasing spring force does not repair a damaged contact surface.
The action changed after a gauge change
Recheck bridge balance before adjusting the posts. A tilted bridge can change the apparent action even though nobody moved the studs. Once the balance is restored, check relief and action in the normal setup order.
The bridge looks tilted but the guitar plays well
Confirm which surface the manual uses as its reference and view the bridge squarely from the side. Do not judge from the top of a shaped saddle or a dramatic camera angle. If tuning, travel, and clearance are healthy, verify the geometry before making a cosmetic adjustment.
Ibanez Edge tremolo setup FAQ
Should every Ibanez bridge sit flat against the body?
No. A floating bridge needs its intended clearance and neutral angle. Follow the diagram for the exact bridge; “flat against the body” is not a universal instruction for Edge-family hardware.
Why does tuning one string detune the others?
Changing one string's tension shifts a floating bridge slightly, affecting the other strings. Tune the whole set in repeated passes and check spring balance at the intended final tuning.
Can I adjust an Edge stud while its lock is engaged?
No. Identify and release the internal stud lock before moving the main post on hardware fitted with that mechanism. A post that resists adjustment needs inspection, not more leverage.
Does every Edge-Zero II have a Zero Point System?
No. The manufacturer documents configurations with and without it. Inspect the rear assembly and follow the matching instructions rather than assuming the bridge name describes every fitted part.
How many springs do I need for heavier strings?
There is no single count for every set and tuning. Establish the actual tuning and check the available balance range first. Change springs only using the manual's procedure, with string load reduced and the bridge supported.
Can I change all the strings at once?
You can, but the bridge needs appropriate support when the string load disappears. Individual changes usually preserve the starting balance more easily. Protect the finish and follow the bridge manual if removing the whole set.
Are the fine tuners used for intonation?
No. Fine tuners make small pitch corrections after the nut is locked. Intonation changes the saddle position so fretted notes agree more closely with the intended pitch across the neck.
Is an Ibanez AZ tremolo adjusted like an Edge?
Not automatically. AZ models may have non-locking Gotoh hardware with separate instructions. Identify the actual bridge and use its manual instead of applying Edge nut-locking or saddle procedures.
When should I stop and take it to a technician?
Stop if a bolt is seized or damaged, a pivot appears worn, the bridge binds, or you cannot identify the locking and adjustment controls. Clear photos and your before-and-after notes will help the technician isolate the problem.
Keep an Ibanez bridge setup record
Record the bridge name, gauge, tuning, spring arrangement, and action measurement location. Add photographs of the neutral angle and rear mechanism. That gives the next string change a reliable starting point and helps distinguish an ordinary balance change from a new fault.
Use the Ibanez resource hub for related maintenance guides. For your final pitch comparison, open the intonation checker, work one string at a time, and confirm the guitar plays normally after locking and fine-tuning.
Related: the Jackson and Charvel setup guide covers Floyd Rose balancing and Jackson's published factory specs, and the Schecter setup guide covers 7-string, multiscale and EverTune models.
Keep reading
Next for your Ibanez
Everything for your Ibanez
Open the hub