Acoustic Guitar Action Height: Measure Before You Adjust
Measure acoustic guitar action at the 12th fret, compare mm and inch targets, and diagnose high action before changing relief, nut or saddle height.
By Nick TheodoulouUpdated


Acoustic guitar action height is the gap between the top of a fret and the underside of a string. A useful setup begins with an accurate measurement, followed by a diagnosis of why the guitar feels difficult to play. High strings do not automatically mean the saddle needs sanding.
Quick Answer: For a six-string steel-string acoustic, about 2.4–2.8 mm on the low E and 1.6–2.0 mm on the high E at the 12th fret is a practical starting range, not a universal factory specification. Measure at your playing tuning with no capo. Check humidity, neck relief, nut height and saddle clearance before adjusting. Use your manufacturer's specification and your playing style to choose the final target.
On this page:
- Action height chart in mm and inches
- Check humidity and guitar condition
- Tune and prepare to measure
- Measure action at the 12th fret
- Find the cause of high action
- When saddle adjustment is appropriate
- Calculate the approximate 2:1 saddle change
- What a drop-in saddle adjustment involves
- Check the result and record your setup
- Frequently asked questions
Acoustic Guitar Action Height Chart: Millimetres and Inches
These measurements refer to open strings at the 12th fret, with the guitar tuned to the pitch you play. They are starting points for conventional six-string steel-string acoustics. Do not transfer them directly to classical guitars, twelve-strings, resonators or a manufacturer procedure that specifies a capo.
| Measurement | Millimetres | Inches, approximately |
|---|---|---|
| Lower end of the suggested low-E range | 2.4 mm | 3/32 inch, or 6/64 |
| Upper end of the suggested low-E range | 2.8 mm | 7/64 inch |
| Lower end of the suggested high-E range | 1.6 mm | 1/16 inch, or 4/64 |
| Upper end of the suggested high-E range | 2.0 mm | 5/64 inch |
The rounded conversions are reference values, not a claim that 2.4 mm and 3/32 inch are mathematically identical. For your own reading, use the free guitar action measurement converter to compare mm, decimal inches and full fractions without changing the measuring method. Choose one unit system for your notes so rounding does not become an apparent setup change.
A light fingerstyle player may prefer the lower end, if the guitar's frets and geometry allow it. A hard strummer may need more clearance, sometimes above this range. The right result is comfortable playing with an acceptable response under your actual attack.
Is 3 mm action too high?
A low-E reading of 3 mm can be usable for a forceful acoustic player, while the same height on the high E would feel unnecessarily high for many players. Always identify the string, fret and measuring method before comparing somebody else's number.
Also separate measured action from playing effort. High nut slots can make first-position chords hard even when the 12th-fret measurements seem reasonable. String gauge and excessive fretting pressure can contribute to discomfort without requiring a lower saddle.
Do lower numbers always mean a better setup?
No. The lowest buzz-free action for gentle playing may rattle when you strum a chorus. Test the loudest part of your normal playing before deciding the setup is finished. A little extra clearance may be a good trade for the dynamic range you need.
First Check Humidity and Guitar Condition
Before changing hardware, ask whether the action changed recently. A guitar that became difficult to play after a humid summer needs a different investigation from one that has always had a tall saddle.
Check the room and case with a hygrometer and compare the readings with the maker's care guidance. For example, Martin recommends 45–55% relative humidity. Follow the guidance for your instrument, and allow it to stabilise before deciding that a lasting mechanical adjustment is necessary.
A swollen top can raise the bridge and action. Taylor lists high action among the symptoms of an over-humidified guitar. Removing saddle material while the body is temporarily swollen can leave the action too low when conditions return to normal.
Look for a lifting bridge, cracks, unusual distortion or a sudden large change in playability. These need assessment before setup work. An acoustic top is not necessarily flat by design, so a visible curve alone is not enough to diagnose damage.
Write down when you first noticed the problem, whether the string gauge changed, and whether the guitar travelled or moved rooms. Those details help distinguish an environmental change from a longstanding setup issue.
Tune and Prepare to Measure Acoustic Action
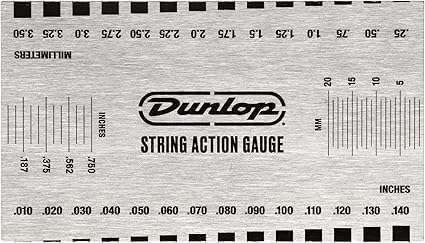
Use a string-action gauge or a small ruler whose scale starts at its measuring edge. A household ruler with a blank margin before zero will give a misleading result. You also need a tuner, good light and somewhere to record two readings.
Tune to your intended playing pitch. That may be standard tuning, DADGAD or another regular tuning. A measurement with slack strings does not describe the setup you will play.
Hold the guitar comfortably in its normal playing position, without pulling on the neck or pressing the body against a support. Use the same position for repeat measurements. Remove the capo for the open-string readings in this guide.
If you are following a manufacturer procedure that uses a capo, follow that whole procedure and its associated targets. Do not mix its numbers with an open-string chart: fretting or capoing a string changes what you are measuring.
You can use tools you already own. The options below cover measuring, tuning an electro-acoustic through its output, and monitoring humidity; a clip-on tuner also works if your guitar has no pickup.
Tools for Measuring Action and Conditions
 Buy on Amazon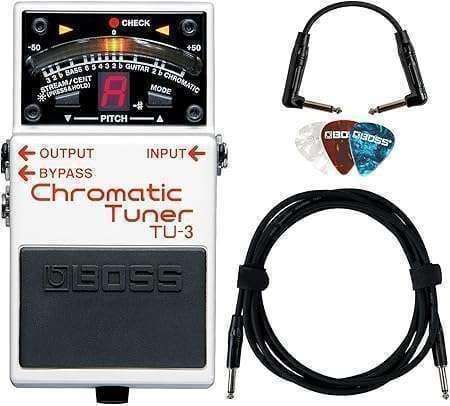

How to Measure Acoustic Guitar Action at the 12th Fret
Place the gauge on the top of the 12th-fret crown, beside the low E. Read the gap to the underside of the string without lifting or pushing it. Repeat on the high E, keeping your view level with the measurement to reduce reading error.
Take each reading twice. If you cannot reproduce it, improve the lighting or reposition the gauge before doing any calculations. A ruler marked every 0.5 mm does not justify claiming a measurement accurate to 0.01 mm.
Record both sides, the tuning and the string set. For example: “Low E 3.0 mm; high E 2.1 mm; standard tuning; 12–53 strings; no capo.” Add the date and humidity reading so you can compare like with like later.
Common measuring mistakes
- Measuring from the fretboard wood: this includes fret height and overstates the playing clearance.
- Reading to the centre or top of the string: this also makes the reading too high. Use its underside.
- Measuring at another fret: a 14th-fret reading cannot be compared directly with this 12th-fret chart.
- Pressing on the string with the gauge: the measurement changes while you read it.
- Comparing tuned and detuned readings: changed string tension can change the neck's position.
Check other strings if one has an obvious local problem, but keep the low-E and high-E readings as your repeatable reference. A single low note buzzing does not necessarily mean the whole saddle is too low.
Why Is Your Acoustic Guitar Action Too High?
Use the symptom to decide what to inspect next. This table narrows the investigation; it does not diagnose a repair from one measurement.
| What you notice | Check next | What to avoid |
|---|---|---|
| Action rose after humid weather | Body condition and humidity | Sanding before conditions stabilise |
| First-position chords are unusually hard or sharp | Nut clearance and fretting pressure | Lowering the saddle to solve only a nut problem |
| Excessive clearance through the middle of the neck | Neck relief using the correct procedure | Treating the truss rod as a general action control |
| High action with an already low saddle | Neck angle, top and bridge geometry | Removing the remaining saddle height |
| One area buzzes while the rest plays well | Fret condition and local clearance | Adjusting everything to mask one fret problem |
| Action seems reasonable but playing is tiring | String gauge, technique and nut height | Assuming every discomfort requires sanding |
Neck relief: check curvature before final saddle work
Relief is the neck's slight forward curve under string tension. Measure it using the method and reference points specified for the instrument. The truss rod adjustment guide explains why this is a separate measurement from action.
Correcting excessive relief can reduce action, but adding relief is not a method for lowering action. Nor should you straighten the neck beyond its appropriate setting just to reach a 12th-fret target. If relief is already suitable, keep looking for the cause.
Nut height: focus on the first few frets
High nut slots make the strings travel farther when you fret near the nut. Compare how first-position chords feel with playing farther up the neck. A careful third-fret hold and first-fret clearance check can help identify whether the nut needs closer inspection.
This is a diagnostic check, not an instruction to file a slot to a generic paper-thickness target. Nut work needs the correct tools, slot shape and depth. If you are unsure, ask a technician to measure it before removing material.
A low saddle with high action needs a geometry check
Little saddle remaining above the bridge limits further lowering. Possible causes include the neck angle, humidity-related body movement or structural issues. It does not prove that every older guitar needs a neck reset.
Have the instrument assessed as a whole. The appropriate repair depends on its construction and condition, and may differ between traditional neck joints and adjustable systems.
When Is Lowering the Acoustic Saddle Appropriate?
Consider saddle work only after the instrument is stable, the neck relief and nut are appropriate, and the saddle has enough usable height. Confirm what kind of bridge and saddle you have before following a generic procedure.
For a conventional removable drop-in saddle, reducing its height can lower action. That is different from a glued through-saddle, an adjustable bridge, or a manufacturer system with its own action adjustment method.
Taylor recommends saddle sanding only for small adjustments within a comprehensive setup; larger changes use neck-angle adjustment through a certified service centre. Check your model rather than assuming the same removal procedure suits every acoustic.
Extra care with an undersaddle pickup
The saddle must transfer string pressure evenly to the pickup beneath it. An uneven bottom or poor fit can create unbalanced amplified string volume. Fishman's Acoustic Matrix installation guidance explains the importance of the saddle and slot surfaces.
If you cannot maintain that fit, have a technician do the adjustment. A guitar can sound acceptable unplugged and still have a new pickup-balance problem after saddle work.
The Acoustic Saddle 2:1 Rule: An Approximate Calculation
On a conventional setup, lowering the saddle by a given amount changes the 12th-fret action by roughly half that amount. The 12th fret is approximately halfway along the speaking string length, which explains the relationship. StewMac's acoustic setup demonstration shows saddle adjustment in a full setup context.
Estimated saddle reduction = desired action reduction × 2.
For example, suppose the low E measures 3.0 mm and an appropriate first target is 2.7 mm. The action difference is 0.3 mm, so the estimated saddle change is 0.6 mm. That calculation does not establish whether the saddle has enough height to lose 0.6 mm.
Check the treble side too. If it is already at your preferred height, removing the same amount across the saddle base may lower it too far. Unequal changes can require skilled reshaping or a replacement saddle, not simply more sanding on one end.
Treat the number as a planning estimate. Actual geometry, measurement accuracy and the final setup affect the result. Stop short, refit, tune and measure again rather than assuming the first calculated removal must be completed in one pass.
What a Removable Drop-In Saddle Adjustment Involves
This outline applies only after the checks above establish that a conventional removable saddle is the correct adjustment point. If the saddle is glued, stuck, unusually shaped or part of a special system, use the maker's procedure or a technician.
- Record and mark the original fit. Note the bass and treble ends and photograph the orientation. The compensated top must go back the correct way round.
- Release string pressure carefully. Loosen the strings enough to access the saddle using the appropriate procedure for the bridge. Do not pry against the bridge or pull on pickup wiring. If the saddle will not lift out normally, stop.
- Measure the saddle and plan a small reduction. Check that sufficient height, string break angle and secure support will remain. A spare correctly fitted saddle preserves the original setup, but a generic blank still needs fitting.
- Maintain a flat, square base. Where bottom reduction is appropriate, use a genuinely flat sanding surface and check frequently with suitable measuring tools. Keep the compensated crown intact. A particular sanding motion does not guarantee a flat result.
- Refit before reaching the full estimate. Reinstall in the original orientation, bring the strings back to pitch and measure both outer strings again. Decide whether any further change is justified from the new readings.
Lowering either the top or the bottom reduces the final saddle height and can reduce string break angle. Bottom sanding is often used to preserve a correctly shaped crown; it is not an exception to that geometry.
If you remove too much, the solution may be a properly fitted replacement saddle. Do not assume a makeshift shim will restore the original fit or pickup balance. This is why a small, measured adjustment is preferable to chasing the lowest number in a chart.
Check the Result and Keep a Setup Record
Retune, remeasure and play the guitar with your normal attack. Test open chords, barre chords, individual notes across the neck and your strongest strumming. A setup should work for the way you perform, including a capo if you normally use one.
For an electro-acoustic, also test every string through the pickup at similar picking strength. Listen for a new imbalance, weak string or unexpected rattle. Check that the saddle is seated correctly before deciding the problem needs another height change.
Use the fret-buzz guide if the problem is localised. For the wider sequence, the complete acoustic setup guide connects relief, action, nut and intonation checks.
Keep string changes separate from action changes
Changing gauge can alter tension and neck relief, so retune and remeasure afterwards. Heavier strings do not automatically have a wider vibration arc, and lighter strings do not guarantee lower buzz-free action. Attack, tuning and construction all affect the result.
If you want easier fretting, compare a suitable lighter set before irreversible work, then reassess the setup. The acoustic string gauge guide helps with that choice. Keep the old pack details in your notes.
The strings below are options if replacement is already due; humidity control is useful when your measurements show conditions need attention. Neither purchase substitutes for diagnosing a structural or setup problem.
String and Humidity Options After Diagnosis



Keep a short record of date, tuning, string gauges, humidity, relief and low/high-E action. Add what changed and how the guitar played afterwards. When the seasons change, compare these notes before turning anything.
Acoustic Guitar Action Height FAQ
What is a good acoustic guitar action height at the 12th fret?
For a conventional six-string steel-string acoustic, about 2.4–2.8 mm on the low E and 1.6–2.0 mm on the high E is a practical starting range. These are open-string measurements at playing pitch. Follow your model's guidance and adjust the target for your playing style.
Is 3 mm action too high on an acoustic guitar?
It depends on the string and player. A 3 mm low E may suit strong strumming, while 3 mm on the high E is high for many players. Check the measuring method, nut height and playing response before deciding what to change.
Can I lower acoustic action without sanding the saddle?
Sometimes. Correcting excessive neck relief or resolving humidity-related movement may change action without saddle sanding. Some guitars use manufacturer-specific neck or bridge adjustments. The correct approach depends on the cause; adding relief is not a method for lowering action.
What is the 2:1 rule for acoustic saddles?
A saddle-height change produces roughly half as much action change at the 12th fret on a conventional setup. An intended 0.3 mm action reduction therefore suggests about 0.6 mm at the saddle. Check both sides and remaining saddle height before treating that estimate as an adjustment plan.
Should I sand the top or bottom of the saddle?
A suitable removable drop-in saddle is often reduced at the bottom to preserve its compensated crown. That requires a flat, square base and sufficient remaining height. Glued saddles, special systems and undersaddle pickups need the appropriate fitting procedure rather than a universal sanding instruction.
How do I know whether high nut slots are the problem?
Unusually difficult or sharp first-position chords can justify a nut-clearance check. A third-fret hold and first-fret clearance inspection can help narrow the diagnosis. Do not file slots based only on a generic gap description; correct depth, shape and fit matter.
Does high action with a low saddle mean I need a neck reset?
It means the neck and body geometry need assessment. Neck angle, humidity-related movement and structural issues can all be relevant. A neck reset is one possible remedy, but the appropriate work depends on the instrument's construction and condition.
Does string gauge affect acoustic action?
A gauge change can alter tension and neck relief, which can change action. Retune and measure the result. Lighter strings may feel easier to fret, but they do not automatically allow lower action without buzzing under your picking attack.
Why did my pickup become uneven after saddle work?
An uneven saddle base, poor seating or unsuitable fit can change pressure on an undersaddle pickup and unbalance string volume. Have the fit checked rather than continuing to lower the saddle. Compare the amplified response of every string after any saddle adjustment.
How often should I measure acoustic action?
Measure when playability changes, after changing gauge, or when comparing seasonal conditions. Keep the same tuning, position and measuring method. A stable guitar that plays well does not need an adjustment simply because a calendar interval has passed.
Keep reading
Next for your Acoustic
- Same guitarAcoustic Guitar Humidity: What to Check When Action ChangesRead
- Same guitarAcoustic Guitar Truss Rod Adjustment: Measure FirstRead
- Same guitarAcoustic Guitar String Gauges: Light vs MediumRead
Everything for your Acoustic
Open the hub