Yamaha Acoustic Guitar Setup: Complete Guide for FG800, FS800 & More
Yamaha acoustic guitar setup for FG800 and FS800: check relief, action and pickup hardware, diagnose high strings, and record measurements before saddle work.
By Nick TheodoulouUpdated

Your Yamaha setup0 of 4 done
Let the neck settle before you set the string height
A bigger truss rod change keeps moving for hours, so pros leave it overnight. Re-measure the relief tomorrow, then carry on.
Your ticks are saved on this device.
On this page
- In This Guide
- Identify Your Yamaha: FG800, FS800 and Pickup Variants
- Essential Tools and an Inspection Worksheet
- Neck Relief and Truss Rod Adjustment
- Action Height and Saddle Decisions
- Nut Slots and Intonation: Observe Before Cutting
- Strings and Humidity: Keep the Comparison Fair
- When to Take Your Yamaha to a Professional
- FAQ
- Your Next Yamaha Setup Check
A useful Yamaha acoustic guitar setup starts with the guitar in front of you: its full model name, installed strings, pickup system and actual playing problem. An FG800 with hard-to-fret chords does not automatically need a lower saddle. Measure first so you can distinguish neck relief, nut clearance, saddle height and a changing environment.
This guide is for six-string Yamaha steel-string acoustics, especially FG800 and FS800 owners. It separates published Yamaha guidance from measurements you need to record yourself. Classical, nylon-string crossover, twelve-string and modified instruments need their own model instructions.
Quick Answer: Tune the guitar, inspect its condition and check humidity before changing anything. Record relief, action and the exact notes that misbehave. Compare with Yamaha's published method below, then decide whether to maintain the setup, make a supported adjustment or book a repair. High action alone does not identify the cause or establish that saddle sanding is appropriate.
In This Guide
- Identify your Yamaha and its hardware
- Tools and an inspection worksheet
- Neck relief and truss rod adjustment
- Action height and saddle decisions
- Nut slots and intonation
- Strings and humidity care
- When to take your Yamaha to a professional
- Frequently asked questions
- Your next setup check
Browse the Yamaha resources hub for the existing setup, strings and identification guides.

Photo by Jefferson Santos on Unsplash. This is an illustrative acoustic photograph, not a measured Yamaha example.
Identify Your Yamaha: FG800, FS800 and Pickup Variants
Read the model label inside the guitar and retain suffixes such as J, X and C. A used guitar may also have a replacement saddle or aftermarket pickup. Photograph the label and visible hardware for your own record; do not assume a catalogue describes later modifications.
Model differences that matter before adjustment
| Verified example | Published specification | What to check on your guitar |
|---|---|---|
| FG800, Yamaha Japan listing | 650 mm scale | Do not substitute the FG800J specification |
| FG800J, current Yamaha USA listing | 634 mm scale | Keep the J suffix in your setup record |
| FS800 | 634 mm scale; concert-style body | Shorter than the listed FG800, not a universal FS action target |
| FGX800C / FSX800C | SYSTEM66 preamp with an undersaddle piezo pickup | Identify the pickup before disturbing the saddle |
| FG800J / FS800, standard listed configuration | No factory electronics; urea saddle | Check for aftermarket parts before assuming stock construction |
Sources: Yamaha Japan FG/FS800 specifications, Yamaha USA FG/FS800 specifications and Yamaha's model descriptions, checked September 14, 2026. Regional and historical models differ.
Other Yamaha acoustic families
An L-series, A-series, APX, CPX or TransAcoustic owner can use this article's observation log. Use the exact model's documentation for hardware and service decisions. The family name alone does not establish the scale, access point, electronics or appropriate string set.
A jack socket also does not tell you where the pickup is. Yamaha distinguishes undersaddle pickups from ART contact pickups mounted beneath the soundboard in its acoustic guitar anatomy guide. Identify the installed system before applying advice written for another design.
Essential Tools and an Inspection Worksheet
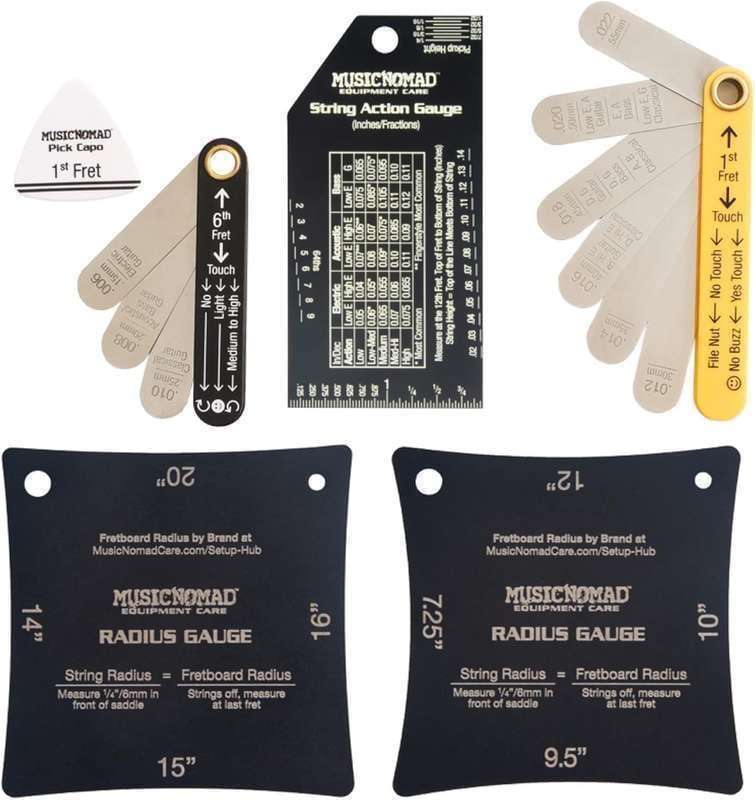
Start with a tuner, capo, feeler gauges, a string-action ruler and a hygrometer. Good light helps you see the fret crown and underside of the string without guessing. You do not need nut files or a replacement saddle to establish a baseline.
A ruler must sit on the fret crown for action measurement. Looking at the distance from the wooden fingerboard gives a different reading. Photograph the ruler at the same angle each time if you want a visual record, keeping the markings legible rather than relying on perspective.

Describe the problem before choosing a repair
Use a specific observation such as “the B string rattles at fret five with my normal picking stroke.” “The setup is bad” does not tell you which change to make. Record whether the issue is new, whether it follows a string change and whether it occurs unplugged or only through an amplifier.
| Observation | Next check | Avoid assuming |
|---|---|---|
| Open chords feel unusually hard | Compare first-position symptoms with action and relief readings | Every difficult chord needs a lower saddle |
| Action changed after storage or travel | Record humidity and inspect the top and bridge | The neck alone caused the change |
| One note buzzes while neighboring notes work | Map the string and fret; inspect for local fret trouble | A whole-neck adjustment will cure one fret |
| Several strings have high action up the neck | Check relief, remaining saddle and structural condition together | The saddle is necessarily too tall |
| A string is quieter only when amplified | Check pickup system, battery if fitted, cable and settings | Acoustic action is the cause |
| Guitar plays comfortably and readings are stable | Save the baseline and keep playing | A number must change to justify a setup |
These are diagnostic starting points, not remote diagnoses. A photograph or measurement can identify a question to investigate without proving the repair.
Free before-and-after worksheet
Copy this table into a notebook. Leave unknown fields blank until you can verify them. Use one unit consistently and repeat the same measuring method at every check.
| Record | Before | After / next check |
|---|---|---|
| Date, full model and known modifications | ___ | ___ |
| String make, all six gauges and tuning | ___ | ___ |
| Relative humidity where the guitar is stored | ___ % | ___ % |
| Relief: held frets, measured fret and gap | ___ | ___ |
| Open-string action at fret 12: low E / high E | ___ mm / ___ mm | ___ mm / ___ mm |
| Symptom: string, fret, picking strength | ___ | ___ |
| Pickup system and plugged-in balance | ___ | ___ |
| One change made, or reason to leave it alone | ___ | ___ |
Do not fill the “after” column with a target. It is for the result you actually measure. If a change makes playing worse, the record helps you and a technician understand what happened.
Measurement Tools for Your Setup Record
 Buy on Amazon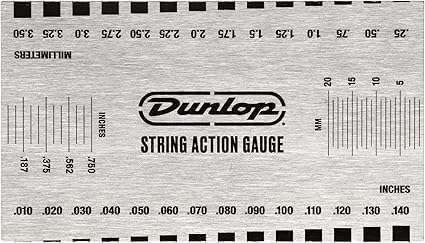
Neck Relief and Truss Rod Adjustment
Relief is the neck's lengthwise curvature. Action is the string's clearance above a fret. The two interact, but their measurements answer different questions. Keep separate columns for them rather than treating the truss rod as a general height control.
Use a named measuring method
Yamaha's acoustic adjustment FAQ, last updated December 15, 2010, gives this reference: tune to pitch, capo fret 1, hold the string at fret 15 and check approximately 0.010 inch (0.25 mm) at fret 8. Follow exact-model instructions when available.
For this worksheet, use the low E consistently; the historical FAQ does not specify which string.
- Set the guitar in a stable playing position and tune it.
- Apply the capo and hold the low E at the stated fret.
- Slide the gauge between string and fret without lifting the string.
- Record the method alongside the result; repeat to check consistency.
Changing the held fret changes the span being measured. Do not compare a first-to-fourteenth-fret reading with a different method's reference as though they were interchangeable. A poor-fitting capo or pressure from the gauge can also make a small gap difficult to read.
Verify the wrench before turning
Use the supplied tool or confirm the correct replacement for the exact instrument. Yamaha's specifications list a hex wrench for the FG/FS800 models, but the cited table does not establish its size. A wrench that nearly fits is not sufficient identification.
Yamaha's playability guidance explains that access locations vary. Inspect the actual adjuster; do not remove a cover or insert a guessed wrench because another Yamaha owner did so.
The adjustment FAQ specifies loosening strings before a clockwise one-eighth-turn tightening adjustment, followed by retuning and checking. Counterclockwise loosening adds relief. Directions are viewed facing the adjustment nut. Stop for a seized rod or no response and seek service. Never keep turning to chase high action when the relief reading is already appropriate.
Action Height and Saddle Decisions
Measure open-string action at fret 12 from the fret crown to the underside of each outside string. Remove the capo used for relief. Write down both readings before considering material removal, and describe how the guitar feels with your usual playing technique.
What Yamaha's published numbers actually mean
The same Yamaha FAQ gives approximate, older category references: solid-top FG/L and specified APX/CPX700/900 models at 1.8 mm high E / 2.6 mm low E; laminate F and APX/CPX500 models at 2.0 / 2.8 mm. These are not current acceptance tolerances for every FG800, FS800 or stage acoustic.
There is no verified basis here for a separate “factory action” range for each modern family. Treat your model's instructions and a clean playing test as the context for the measurement. Neither a low reading nor a particular body shape guarantees comfortable, buzz-free playing.
Decide whether saddle work is appropriate
Before authorizing a lower saddle, answer these questions:
- Has the guitar's storage environment stabilized?
- Has relief been measured and dealt with where necessary?
- Is the top or bridge visibly damaged, lifting or changing shape?
- Is there sufficient saddle remaining for a sound installation?
- Does an undersaddle pickup depend on the fit being preserved?
- What specific improvement are you asking the technician to achieve?
A very low saddle alongside high action is a reason to assess the instrument's geometry, not remove the last remaining material. Likewise, reshaping the wooden bridge or its slot is repair work. It is not the routine next step when a saddle adjustment runs out of room.
Understand the geometry without guessing a sanding allowance
At roughly the midpoint of the string, a change in saddle height produces about half as much change in string height. The familiar 2:1 calculation describes that geometry; it does not say how much material your instrument can safely lose. It also does not account for correcting a separate relief, nut or structural problem.
Yamaha's 2024 playability article places saddle and nut cutting with a luthier. Ask for a before-and-after measurement and keep the original saddle if a replacement is fitted. Do not file its top to “move the string back,” sand one end by guesswork or assume bone will solve a poor fit.
Check amplified balance as well as feel
With an FGX800C or FSX800C, record each string through your usual clean amplified setup before saddle work. Keep the same cable, EQ and playing strength for the comparison afterward. A new balance problem deserves a pickup and saddle-fit inspection before further material removal.
This comparison cannot locate a hidden fault by itself. Its purpose is to distinguish an existing electrical symptom from something that changed during the work. Tell the technician which strings changed and under which settings.
For broader measurement context, the existing acoustic action-height guide covers the relationship between action and the rest of a setup.
Nut Slots and Intonation: Observe Before Cutting
A hard first-position chord is useful evidence, but it is not a nut-slot diagnosis. Compare the same chord with lighter fretting pressure, check tuning and note whether the problem also appears farther up the neck. Record the strings involved instead of deciding that every slot needs filing.
Keep nut checks distinct from action checks
Open-string clearance above fret 1 and a gap checked while holding a string farther along the neck are different tests. Do not reuse a number from one as a cutting target for the other. Nut work also depends on the installed string and slot shape, not a single clearance for all six strings.
Inspect for a chipped nut, a string that binds during tuning or an obvious change after a different gauge was fitted. Give these observations to a technician. Deepening a slot cannot fix one that is already too low, and a file should not be your diagnostic tool.
A repeatable intonation comparison
Use a tuner that shows small pitch differences. Tune the open string, then compare the octave harmonic with the note gently fretted at fret 12. Keep the guitar in its normal playing position and use consistent picking strength. Write “sharp,” “flat” or the repeatable tuner reading for each string.
Repeat any unexpected result after checking the open tuning. Try a normal chord as well; do not squeeze harder merely to make the tuner settle. Old, damaged or incorrectly fitted strings and excessive fretting pressure can complicate the result, so record those conditions before asking for compensation work.
An acoustic saddle does not offer six screw-adjustable saddles like many electric guitars. A persistent discrepancy is a reason for diagnosis; it does not prove a loose bridge plate or authorize filing a contact point. Yamaha's playability article also assigns compensation-related nut and saddle work to a luthier.
The fret-buzz troubleshooting guide helps organize buzz by location if pitch accuracy is not the main problem.
Strings and Humidity: Keep the Comparison Fair
Choose the tuning and string set you intend to keep before final adjustments. Record all six gauges from the packet. “Light” is a useful shopping label, but it is less precise than the actual diameters when comparing two sets.
Changing strings without losing the baseline
Do not assume every FG needs mediums or every small-body Yamaha needs extra lights. Check your model's specification and ask Yamaha or a technician about a substantial gauge or tuning change. If the current set works well, replacing it like for like keeps the comparison simpler.
The Yamaha strings guide covers shopping choices in more detail. Coated and uncoated sets are options to compare against your budget and preferences; this article does not promise a fixed lifespan multiplier or an automatic tone improvement.
Compare Acoustic String Sets and Gauges


Humidity care before another setup change
Yamaha's acoustic storage guidance recommends 45–55% relative humidity and avoiding major temperature changes. Use a hygrometer where the guitar actually lives. A room reading beside a humidifier may not describe the environment inside its case.
Record the date and reading when playability changes. Use humidity-control equipment according to its instructions and check the result rather than adding moisture on a calendar. There is no universal number of millimeters that every Yamaha top will move, or a fixed waiting period that proves it has stabilized.
A lifting bridge needs professional attention; Yamaha's care guidance says it requires repair before new strings are installed. Do not use a lower saddle to disguise that symptom. Seasonal monitoring is useful, but visible damage changes the task from setup to repair.
Check the Storage Environment


When to Take Your Yamaha to a Professional
Bring your worksheet, the desired strings and a short description of the problem. Demonstrating an awkward chord or a repeatable buzz often communicates more than asking for “the lowest possible action.” Ask the shop to separate routine adjustments from replacement parts, fret work and structural repairs in its quote.
Book an assessment for a stuck adjuster, lifting bridge, visible crack, suspected neck-angle problem, damaged nut, uneven frets or persistent amplified imbalance after saddle work. If the instrument is newly purchased, document the fault and contact the seller before authorizing irreversible modifications.
A good result is a guitar that works for your playing, with the work and resulting measurements recorded. You may need only observation and maintenance. You may need a skilled repair. The initial readings help distinguish those outcomes without turning every symptom into a purchase.
FAQ
What is the correct action height for a Yamaha FG800?
Use the measuring method and qualified reference in the action section, then judge the guitar with your normal playing technique. This guide does not establish a universal FG800 factory tolerance or a required saddle reduction.
Why is my Yamaha FG800 action too high?
High action is a symptom. Check the storage history, relief, saddle and structural condition together. The worksheet helps distinguish a change over time from a setup that has always felt uncomfortable.
Are FG800 and FG800J setup specifications interchangeable?
Keep the full model name when looking up specifications. The verified model table above shows why a suffix matters; check the regional listing and the actual instrument before ordering parts.
How do I measure Yamaha neck relief?
Use the named Yamaha method in the relief section and write the held frets and measuring fret alongside the gap. Comparing two readings only makes sense when the method is consistent.
What size truss rod wrench does my Yamaha use?
Confirm it for the exact model and adjuster, using the supplied tool or manufacturer support. The general specification saying “hex wrench” is not enough to establish a size.
Can I lower the action by sanding the saddle?
Saddle work may be appropriate after diagnosis, but it removes material permanently. Check the remaining saddle, instrument geometry and any pickup first; take cutting work to a qualified technician.
Does an FGX or FSX pickup change the setup checks?
For the listed FGX800C and FSX800C examples, include an amplified string-balance comparison before and after saddle work. Record the installed pickup system rather than treating every Yamaha acoustic-electric as identical.
Should I replace a urea saddle with bone?
A material change alone does not establish a better fit or solve a playability fault. Diagnose the problem first, and have any replacement fitted for the actual bridge and pickup system.
How often should I check my Yamaha setup?
Recheck when playability changes, after a string or tuning change, and when storage conditions change. Keep a comfortable, stable baseline instead of making adjustments merely because a calendar date arrives.
What should I give the repair shop?
Bring the full model name, installed string details, tuning, measurements and a description of the exact notes or chords that cause trouble. State the playing result you want and ask which work is required.
Your Next Yamaha Setup Check
Tune, inspect and fill in the free worksheet before reaching for an adjustment tool. Keep a stable setup when it works; investigate one documented symptom when it does not. After any work, repeat the same readings and playing checks so the result belongs to your guitar, strings and technique.
For a printable continuation, the Acoustic Setup Cheat Sheet includes the setup checklist and a reusable measurement log. Keep your exact model instructions alongside it when planning any adjustment.
🛠️ Done with this setup? Log the spec — action, relief, strings — in My Gear Garage so you remember exactly what you did in six months. Free, no password — magic-link sign-in.
Keep reading
Next for your Yamaha
Everything for your Yamaha
Open the hub