Telecaster Pickup Height: Complete Setup Guide With Exact Specs
Exact Telecaster pickup height specs in mm and 64ths for neck and bridge pickups. Step-by-step adjustment guide with measurements for country, blues, rock, and jazz. Covers 3-saddle and 6-saddle bridges.

Once pickup height is set, use the Telecaster intonation guide to check fretted notes and adjust the correct bridge saddles.
Telecaster Pickup Height: The Complete Guide to Dialing In Your Tone
Getting your Telecaster pickup height right is one of the simplest, most impactful adjustments you can make — and it costs nothing. The Telecaster's two pickups are fundamentally different from each other: a bright, baseplate-mounted bridge pickup and a warm, chrome-covered neck pickup. This asymmetry means you can't just set them to the same height and call it done. Proper Telecaster pickup height adjustment balances the iconic bridge "twang" against the neck's warmth, giving you a guitar that sounds great in every switch position.
This guide explains Fender's pickup-type starting points, the bridge and neck adjustment mechanisms, and how to balance the result by ear. Check the actual pickups and mounting on your guitar: Fender, Squier, vintage reissue and modified Telecasters do not all share one specification or neck-pickup mounting arrangement.
🧮 Try Our Pickup Height Calculator: Get your ideal pickup-to-string gaps and a raise/lower recommendation in seconds — free, no signup.
Factory Specs Tool to compare your current setup against factory standards, or add it to My Garage to track maintenance.
What Makes Telecaster Pickups Unique?
Quick Answer: The Telecaster bridge pickup is mounted on a steel baseplate that focuses its magnetic field and adds midrange punch. The neck pickup is a smaller, chrome-covered unit designed for warm, round tones. This asymmetric design makes pickup height adjustment especially important.
The Telecaster was the first mass-produced solid-body electric guitar, and its pickup design reflects Leo Fender's pragmatic engineering. Unlike Stratocasters (three identical-ish single coils) or Jazzmasters (two wide, flat pickups), the Telecaster uses two completely different pickup designs in a single guitar.
Bridge Pickup: The Twang Machine
- Mounted on a steel baseplate — the metal plate focuses the magnetic field, adding midrange punch and the signature "twang"
- Overwound compared to Strat pickups — hotter output with more aggressive attack
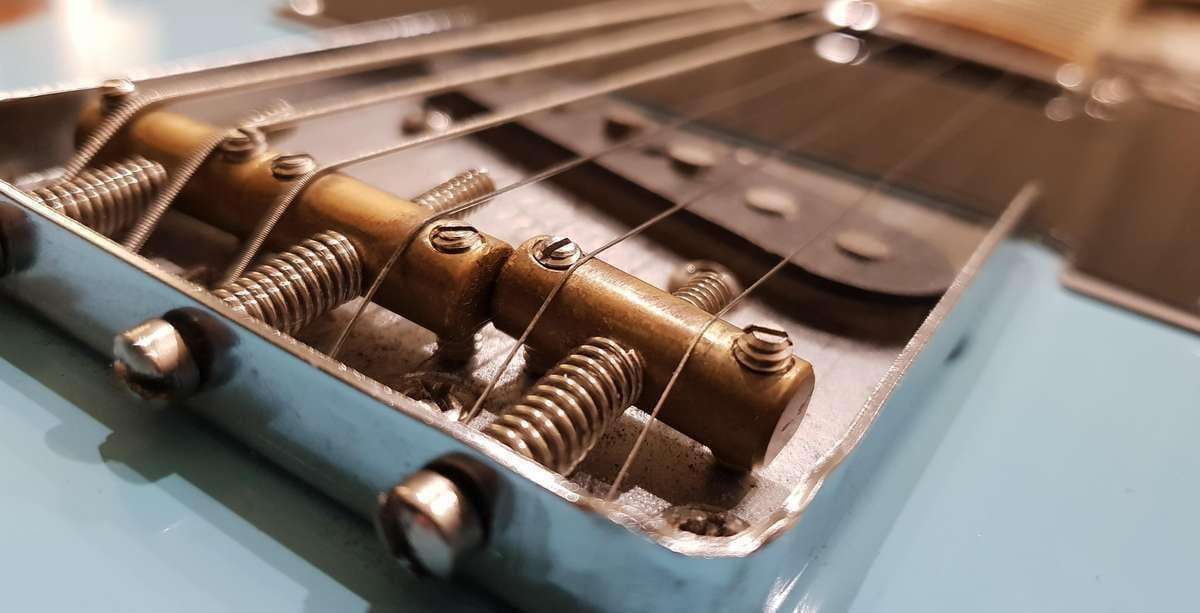
- Brass vs steel saddles affect tone — brass is warmer, steel is brighter (this interacts with pickup height)
- Very sensitive to height changes — the baseplate amplifies the effect of small adjustments
Neck Pickup: The Warm Counterpart
- Chrome cover acts as a shield — reduces noise and slightly warms the tone
- Smaller coil than the bridge pickup — lower output, smoother frequency response
- Designed for rhythm and jazz tones — warm, round character that contrasts with the bridge
- Less sensitive to height changes — the chrome cover provides some magnetic shielding
Why This Matters for Setup
Because the two pickups are so different, getting the balance right between them is the real challenge. A Telecaster with poorly balanced pickups will have a jarring volume jump when switching positions — the bridge will be ice-pick bright while the neck sounds muddy and quiet, or vice versa.
 Buy on Amazon
| Pickup type | Bass side | Treble side |
|---|---|---|
| Vintage style | 2.4mm (6/64") | 2.0mm (5/64") |
| Standard single-coils | 2.0mm (5/64") | 1.6mm (4/64") |
Telecaster Pickup Height Specs: Fender Starting Points
Quick Answer: Choose the gap by pickup type. Fender lists vintage-style single coils at 6/64" (2.4mm) bass and 5/64" (2.0mm) treble, and standard single coils at 5/64" (2.0mm) bass and 4/64" (1.6mm) treble. Neither pair is a universal specification for every Telecaster.
Fender Starting Specifications by Pickup Type
| Pickup type | Bass-side gap | Treble-side gap |
|---|---|---|
| Vintage-style single coil | 6/64" (2.4mm) | 5/64" (2.0mm) |
| Standard single coil | 5/64" (2.0mm) | 4/64" (1.6mm) |
Source: Fender's Telecaster setup instructions, pickup section, checked September 9, 2026. Fender also lists separate guidance for Texas Specials, Noiseless pickups and humbuckers. Follow the instructions for the pickups fitted to your instrument before using a general table.
Starting Gaps and Final Balance
Fender gives starting points by pickup type, not a rule that every neck and bridge must finish at an identical gap. Start from the appropriate guidance, then compare the pickups through a clean amp. A larger gap lowers output; a smaller gap usually raises it. Lowering the louder pickup is a useful first balancing step when you want to preserve string clearance.
Measurement Tips for Telecaster Pickups
- Tune to playing pitch and fret each outer E string at the last fret. This provides a repeatable reference; also check clearance during normal playing and bends.
- At an exposed-pole bridge pickup, measure from the top of the pole piece under that string to the string's underside. Do not measure from the bridge plate or pickup baseplate.
- A traditional covered Tele neck pickup has no exposed pole pieces or cover slots. Use its maker's measurement instructions. A gap measured from the top of the cover is a cover-to-string gap, not an exact pole-to-string measurement; record that reference and do not remove the cover just to measure hidden poles.
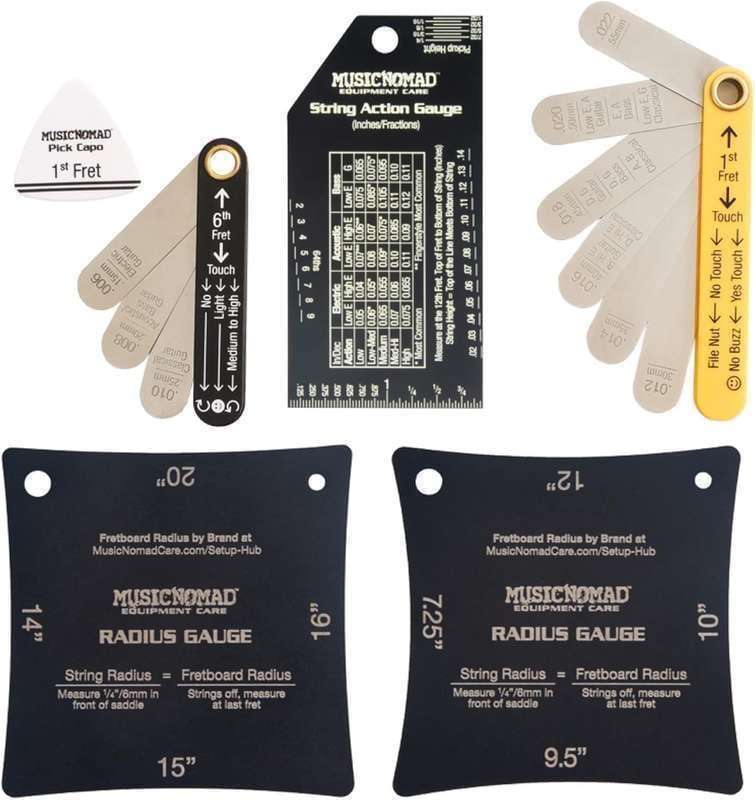
- Use a ruler or string height gauge — the Jim Dunlop String Height Gauge is one option. Record both E-string gaps and the reference surface so you can reproduce your starting setup.
Step-by-Step Telecaster Pickup Height Adjustment
Now let's walk through the complete adjustment process for both pickups.
Tools You'll Need
- Small Phillips screwdriver (for pickup mounting screws)
- 6" ruler or precision measuring tool like this Jim Dunlop String Height Gauge
- Capo (optional, for fretting at the last fret)
- Tuner like the Boss TU-3 Chromatic Tuner (to ensure accurate pitch during testing)
- Cable and amplifier (for tone testing)
- Guitar setup tool like the D'Addario Multi-Tool for various adjustments
Preparation
- Tune your guitar to pitch — pickup height measurements only work at proper string tension
- Set your action and neck relief first — adjust pickups after these and before the final intonation check (truss rod → action → pickups → intonation)
- Clean your workspace — avoid scratching the finish around the pickguard or bridge plate
Adjusting the Bridge Pickup
The bridge pickup defines the Telecaster's signature sound — that bright, cutting "twang" that has driven country, rock, and blues for over 70 years:
- Identify the pickup mounting screws. A traditional Tele bridge pickup hangs below the bridge plate on three screws. These are separate from saddle-height, intonation and bridge-fixing screws.
- Fret the low E string at the last fret and measure from the pole-piece top to the string's underside. Use the bass-side starting point for your pickup type.
- Adjust the mounting screws, viewed from above each screw head:
- Clockwise raises the bridge pickup toward the strings, reducing the gap.
- Counter-clockwise lowers it away from the strings, increasing the gap.
- Make up to 1/4-turn adjustments, remeasuring after each. The three screws also control tilt, so observe how each turn moves the pickup rather than assuming two independent end screws.
- Repeat at the high E string, fretted at the last fret, using the treble-side starting point for the pickup type.
- Test through your amp and check string clearance across bends and your normal picking range.
The mounting direction and the body-mounted neck exception are documented in Fender's Standard Series manual, printed page 4. Use the service instructions for a non-standard bridge or replacement pickup. Stop if the pickup binds or fails to move; do not force it or unscrew it until it detaches.
Adjusting the Neck Pickup
Check the mounting before turning anything. Tele neck pickups commonly use either of these arrangements:
- Suspended from the pickguard: the mounting screws pass through the guard and thread into the pickup ears. Viewed from the screw head, clockwise raises the pickup and counter-clockwise lowers it.
- Screwed directly into the body: the screws pass through the pickup ears into the wood, with resilient support underneath. Clockwise lowers the pickup and counter-clockwise raises it. The pickguard may need removal to reach these screws; loosen strings only as needed for access and retune before every measurement.
Use small turns and watch the pickup move. If foam or tubing no longer supports it, further loosening will not reliably raise it. Restore the support or use a technician instead of forcing or detaching the pickup.
For a covered neck pickup, follow the measurement guidance above. Record the top-of-cover gap where the poles are hidden, then compare output with the bridge and adjust by ear. Do not treat a cover reading as a verified pole-piece factory measurement.
Fine-Tuning and Testing
After setting suitable starting gaps for your actual pickups:
- Play through all three switch positions — neck, bridge, and both together
- Test clean and with overdrive — pickup height affects how your signal drives the amp
- Play bends and vibrato — listen for any warbling or pitch instability (sign of pickups too close)
- Check sustain — play a note and let it ring; if it dies quickly, pickups may be too close
- Test with your typical playing dynamics — strum hard and play softly to check for consistent response
Telecaster Pickup Height for Different Playing Styles
The following are optional listening experiments, not Fender factory presets or documented artist measurements. Work from the guidance for your actual pickups. The bridge examples use the vintage-style 6/64" bass and 5/64" treble starting pair. For the covered neck, work from its maker's method and your recorded starting gap. Recheck clearance, pitch stability and sustain after every change:
Country and Twang
Target feel: Maximum brightness, snappy attack, clear note definition with that signature Tele "snap"
Recommended adjustments:
- Keep the bridge at its starting gap, or try raising it by 1/64"; from the vintage-style starting pair this gives 5/64" bass, 4/64" treble
- Try lowering the neck pickup, increasing its recorded gap by about 1/64"
- The hotter bridge emphasizes the steel-baseplate twang
- The lower neck provides a clean, warm rhythm tone without competing
Best for:
- Traditional country (Brad Paisley, Brent Mason style)
- Chicken pickin' and hybrid picking
- Rockabilly and Western swing
- Bright, clean tones through a Fender amp
Blues and Classic Rock
Target feel: Warm overdrive with singing sustain, responsive dynamics, and smooth lead tones
Recommended adjustments:
- Try lowering the bridge by 1/64"; from the vintage-style starting pair this gives 7/64" bass, 6/64" treble
- If the neck is too quiet, try a small raise from its recorded gap, checking sustain and clearance
- Tames the bridge pickup's ice-pick treble for smoother overdrive
- The hotter neck drives tube amps into natural breakup
Best for:
- Blues lead and rhythm (Keith Richards, Mike Bloomfield)
- Classic rock tones
- Slide guitar
- Expressive bending and vibrato
Jazz and Clean Playing
Target feel: Warm, articulate tone with excellent dynamic response and no harshness
Recommended adjustments:
- Try lowering the pickups to increase their recorded gaps by about 1/64", then compare
- Reduces output for more headroom and cleaner signal
- Increases sustain and harmonic complexity
- Better touch sensitivity for expressive playing
Best for:
- Jazz comping and soloing (Ted Greene, Julian Lage)
- Clean fingerstyle
- Studio recording where dynamics matter
- Ambient and textural playing
Modern Rock and High-Gain
Target feel: High output, aggressive attack, tight low end for distortion and overdrive
Recommended adjustments:
- If more output is useful, try reducing the recorded gaps by about 1/64", one pickup at a time
- Higher output feeds more signal into gain stages
- Check sustain and pitch with a clean sound too; distortion can mask problems
- Tight, focused tone that cuts through a loud band mix
Best for:
- Modern rock and alternative
- Punk and post-punk
- High-gain lead tones
- Aggressive rhythm playing
Common Telecaster Pickup Height Problems and Fixes
Problem: Bridge Pickup Has Ice-Pick Treble
Cause: Bridge pickup too close to strings. The steel baseplate amplifies treble frequencies, and when the pickup is too close, this becomes harsh and piercing.
Fix: Try lowering the bridge pickup in small steps and compare the sound. Stop at a useful balance of output and clarity; also check your amp EQ and tone control if height does not solve the harshness.
Problem: Neck Pickup Sounds Muddy
Cause: Neck pickup too close to strings, capturing too much bass-heavy string vibration.
Fix: Lower the neck pickup 1/64" at a time until clarity improves. The chrome cover already warms the tone, so the neck pickup doesn't need to be as close as you might think.
Problem: Volume Jump When Switching Pickups
Cause: Unbalanced pickup heights creating different output levels.
Fix: Lower the louder pickup rather than raising the quieter one. This preserves sustain while evening out volume. On most Telecasters, the bridge pickup is louder due to the baseplate, so lowering it slightly is the typical fix.
Problem: Strings Warble or Go Out of Tune When Bending
Cause: Pickups too close, magnetic pull interfering with string vibration.
Fix: Lower both pickups 1/64" and test bends again. This is especially common on the bass strings where the magnetic pull is strongest.
Problem: Loss of Sustain
Cause: Magnetic pull from pickups too close to strings dampening vibration.
Fix: Lower pickups 1/64" at a time until sustain improves. Test by playing a note and timing how long it rings clearly.
Problem: Weak Output from Both Pickups
Cause: Pickups too far from strings, not capturing enough signal.
Fix: Check the current gaps against the guidance for your pickups. If they are too far away, raise them gradually and listen. Stop if notes warble, sustain worsens or strings approach the pickup; there is no universal safe minimum gap. If output remains weak, check the wiring, controls and pickups.
Telecaster vs Stratocaster Pickup Height: Key Differences
If you play both a Telecaster and a Stratocaster, here's how their pickup height specs compare:
| Feature | Traditional Telecaster | Traditional Stratocaster |
|---|---|---|
| Number of pickups | 2 (neck, bridge) | 3 (neck, middle, bridge) |
| Bridge pickup mounting | Usually three screws in the bridge plate | Two screws in the pickguard |
| Neck pickup mounting | Body or pickguard; check before adjusting | Usually suspended from the pickguard |
| Measurement surface | Exposed bridge poles; covered neck requires its maker's method | Exposed pole pieces on conventional single coils |
| Starting specification | Depends on pickup type | Depends on pickup type |
| Final adjustment | Balance output and check clearance | Balance all five switch positions and check clearance |
The main practical differences are the mounting hardware, access and measurement surface. Neither guitar has one universal factory gap: identify the pickups and balance the result after applying their starting guidance.
For detailed Stratocaster specs, see our Stratocaster Pickup Height Guide. For offset guitars, see our Jazzmaster Pickup Height Guide.
How Telecaster Pickup Height Interacts with Your Setup
Pickup height doesn't exist in isolation. Here's how it connects to the rest of your Telecaster setup:
Setup Order Matters
Always adjust in this sequence for best results:
- Truss rod — set proper neck relief (Telecaster Truss Rod Guide)
- Bridge saddle height — set string action
- Pickup height — optimize pickup-to-string distance
- Intonation — ensure accurate tuning across the neck
String Gauge Effects
String gauge affects the magnetic interaction between strings and pickups:
- Light gauge (.009-.042): Less mass means less magnetic signal. You may need pickups slightly closer for adequate output
- Standard (.010-.046): Recheck gaps and balance; string gauge alone does not identify the right pickup specification
- Heavy gauge (.011-.049 or .012-.052): More mass produces stronger signal. Lower pickups 1/64" to avoid excessive magnetic pull
3-Saddle vs 6-Saddle Bridge Considerations
The bridge type doesn't directly affect pickup height, but it affects your overall setup workflow:
- 3-saddle vintage bridge: Intonation compromises mean some strings may sit slightly higher or lower than ideal. Measure each outer E string individually at the last fret; do not average the string heights
- 6-saddle modern bridge: More precise string height control means more consistent pickup-to-string distance across all six strings
Pickup Magnet Strength Variations
Not all Telecaster pickups have the same magnet strength:
- Vintage-style pickups: Use the maker's starting point; the label does not guarantee weak magnetic pull
- Hot-wound or overwound pickups: Output and magnet strength are not the same thing; do not infer a safe gap from winding alone
- Noiseless pickups: Follow the instructions for the exact pickup generation and model

Frequently Asked Questions (FAQ)
1. What is the correct Telecaster pickup height?
Answer: Fender lists starting gaps by pickup type: vintage-style single coils at 6/64" (2.4mm) bass and 5/64" (2.0mm) treble, and standard single coils at 5/64" (2.0mm) bass and 4/64" (1.6mm) treble. Follow the actual pickup's instructions and measurement reference, then balance by ear. There is no universal gap for every Telecaster.
2. Should Telecaster neck and bridge pickups be the same height?
Answer: They may start with the same gap if the pickup type and measurement reference match, but their final balance can differ. Compare them through a clean amp and lower the louder one if necessary. Do not compare a covered-neck reading directly with an exposed pole-piece reading as though they were identical measurements.
3. Why does my Telecaster bridge pickup sound too bright?
Answer: The steel baseplate on the bridge pickup concentrates treble frequencies. If it sounds harsh or "ice-picky," lower the bridge pickup 1/64" at a time. This is the most common Telecaster pickup complaint and is easily fixed. Also consider your amp EQ and string choice — nickel strings are warmer than steel.
4. How do I measure Telecaster pickup height?
Answer: Tune to pitch, fret each outer E string at the last fret, and measure from the exposed pole-piece top to the string underside. On a traditional covered neck pickup the poles are hidden: follow its maker's method, record any cover-to-string gap explicitly, and do not remove the cover just to measure.
5. Can I use the same pickup height specs for a Squier Telecaster?
Answer: Check the fitted pickups and mounting first. Squier Telecasters can use different pickups and body- or pickguard-mounted neck pickups. Choose a manufacturer starting point for that hardware, rather than apply one Fender gap or screw direction to every Squier model.
6. What pickup height is best for country tone on a Telecaster?
Answer: Start from the guidance for your pickups and listen through your normal amp. Raising a bridge pickup slightly can increase output, but check for magnetic pull and string contact. The style suggestions here are listening experiments, not Fender country-tone presets.
7. How does string gauge affect Telecaster pickup height?
Answer: Heavier strings produce a stronger magnetic signal and may need pickups lowered 1/64" to avoid magnetic pull issues. Lighter strings may need pickups raised slightly for adequate output. Always re-check pickup height after changing string gauge.
8. How often should I adjust Telecaster pickup height?
Answer: Adjust pickup height whenever you change string gauge, modify string action, adjust the truss rod, or notice changes in tone or sustain. Most players set it once during a full setup and only revisit if something changes. Seasonal humidity shifts can also affect neck relief, which indirectly changes the string-to-pickup distance.
9. Does the bridge plate affect Telecaster pickup height?
Answer: The traditional bridge supports the pickup on three adjustment screws, separate from the saddle and bridge-fixing screws. Viewed from the screw head, clockwise raises that suspended pickup and counter-clockwise lowers it. A body-mounted neck pickup adjusts in the opposite direction; identify the mounting first.
10. How does Telecaster pickup height compare to Stratocaster?
Answer: Both use starting gaps based on pickup type, followed by listening and clearance checks. A traditional Tele has a bridge-plate-mounted pickup and a neck pickup that may be body- or pickguard-mounted; a conventional Strat suspends all three from the pickguard. There is no universal Tele pair or mandatory Strat gradient. See our Stratocaster Pickup Height Guide for its measurement method.
Want These Specs on Your Workbench?
Pickup height is just one part of a complete Telecaster setup. The Fender Setup Cheat Sheet includes:
- The complete setup order: relief → action → bridge → pickups → intonation
- Tele bridge guidance for three-saddle and six-saddle designs, including shared-saddle intonation decisions
- Pickup-type starting points, plus the body- vs pickguard-mounted neck-pickup difference
- A diagnostic worksheet and printable setup records for your own before/after settings
Get the Complete Setup Guide →
Quick Reference: Telecaster Pickup Height Specifications
| Reference | Starting gap or method |
|---|---|
| Vintage-style single coil | Bass: 6/64" (2.4mm), treble: 5/64" (2.0mm) |
| Standard single coil | Bass: 5/64" (2.0mm), treble: 4/64" (1.6mm) |
| Bridge or pickguard mounting | Clockwise raises; counter-clockwise lowers |
| Body-mounted neck pickup | Clockwise lowers; counter-clockwise raises |
| Increment | Up to 1/4 turn, then remeasure; turns are not a fixed distance |
| Measurement | Outer E strings fretted at last fret; exposed pole top to string underside, or the maker's covered-pickup method |
Use the pickup-specific guidance linked above for other designs. Label cover measurements separately from pole-piece measurements.
Conclusion: Getting the Most from Your Telecaster Pickups
Telecaster pickup height adjustment is a simple, free modification that takes 10-15 minutes but can dramatically improve your tone. The Telecaster's asymmetric pickup design — a hot, baseplate-mounted bridge and a warm, chrome-covered neck — means that small height changes have a big impact on how the guitar sounds and how well the two pickups balance against each other.
Start with the maker's guidance for your actual pickups and mounting, then fine-tune by listening. Record the measurement surface and gaps before adjusting so you can return to the starting setup. Tone goals vary; check clean sustain, pitch stability and string clearance as well as output.
The key principles to remember:
- Choose starting gaps by pickup type and keep the measurement reference consistent
- The bridge pickup is the one to watch — the steel baseplate makes it very sensitive to height changes
- Lower the louder pickup rather than raising the quieter one for better balance
- Adjust in 1/64" increments and test after each change
- Set action and relief before pickup height — always follow the correct setup order
For more comprehensive Telecaster setup guidance, explore these related articles:
Related Posts
Telecaster Setup and Maintenance
- Ultimate Telecaster Setup Guide — Complete step-by-step setup including action, relief, and intonation
- Telecaster Truss Rod Adjustment — Detailed neck relief adjustment techniques
- Best Strings for Telecaster — String recommendations for optimal tone
- Telecaster Wiring Diagram Guide — Electronics and pickup wiring
Guitar Setup Fundamentals
- Guitar Truss Rod Adjustment Guide — Set proper neck relief first
- Guitar Action Height Guide — String height adjustment basics
- Guitar String Gauges Guide — Understanding string tension and thickness
Pickup Height Guides for Other Models
- Stratocaster Pickup Height Guide — Compare with Strat specs
- Jazzmaster Pickup Height Guide — Offset pickup specs and adjustment
Other Fender Setup Guides
- Stratocaster Setup Guide — Complete Strat setup from start to finish
- Jazzmaster Setup Guide — Complete Jazzmaster setup guide
- Serial Number Lookup — Find your guitar's production year
Last updated: September 9, 2026 — corrected mounting-specific directions, measurement references and pickup-specification attribution.